Hot Pipe Bending is when you simply hold a strip of wood against a section of metal pipe heated by a propane torch.
Unlike steam-bending, there is no need to construct a large steam-box or substantial bending forms.
Michael Fortune uses the technique to bend door pulls, curved moldings, salad tongs, back slats for chairs, and many other items.
To Drill A Affective hole use the kreg Pocket Hole Jig Drive
Use a propane flame to shape wood.
This is a quick and easy method for hot pipe bending thin material that is 1/4′′ thick or less.
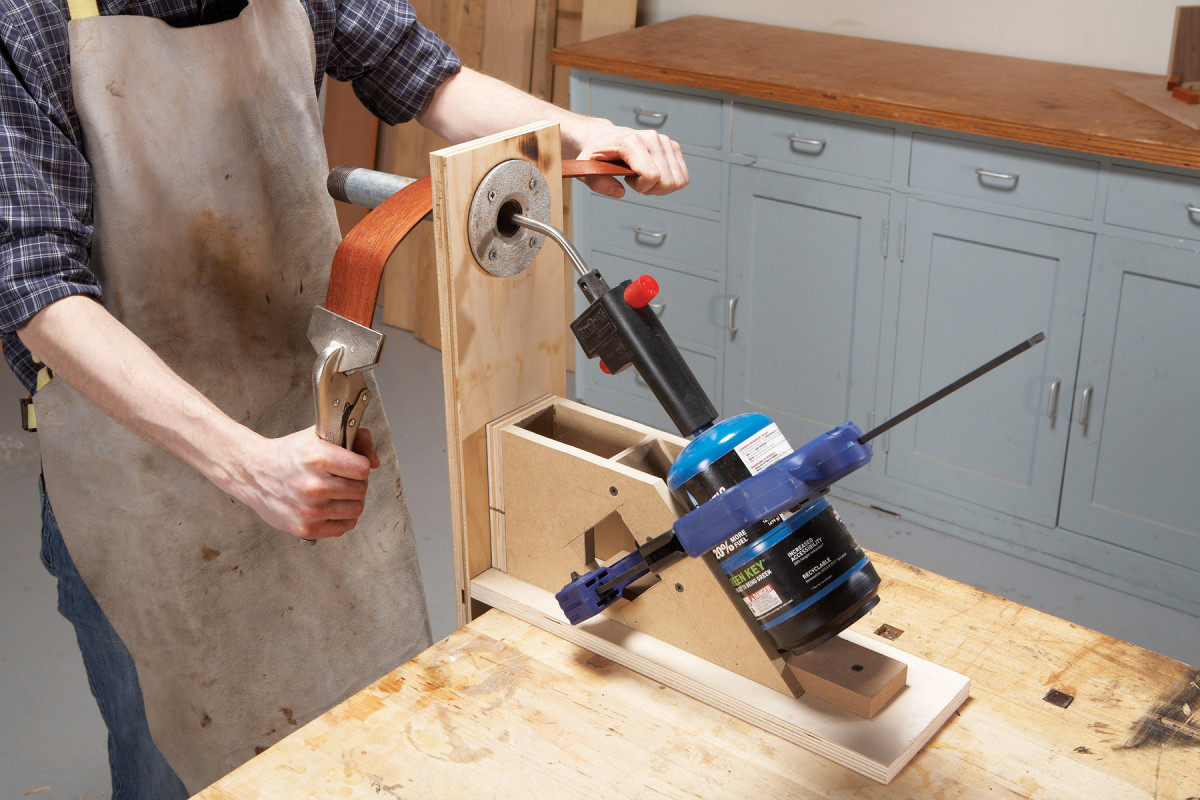
A propane torch, a 1-1/2-inch length of galvanized pipe, a jig to hold them both, and a fire extinguisher are the only things you’ll need.
3/4″ plywood has a hole through which the pipe is fastened to a flange.
The propane torch is held firmly in place by a jig (Photo, top).
This jig clamps in a vise and sits on a bench.
For hot pipe bending, any wood that can be bent with steam works well, such as oak, ash, elm, hickory, beech, birch, maple, and walnut.
The majority of softwoods and exotic woods are not acceptable choices, however there are few exceptions. Air-dried wood bends more readily than kiln-dried wood in general.
The process of kiln drying causes the lignin, the sticky substance between wood fibers, to become more resistant to the softening effects of heat and moisture.
This is not to say that kiln-dried wood cannot be bent; it is simply more difficult.
Always start by making test bends, using extra pieces from the same batch of blanks that you’ve prepared for the real McCoy. Having plenty of extra blanks is important, because you never know where a hidden weakness might lie, and watching a piece break when you don’t have a spare is a real bummer.
Soak the parts you intend to bend in water for a whole night.
If you don’t have a big enough container to submerge the pieces all the way.
Put them in a plastic bag wrapped with a soaking-wet cloth.
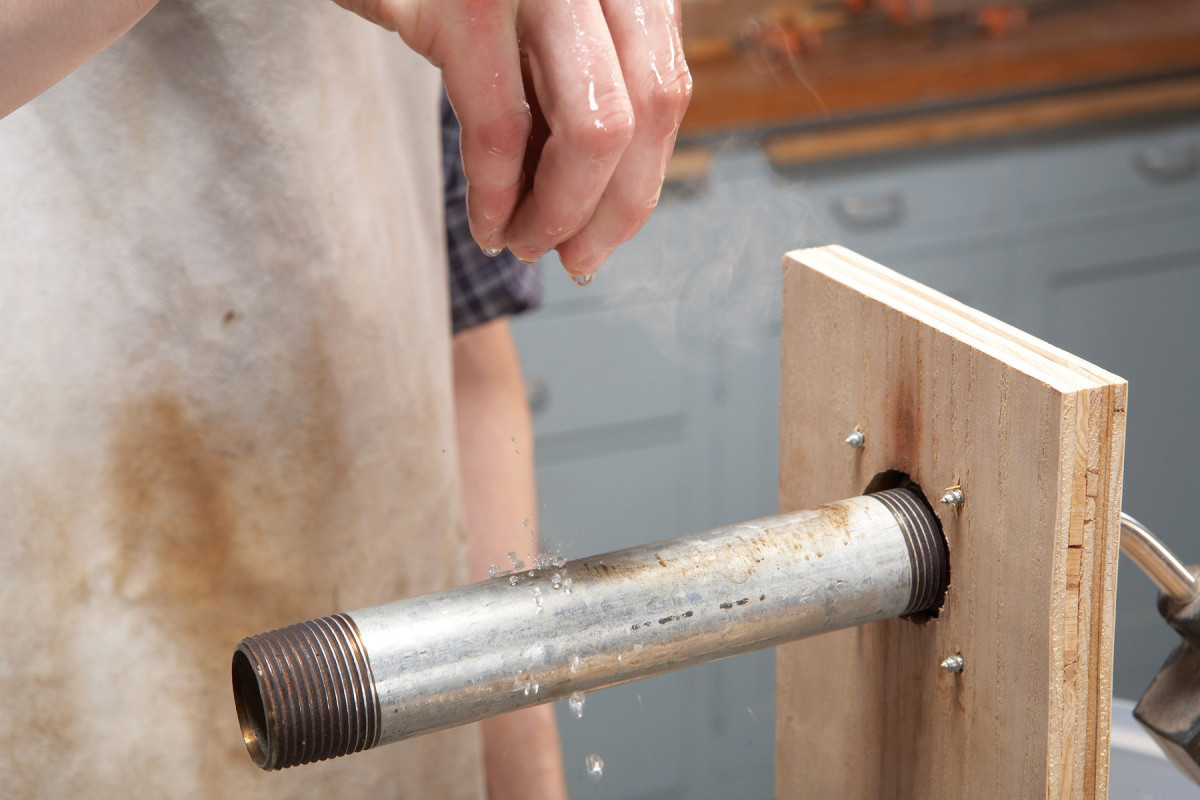
The pipe is ready when water droplets bounce off the surface.
If the droplets stick and boil, the pipe isn’t hot enough.
Ignite the torch, adjust the flame to low, and clamp the torch into position on the cradle.
with its nozzle 1″ or so inside the pipe. It will take a few minutes for the pipe to get sufficiently hot.
Test by dripping water onto the pipe. If the water boils in place, the pipe isn’t hot enough.
When the water skitters off, you’re good to go.
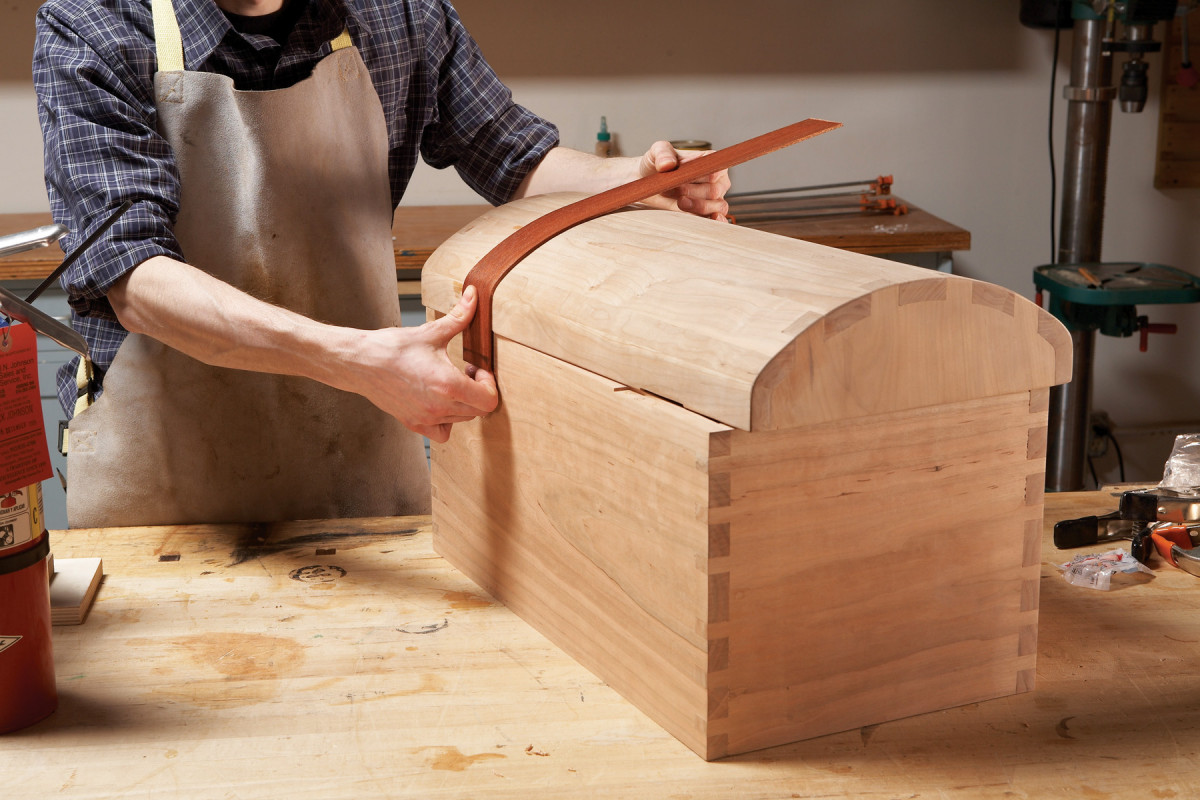
This bending method resembles blacksmithing, because each piece is shaped to fit, one curve at a time.
Apply consistent, light pressure until the wood begins to relax, and rock the strip against the hot pipe in a seesaw motion to make a tight circle. Next, apply more pressure.
Use Vise-Grip pliers to grasp the strip when the bend is almost at the end to shield your hand from the extremely hot pipe.
Move the strip around the pipe in 1/2′′ increments, exerting five to ten seconds of pressure in each spot—just enough to feel the tiniest bend—to form a broader, more progressive curve. Along the way, check the fit.
You may easily turn the strip over to undulate a curve that is excessively sharp.
Work on both sides of the strip to create S-curves.
Every fifteen seconds, or whenever the area around the pipe starts to look dry.
Remove the strip from the pipe and rapidly rewet it with a sponge before continuing to avoid burning the wood.
If the damaged surface is going to be hidden, then a little burning is OK.
However, burning may also damage a piece—it will need further sanding, at the very least.
Similar to steam bending, springback is probably going to happen after the components dry.
The kind of wood used, the grain’s characteristics, and the hand of fate are only a few of the variables that determine how much the piece moves.