Tenon an incredibly ancient woodworking method that has withstood the test of time and is still in use today, is one of the most popular and robust joints.
A mortise and tenon joint is a straightforward, incredibly robust connection that may be successfully scaled up or down in size.
Although the mortise and tenon joint has several variants, the fundamental joint consists of these two parts:
The tenon tongue and the mortise hole.

Working with loose Teno Using your existing router table is another technique to make mortises without the need for additional tools or jigs.
There isn’t much need to mark the workpiece because most things can be controlled by how the table is arranged and where the cuts are made.
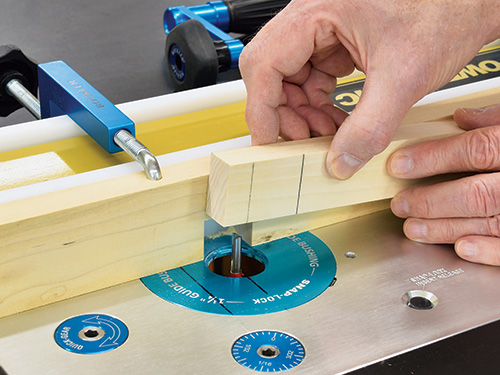
To define the mortise length, all you need is a fence set to center a straight or spiral bit in the workpiece, two start/stop lines on the fence or table surface, and start/stop lines on the workpiece matched to the bit’s cutting edges.

I’ve set the bit high enough to easily measure Teno and set the fence to center a 1/4″ x 1-1/2″ mortise in 3/4″ stock.
I then drew start and stop lines directly on the router table that match the start and stop line on the workpiece.
(A thin-tipped permanent marker pen is easily visible and comes right off with a touch of rubbing alcohol.)
For even more visibility, you can continue the stop/start lines on the fence.
Since mortises are deep cuts—this one is 1′′ deep—they should be made in many shallow passes that go deeper and deeper. Turn on the router and position the workpiece against the fence.
Gently place the workpiece onto the bit at the start mark and push it smoothly to the stop mark along the fence.
Turn off the router now, take out the workpiece, elevate the bit a little higher, and continue until the mortise is finished.
I’m just cutting this one mortise at a time, but if I were cutting numerous, I would raise the bit, run them all through in series, then run them all through on the first bit setting.
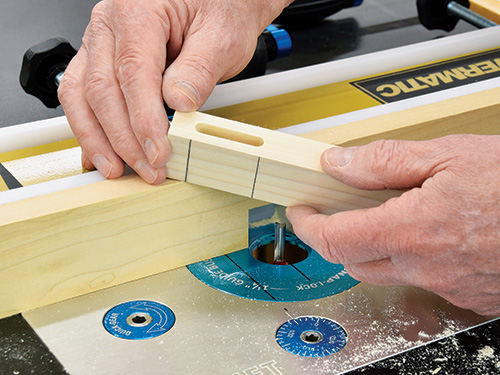
Router bits make perfectly level and clean cuts in mortises.
The mortises will be rounded, just like with the drill press.
For rounded tenons, you may leave the mortise exactly as it is; for squared tenons, you can square the slot and then create a sufficient amount of tenon stock.