Diy Pub table, once only seen in bars and pubs, are becoming more and more in demand.
As chic and adaptable furnishings for contemporary home décor.
These diy Pub table are being used in houses in a number of ways outside of their typical purpose, which gives any area a sophisticated and useful touch.
In this article we’ll talk about how to build your own diy pub table
Step 1: Materials and Tools

Materials:
untreated 4x4x8 (surprisingly difficult to source, not all stores carry untreated ones other than cedar $$)
1×18″ edge glued round
1×24″ edge glued round
Total so far for me is ~$19.93, but I added a bit more hardware for ease of use:
1.5″ 1/4″-20 machine screws
1/4-20 threaded inserts (more on what kind later)
1″+ wood screws (I have hundreds of 2.5″ left over from building my deck so I used those)
I added threaded inserts to the tops so they can be removed easily for transport.
You could save a few bucks and just screw them together.
Tools:
Safety glasses if you’re smart
Miter saw
Drill with assorted drill bits
Measuring tape
Pencil or some form of marking implement
Square
(I would provide links but I can’t paste into the form. I’ll try again later)
Step 2: Cut Your Legs

A big round on top, a 4×4 leg, and a little round on the bottom make up the table’s foundation.
I had thought that I could just ask the retailer to cut them in half and put them together,
but their cuts were a little uneven, and the result was a 50″ table that was a little too tall for my comfort.
In order to have a comfortable 46″ high table top to place a drink or purse on, our magic number for the leg was 44″.
The most crucial step is to ensure that your 4×4 is tightly and neatly clamped on the fence and that your saw is at a nice 90-degree angle.
If not, your table will be uneven since your ends won’t be parallel.
To ensure it was smooth and flat, I cut an 8-foot pole in half again, flipped it over, and measured to cut the other end.
Step 3: Locate the End’s Center


I have to locate the center since I’m installing threaded inserts.
I simply drew a line from corner to corner, marking the center of the X, using a square.
Step 4: Insert the Insert


This step may change depending on the type of insert you select.
I’ll move on from them now because I tried a few.
The packaging the inserts come in should recommend a drill size.
Mine say use a 11/32″, which is weird and I don’t have it so 5/16″ it is!
Make sure you drill deep enough for your insert and bolt to screw all the way in and not hit bottom.
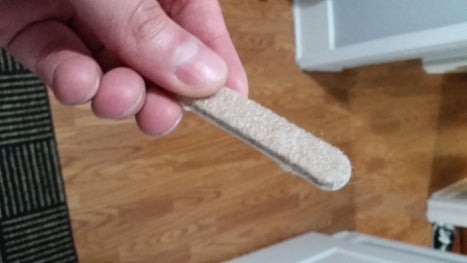
The first I tried are the kind with 3 little bent teeth that you hammer in.
They suck, at least in the end grain. Try one of the other ones I pictured above in orange packaging.
The first I tried and I’m pretty pleased with screw in to your pilot hole.
They say use a 6mm hex key. EASY!
The second I kind tried just hammer into the same size pilot hole.
Haven’t really tested them yet for strength.
Step 5: Locate the Table Top’s Center


So you have a big wooden circle and you need to find the center.
Well, the edges are rounded, so that complicates things.
The rounds are made by gluing a bunch of straight pieces together.
(Hence the edge glued name) and the seams are misleading so don’t trust ’em!
I swept the spool end up and down the edge using a tape measure while keeping the Zero end still on one edge.
Somewhere, you ought to see it reach a great worth. In this picture, the diameter measures around 23-9/16″.
They should all agree on a center if you do this in a few different ways.
SHOULD, but mine didn’t always, so I followed the consensus of the majority.
The thickness of the tape confused me and I don’t think the rounds are completely round.
Maybe a string would have been more useful. Alright, it’s near enough! Moving forward! Wherever you believe that the center is, drill.
Step 6: Assembly


Attach the top to your leg using one of your bolts.
I intentionally used a drill and slightly overtightened it to cause it to slightly countersink into the wood.
Although I’m aware that there are parts for this, I’m not too worried because a tablecloth will cover it.
To ensure a snug fit, make sure your inserts are sub-flush, or below the surface.
Since the bottom is smaller, all I had to do to keep it from spinning was to insert a wood screw in the center (found just like we did previously) and then a couple on each side.
I suggest using T-25 star screws since they are simple to remove in the event that you need to disassemble later.
Step 7: Finishing Touches
This is still going on.
I might attempt staining them if the rain ever stops.
In a hurry, they may just apply some white paint.
If I have too much time on my hands, I could router a pretty edge into the legs (wedding planning time, hehe!).
When I’m done, I could add some felt feet to aid with floor wobbling.
Though most floors aren’t flawless, the bottom round is quite level, so adding three or four feet could help balance things out.
If you construct any of these, or if you have any recommendations, please let me know.
Want to learn how to build your own diy high top pub table read this article