Are you considering creating a homemade Diy kitchen table? In This Short article I’ll be talk about how you can build your own simple Diy kitchen table.
Below is a video on how to be creative when building a diy kitchen Table 👇👇
For More WoodWorking plans Get Access To The World Largest Woodworking Plans
Now thats out the way lets begin!
Ready for one of the most stunning do-it-yourself projects? Today, I’m going to be sharing the first of two DIY kitchen table tutorials with you because…
I was not meant for this magnificent beast.
This lesson is for you if you’re seeking for a fantastic way to acquire a custom-sized dining table at a lot more reasonable price! I hope you can construct the ideal table.
Power tools are required for this post.
Any harm that occurs is not my fault.
To continue doing projects at home, always make sure to work as safely as possible!
Just a quick note this DIY project wasn’t build for me, this was build for my friend who just got a new home recently as a vacation and rental property
In addition to having a spacious dining room, she required a large dining table for the home because they will be hosting guests frequently.
If you haven’t lately gone furniture shopping, you should know how long it takes to obtain.
We have been remodeling and furnishing, and I promise you that it has been quite unpleasant.
She approached me with the idea of having a table built for her blog project because the tables she was looking at cost thousands of dollars and there weren’t many possibilities.
What came to mind first? We usually just construct stuff for ourselves, so that is scary.
However, nothing beats providing all of you with a fantastic instruction without having to shell out a ton of cash.
When we got to planning, Val and I came up with a rather solid strategy.
Creating the Handmade Dining Table Design
Val sent me a few different options of tables she was looking at. I LOVED this one, and this one.
Both were simple in design but had a bit more character and modern edge than just a basic table design.
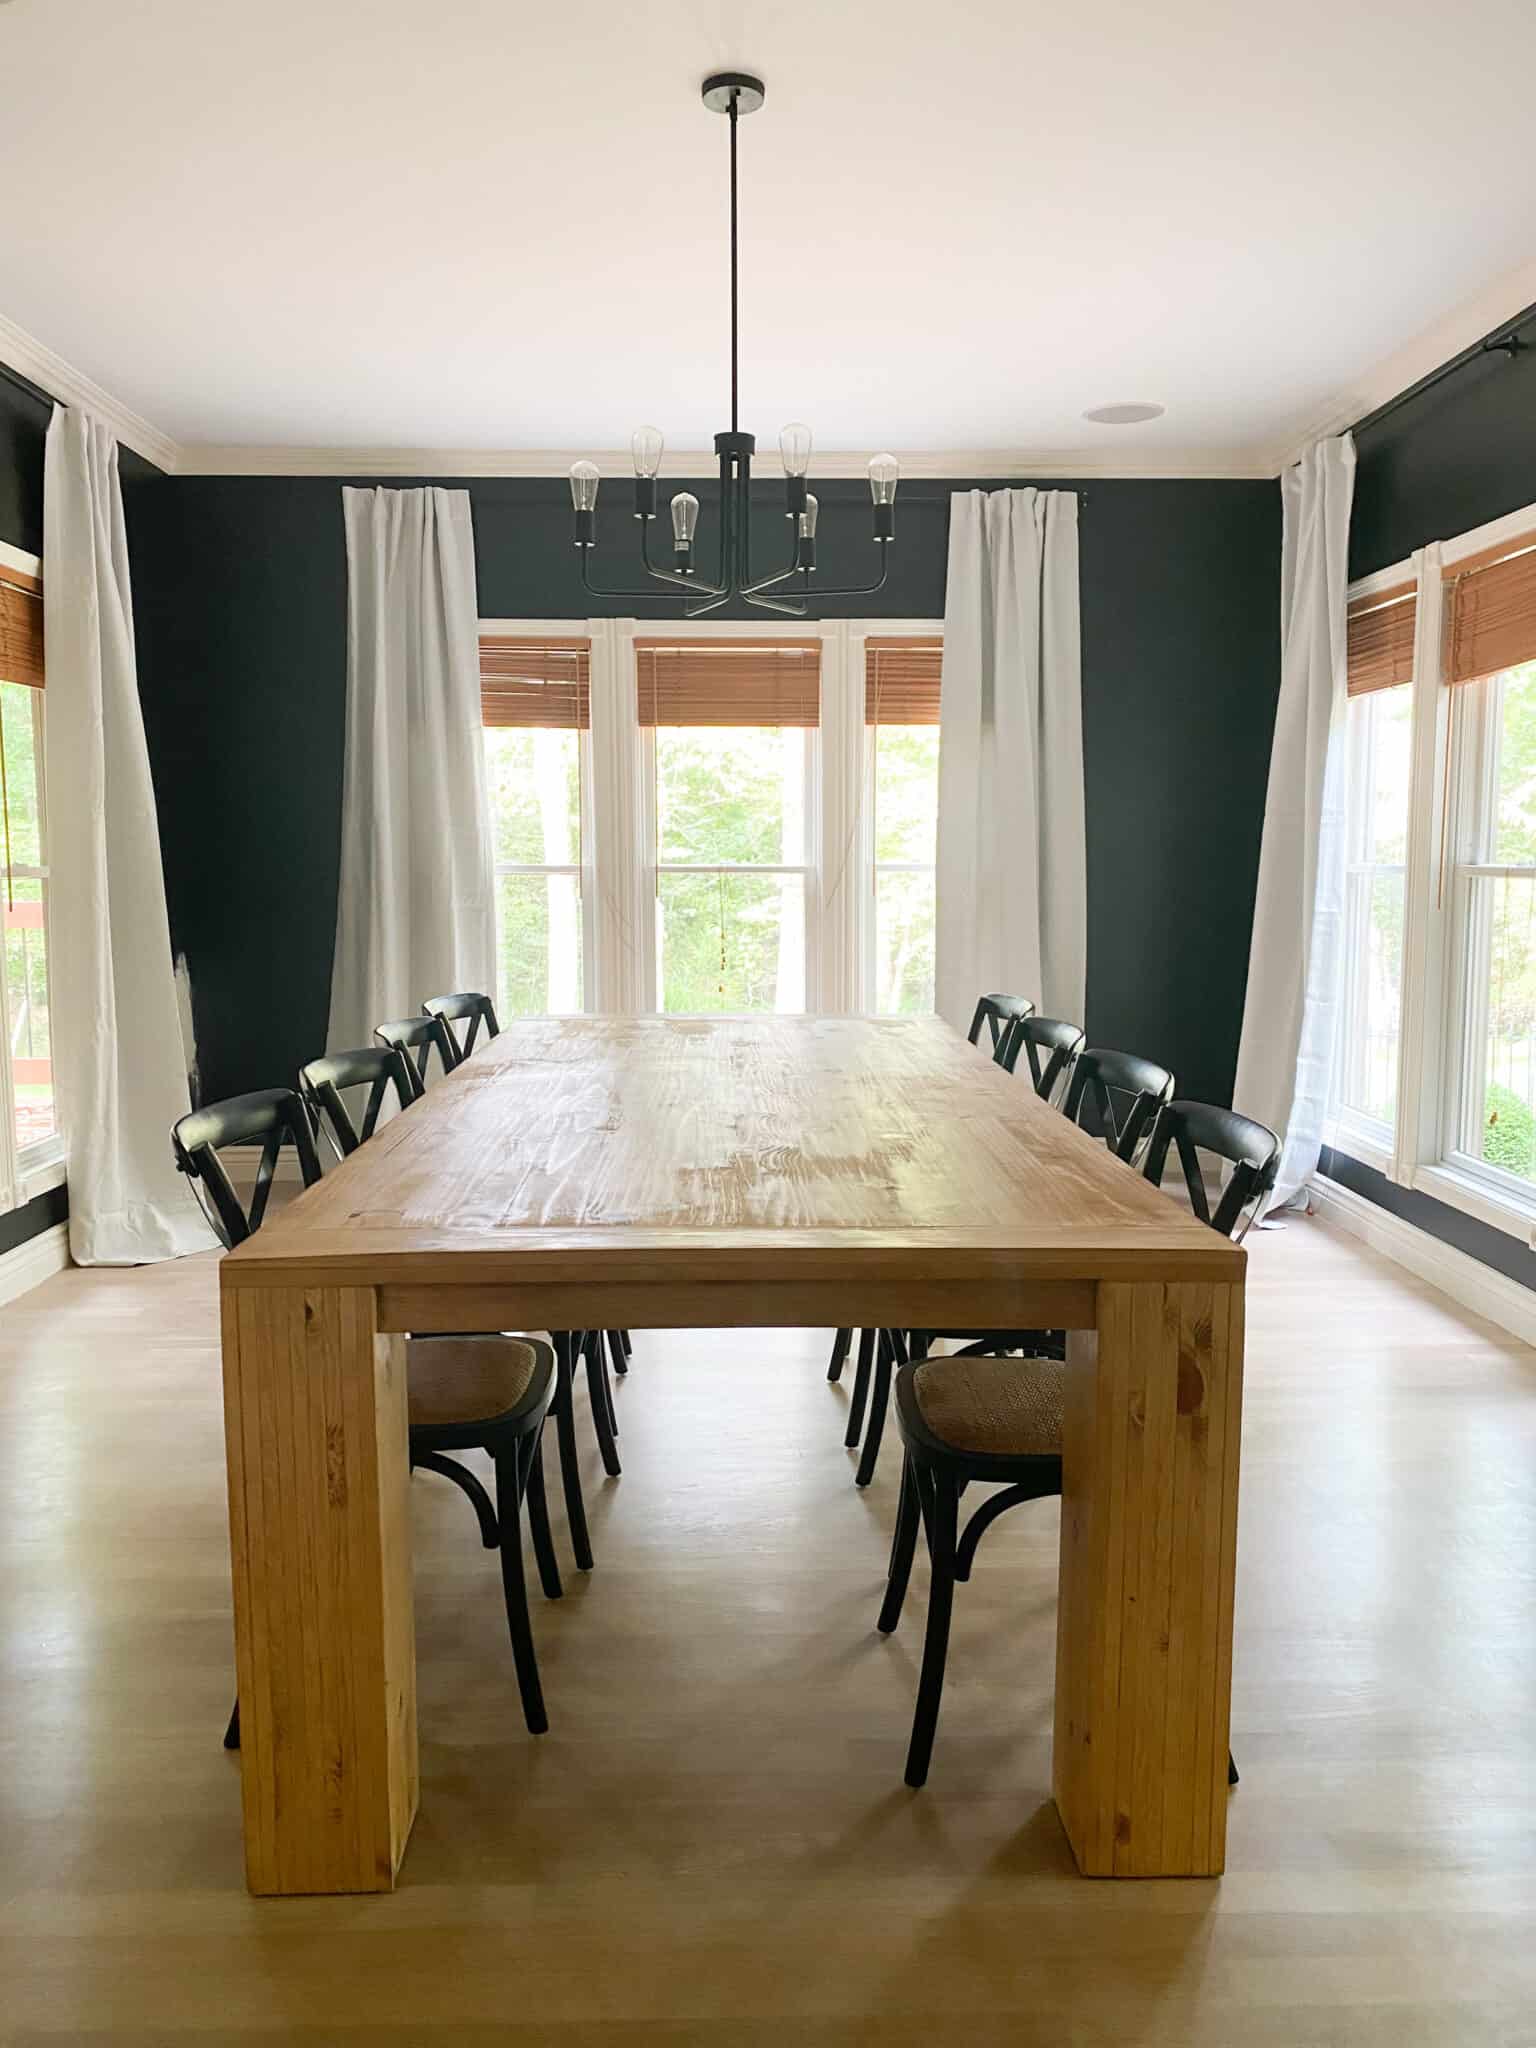
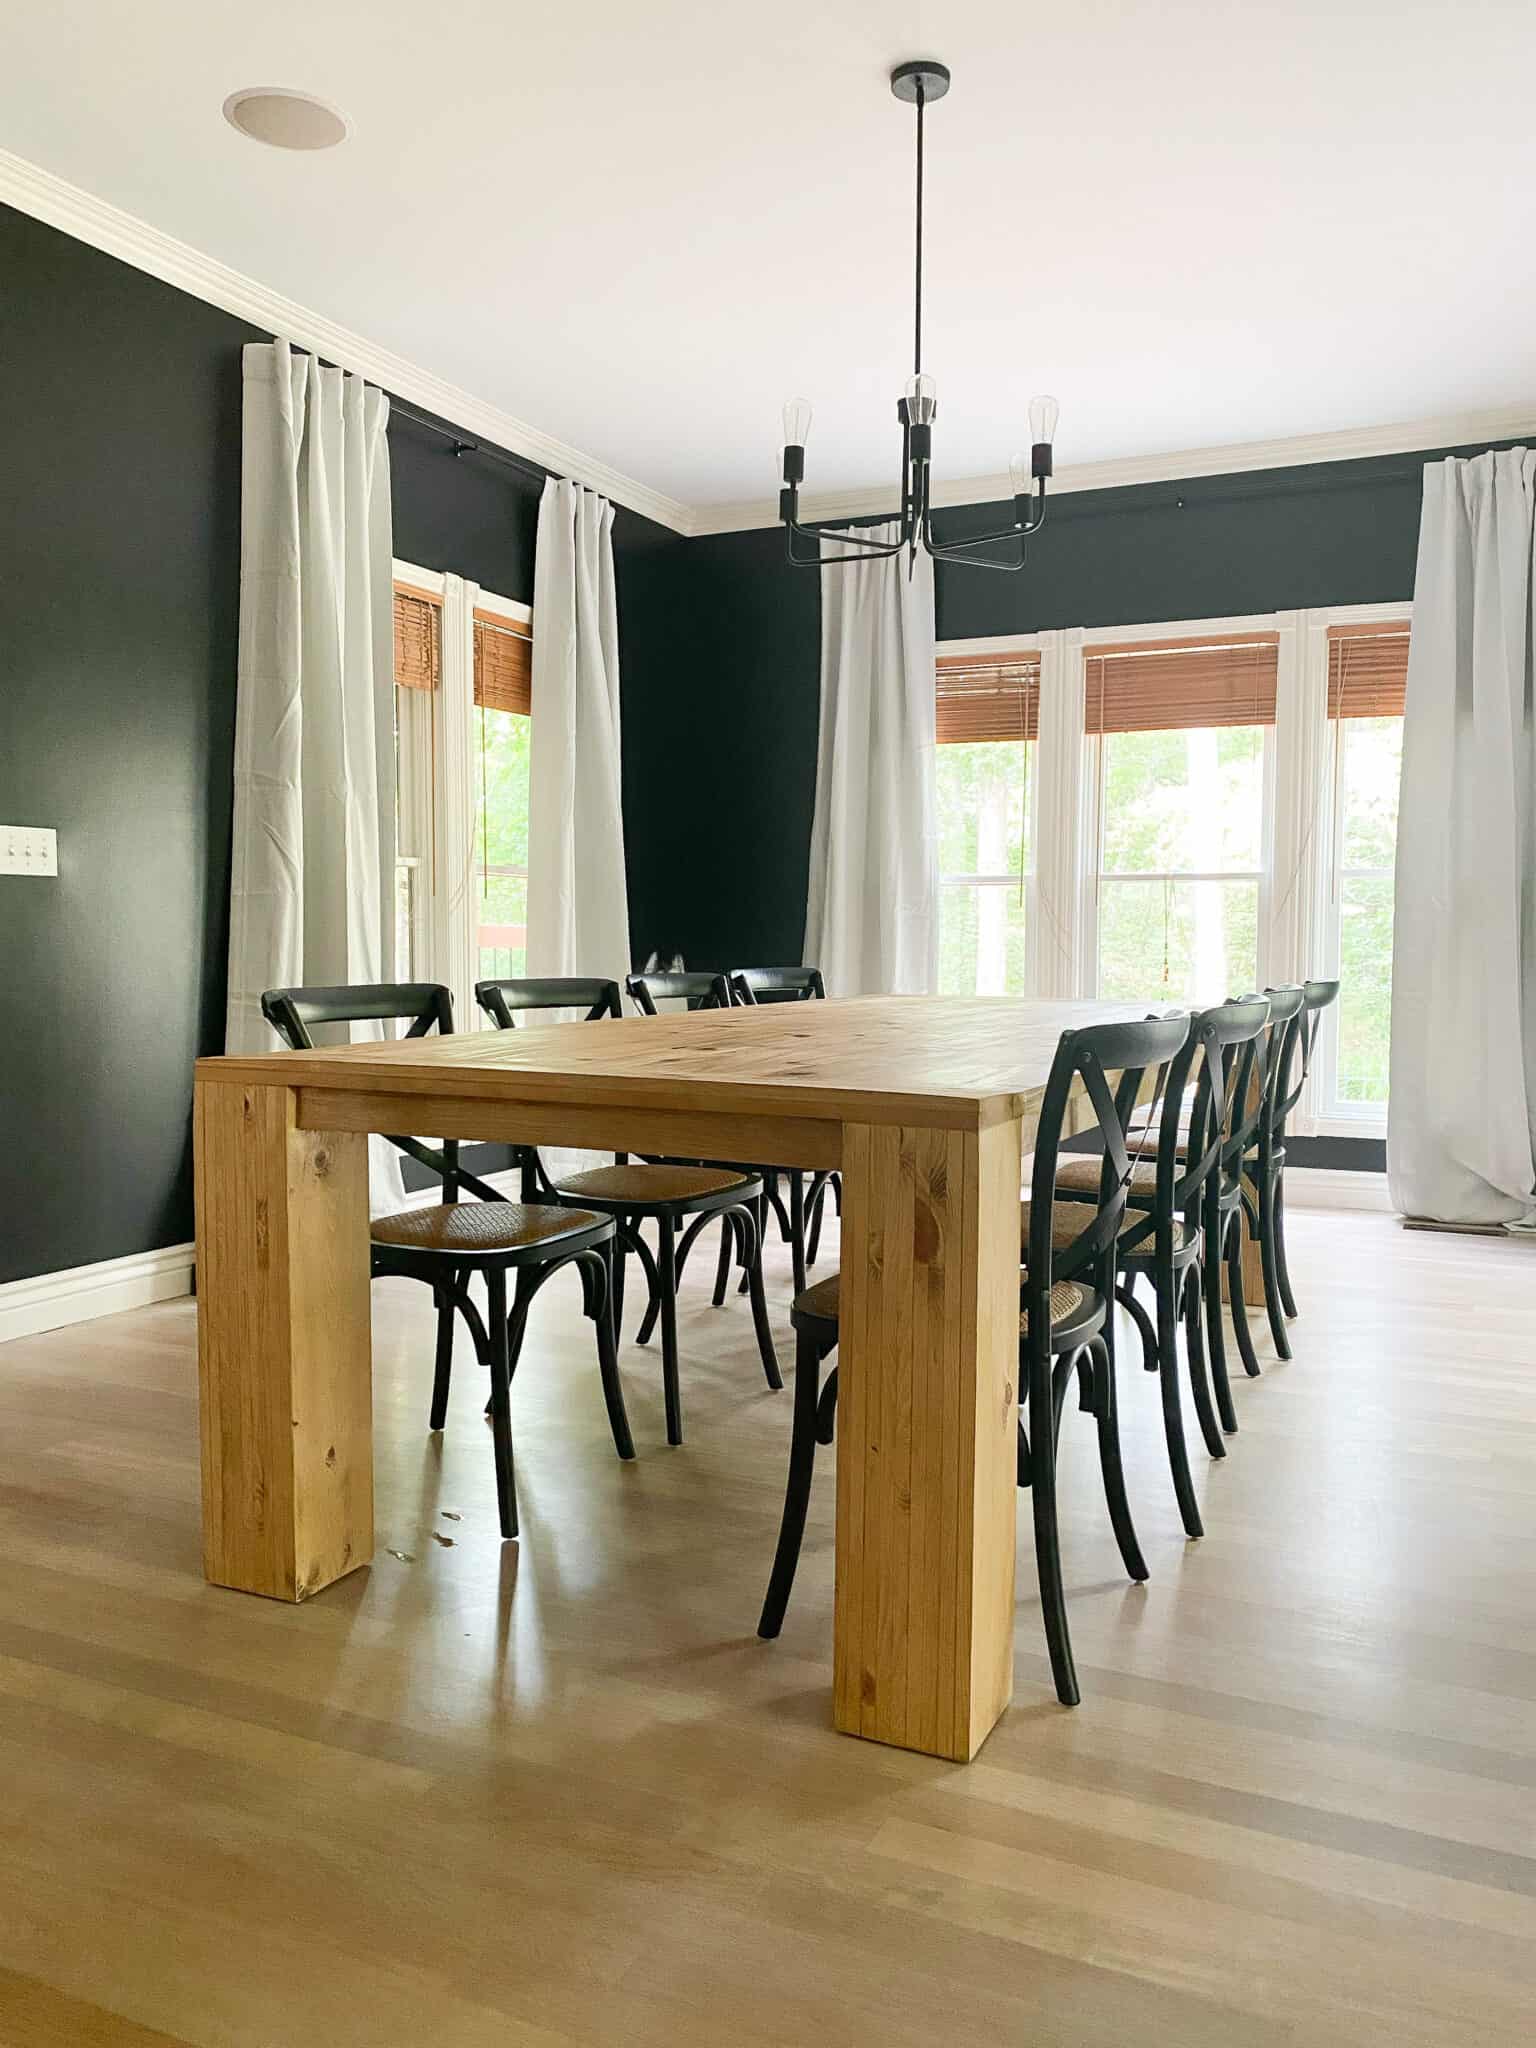
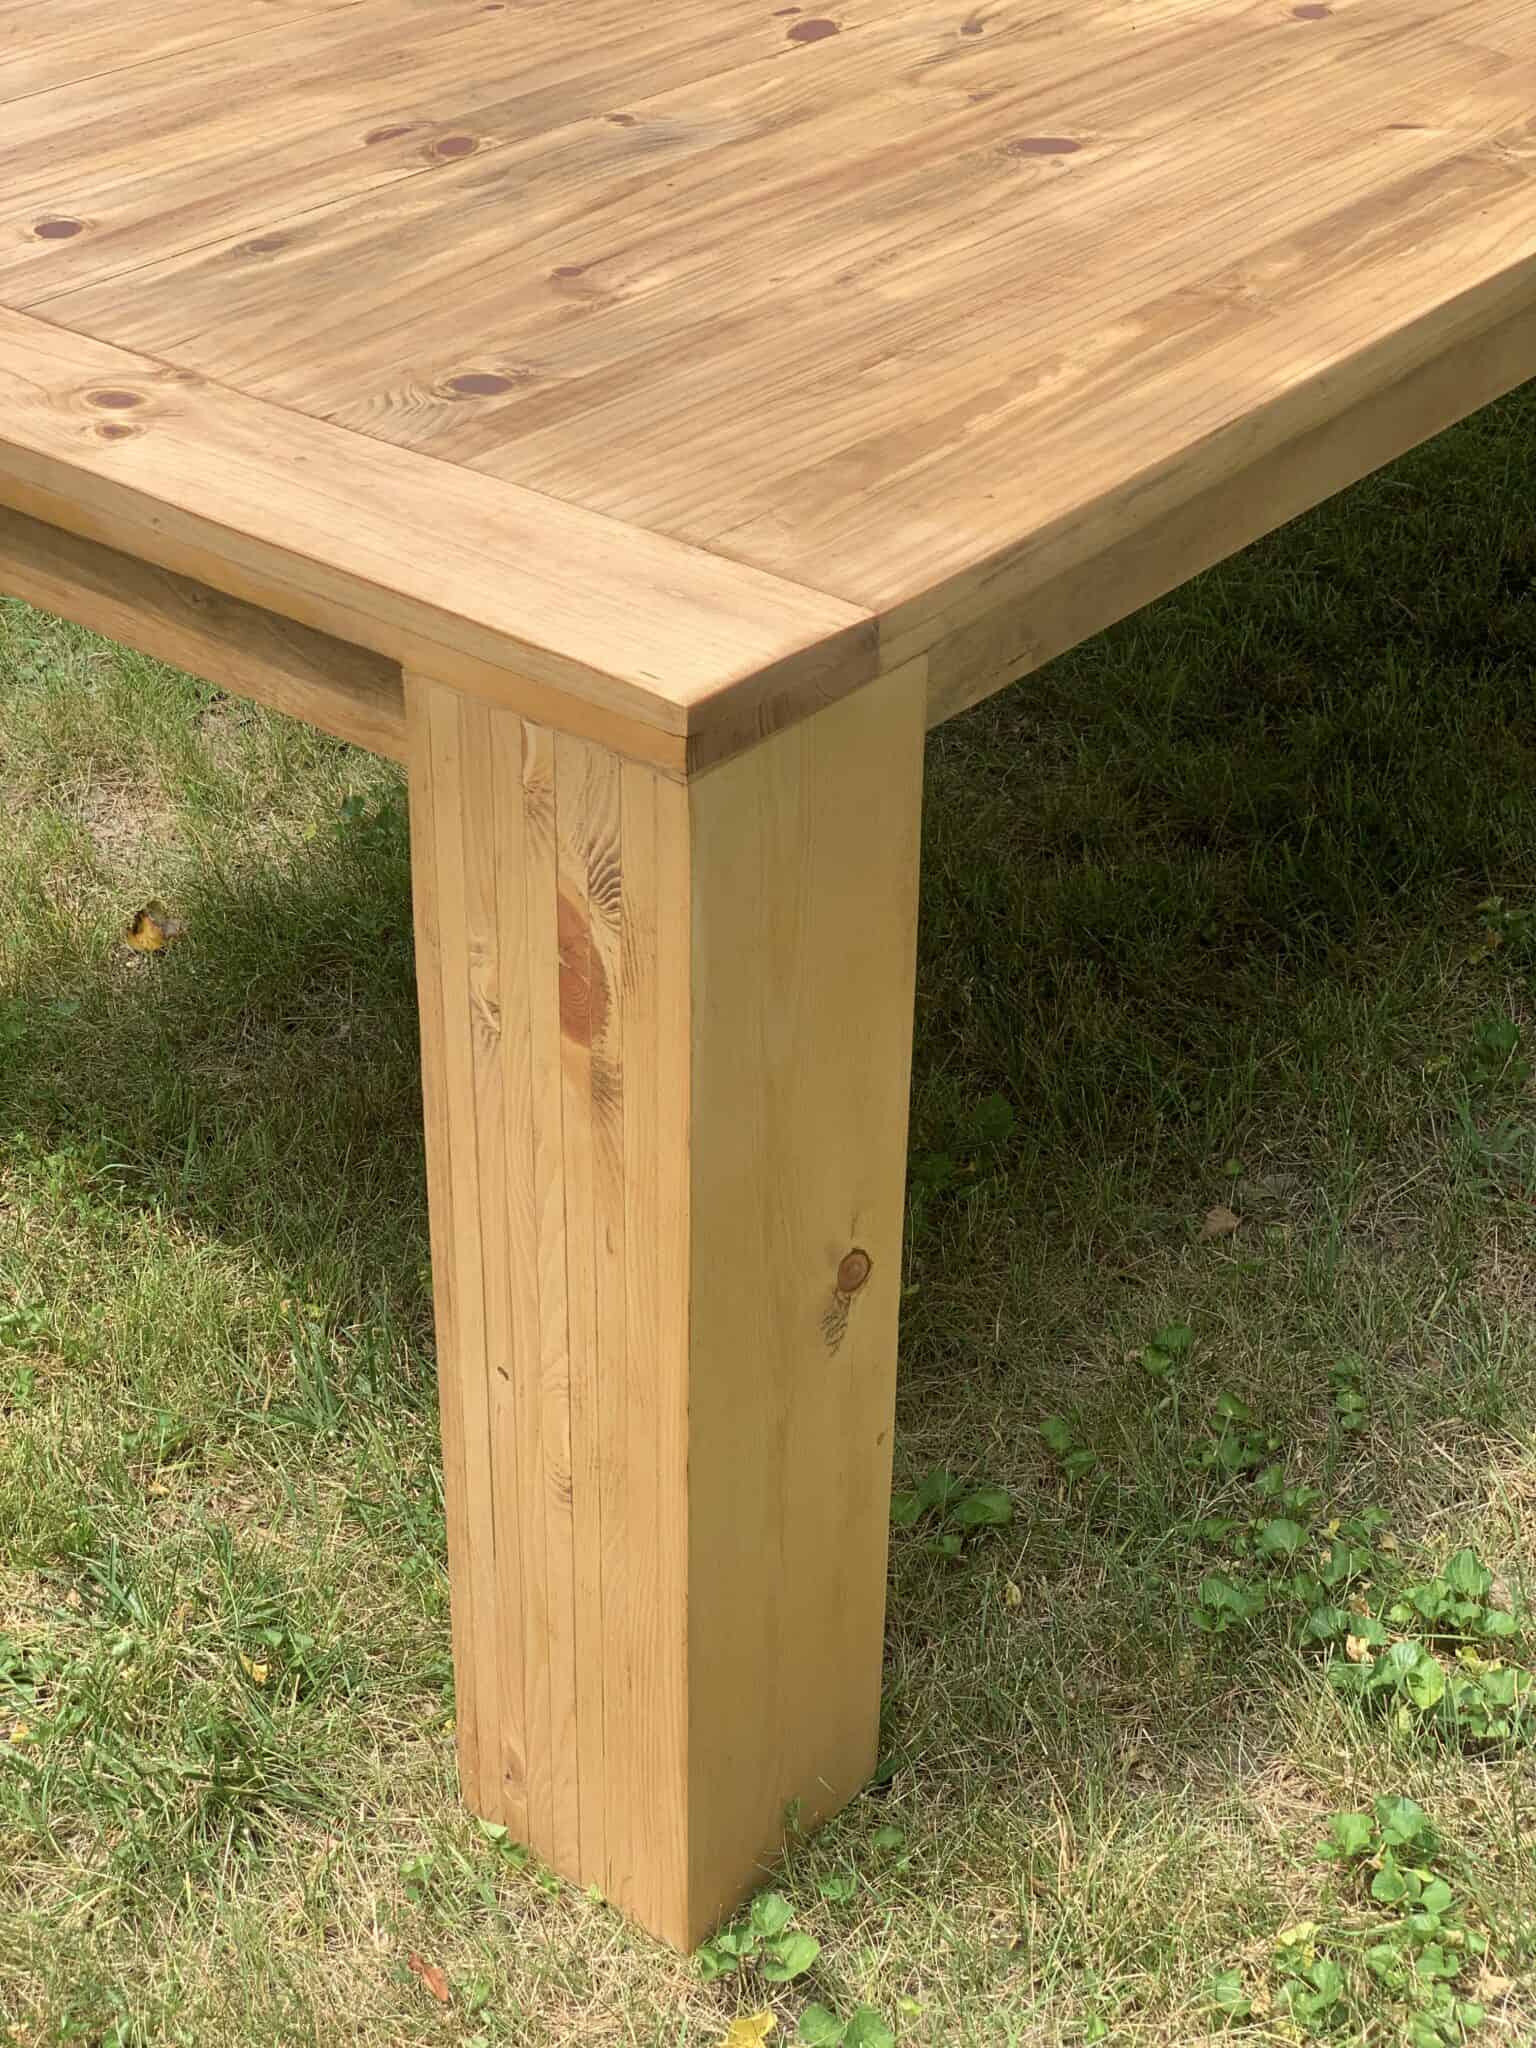
We decided to support the beast with EXTRA large legs because of the size of the table.
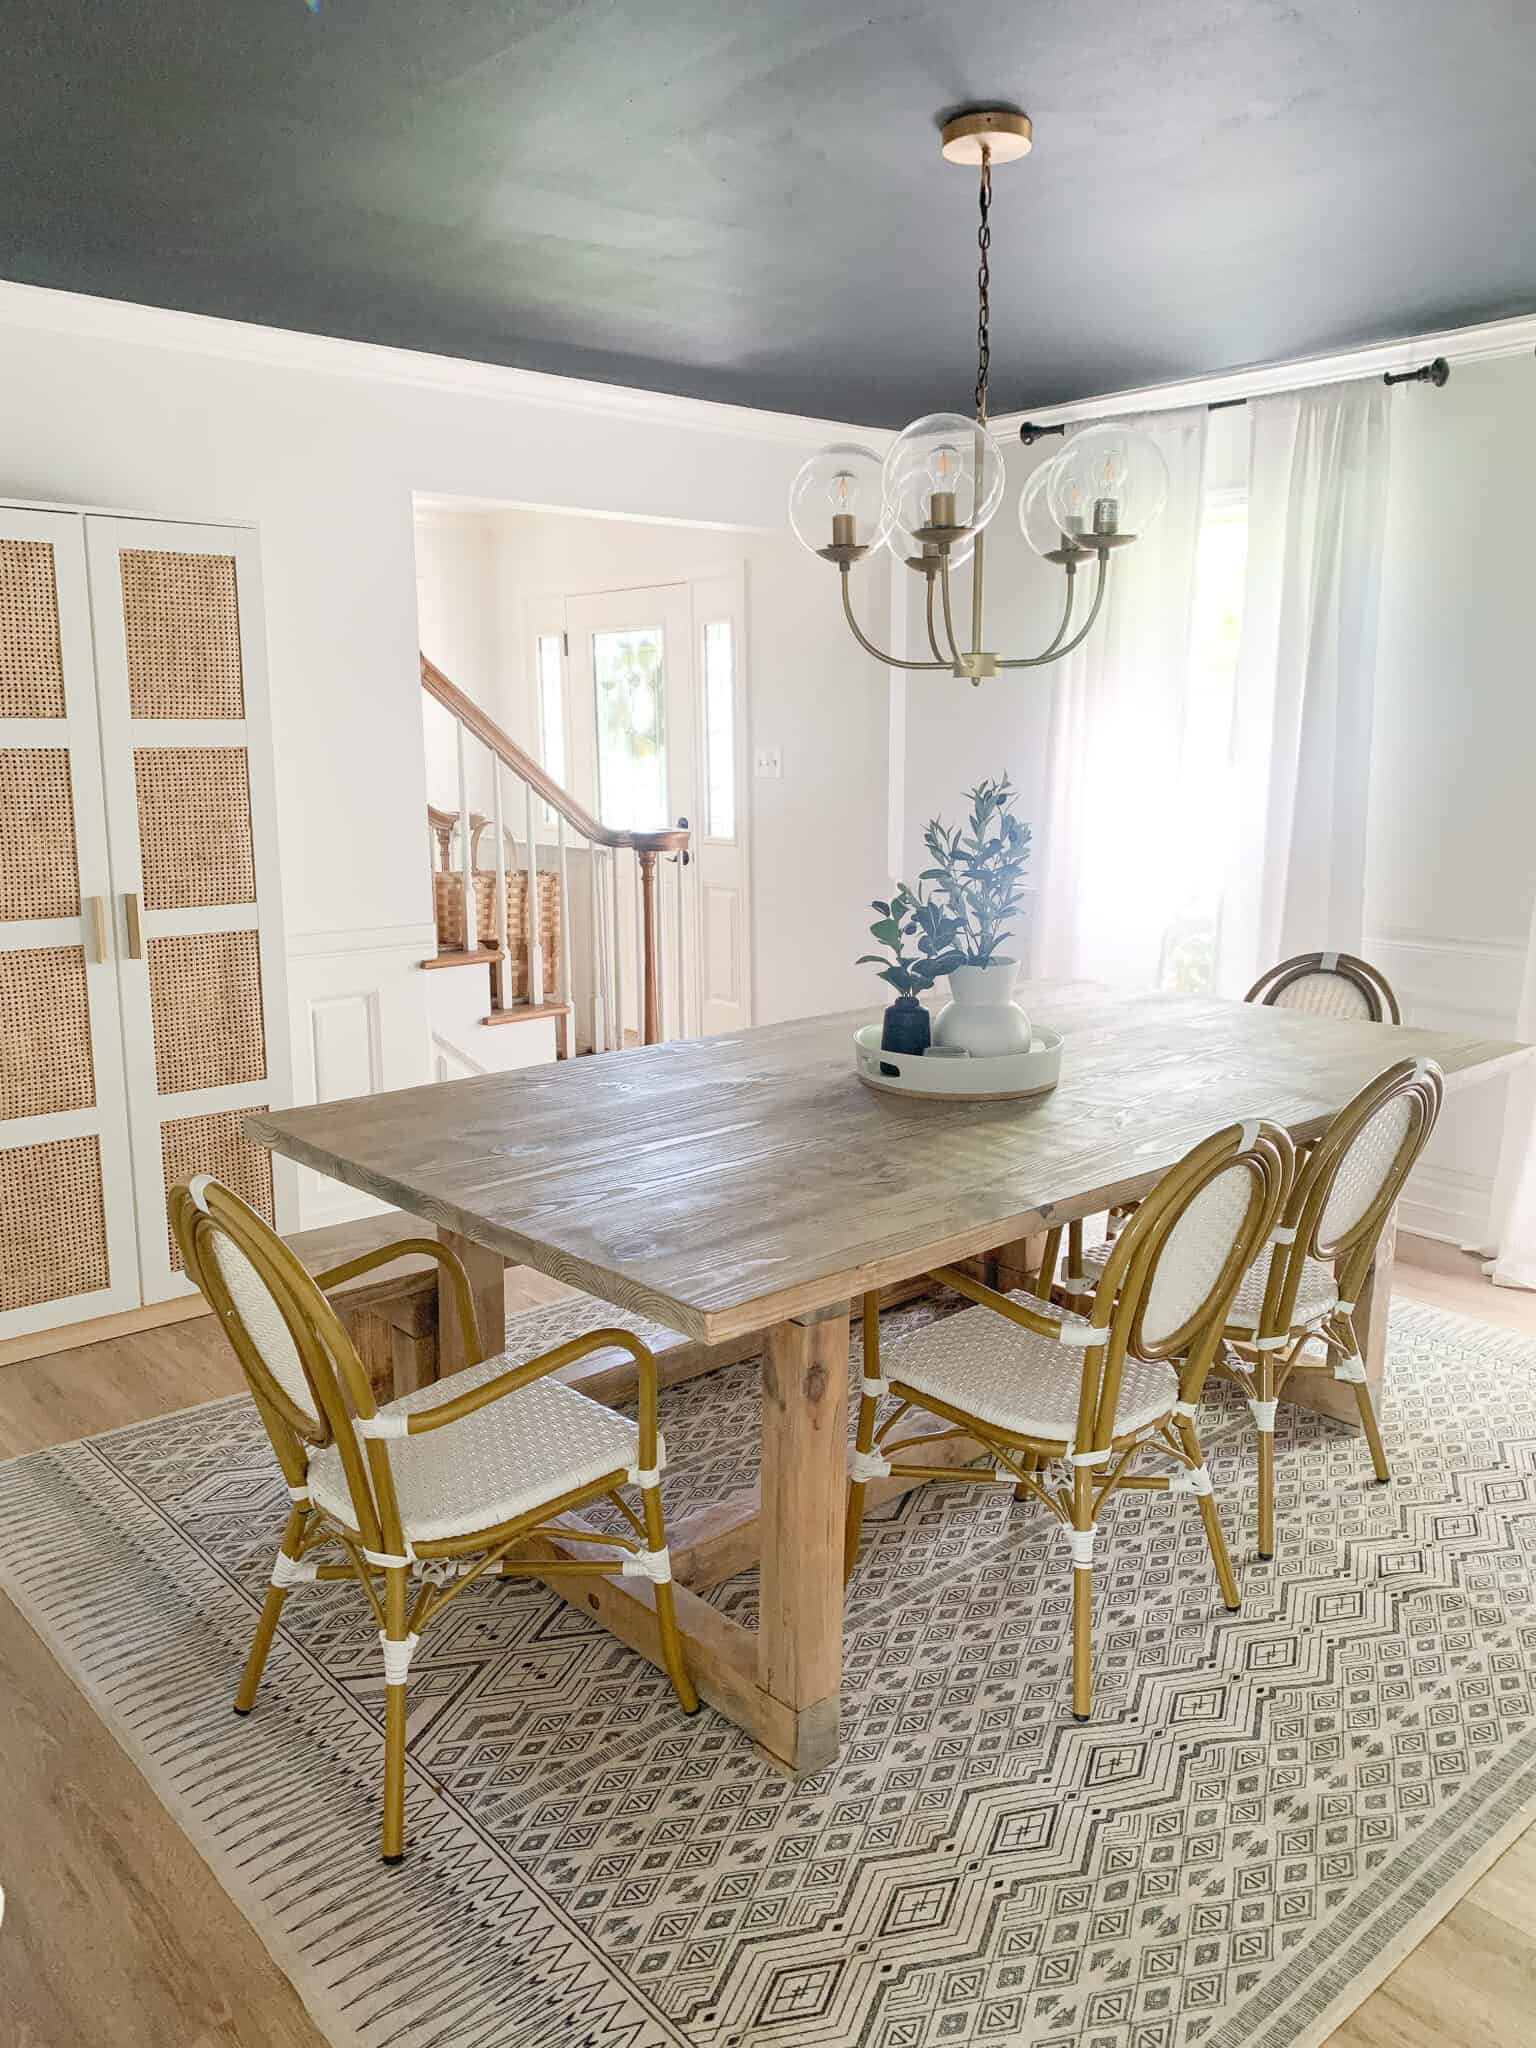
This bad boy is 106 x 48 inches, you guys.
(Don’t worry, most of you probably don’t need this size;
I’ll show you how to choose the best timber for your ideal size table.)
When it comes to DIY you want to make these unique and fun, but I also think there is nothing better than finding a high end table that you can make your own.
We landed on a really simple design that had some edge.
Overall I think we came up with a stylish look that would look good in so many homes, no matter your decor style.
Why DIY Diy Kitchen Table?
DIY can be the best thing in my opinion. Aside from time and cost, DIY has a few other great benefits when it comes to furniture.
We actually have a custom dining table that we have had for years (well before we started doing any woodworking) and I have enjoyed the benefits of a custom table myself – so I feel like I can really weigh in on this.
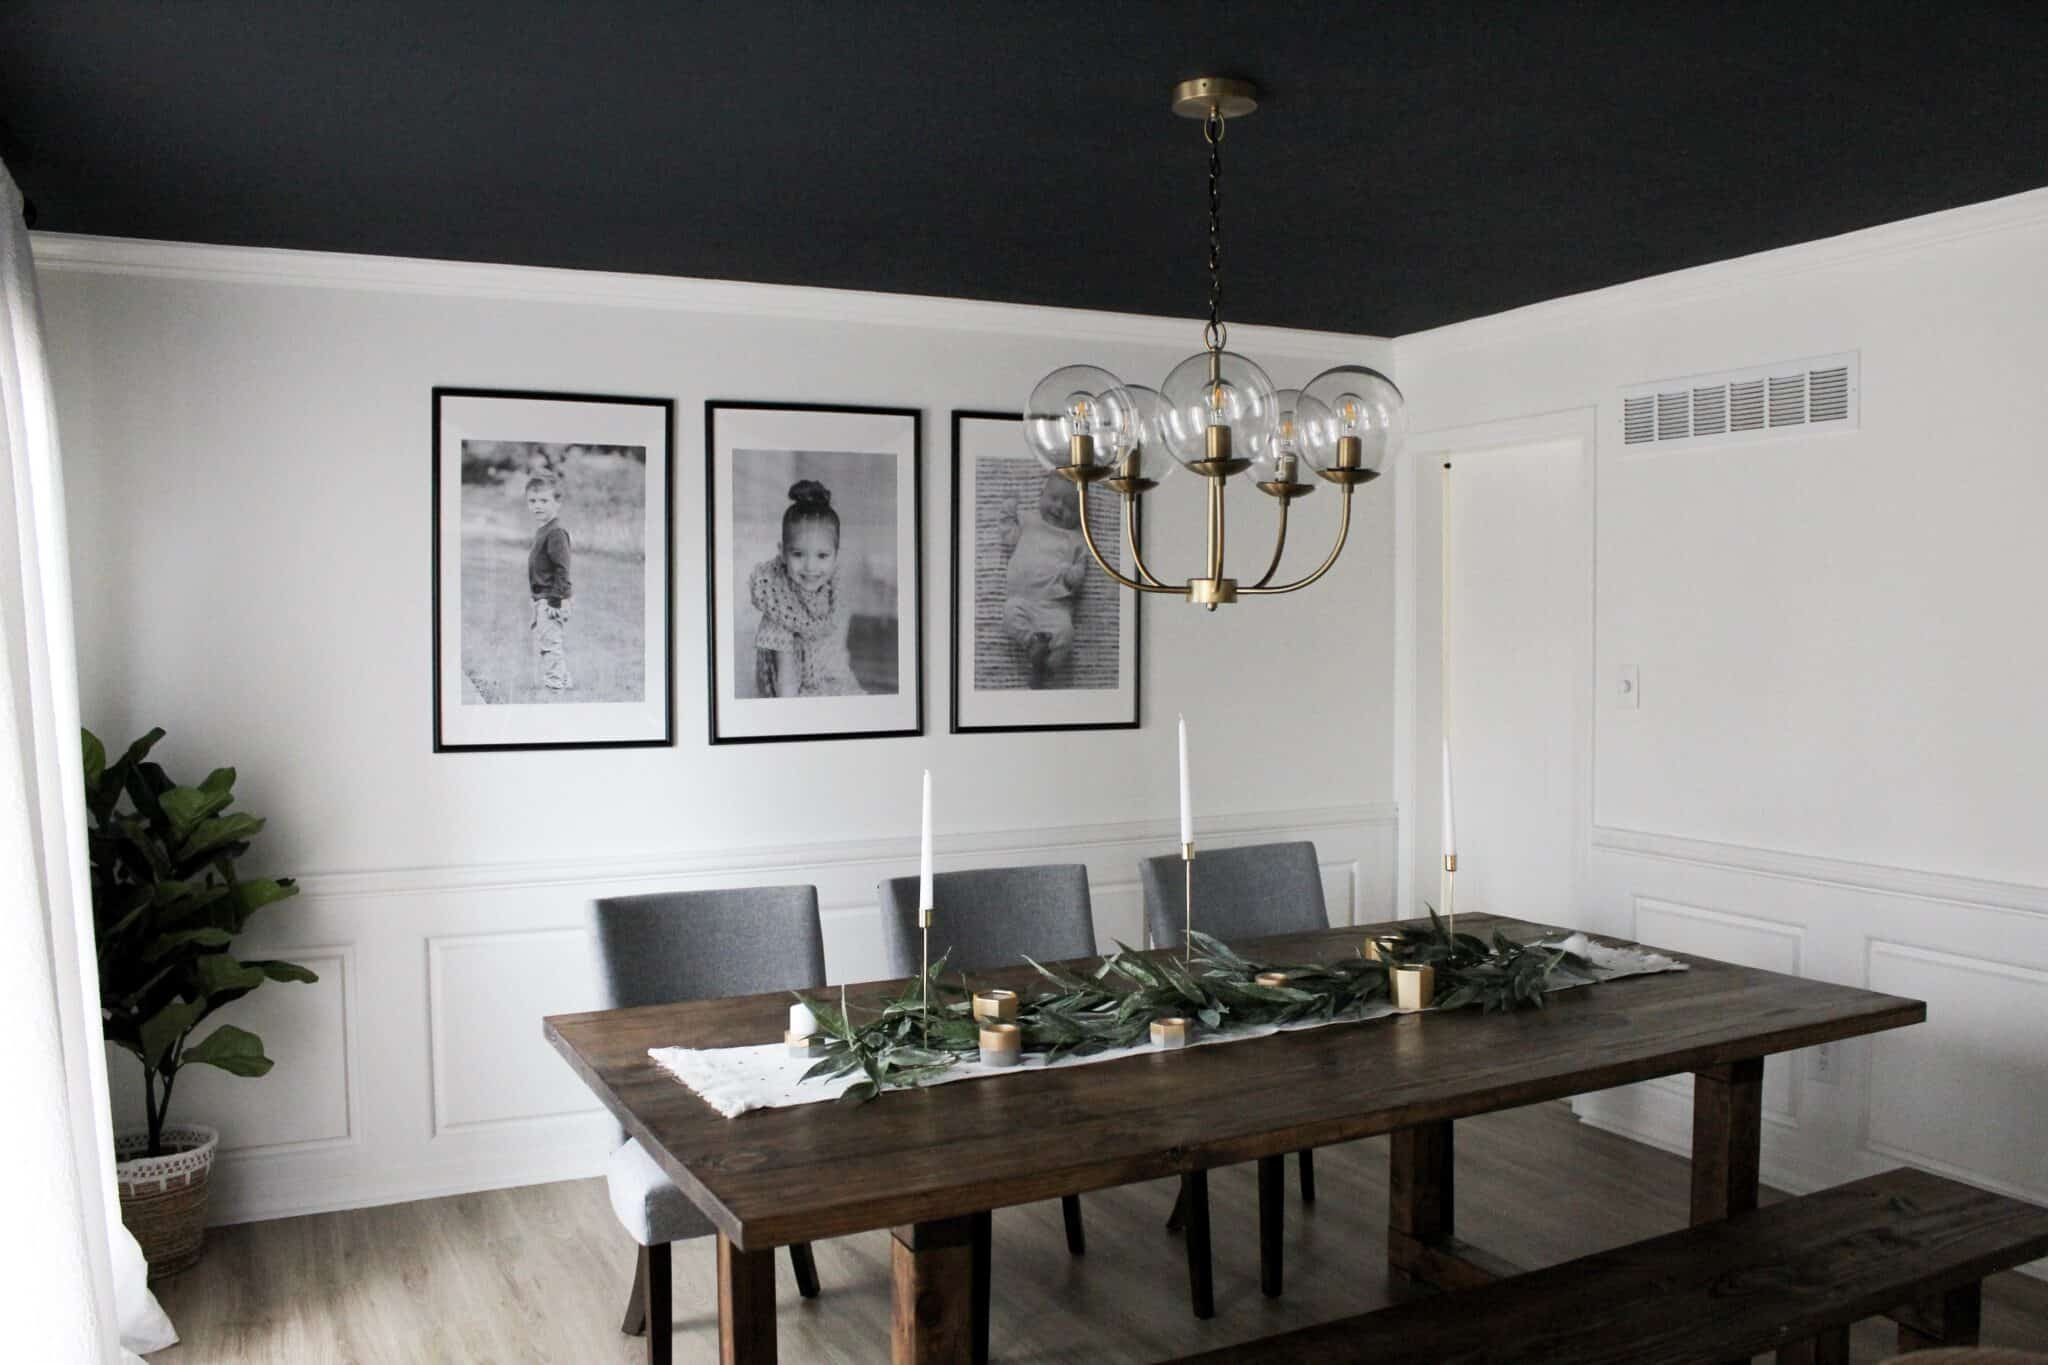
This is our bespoke dining table before it was finished.
When we first bought it, it was this hue.
First of all, you can be sure that a solid wood custom table is free of thick varnishes and other coatings.
Your table will look brand new after some sanding and staining if you decide against staining it or if something goes wrong.
That might not matter for lesser pieces, but peace of mind has been invaluable to us when dealing with huge, pricey objects like tables.
Here is our Diy kitchen table after we sanded and re stained
About three years after we bought our current table, I realized I didn’t love the stain, so we sanded the entire thing down and painted it a lighter color.
It was the ideal choice since, for less than $20 in supplies, it allowed me to rediscover my passion for the table in our house.
For size, custom is equally fantastic.
Table breadth, aside from length, has significantly decreased throughout time.
Years ago, while we were shopping for a dining table, I was really irritated by how narrow the existing tables were.
Our previous table measured around 48 inches in width and was an antique.
I LOVE having a wider table so that I can have decor or food on the table while still sitting comfortably, so going custom allowed me to retain that width of table in our space.
Although lumber costs are high right now – you can still save a lot of money buy DIYing a table, and you will get something high quality and solid wood.
Okay so – now I have given you all the ins and outs to how we came up with this DIY dining table design, and why we did it, so now lets get to actually building the table! This post will have a step by step guide both in the blog post and in a printable version.
A couple of major things to note before you start shopping:
When you are shopping for lumber for something like this you don’t want to skimp.
That said – lumber prices are pretty high right now, so you dont have to get the best of the best.
When you are picking lumber you want to check to see if each piece is high quality.
Turn the pieces on their edges and check for any warping and be picky!

Take note of the temperature and humidity as you are building.
Because of the extreme humidity in Missouri throughout the summer, we had to contend with warping and lost some lumber. Additionally, if at all feasible, you should build on a level surface.
Last but not least, you should test the stains. However, we also discovered that after being opened, certain spots oxidize.
Thus, if you decide on a stain, give it one more test before moving on to the table!
When you are making this bad boy, those three pointers will save you a ton of hassle!
DIY Dining Table Supply List
(depending how you work best, I also have a printable shopping list and instructions towards the end of this, so if that works best for you, you can go that route!)
Supplies for Staining
- Wood Stain – For our table we did a 50/50 mix of special walnut and golden pecan both from Minwax.
- Wood Conditioner
- Polyurethane – We went with a matte finish
- Rags for Stain
- Foam roller
Tools
- Sander and Sanding Disks
- Planer – we got this inexpensive one – but it is very optional.
- Miter Saw – We have personally owned both this inexpensive one and this nicer one. Clearly we love the nicer one, but if you won’t be doing many projects, the first one was amazing for us!
- Drill
- Kreg Jig
- (possibly – we didn’t need this, but I explain why you might in the table top instructions) Circular saw
Other
- Wood Glue
- 1 inch Kreg Screws
- 1.25 inch screws
- Clamps – You need several clamps. I am linking to the ones we have. These little guys are great to have lots of them, Then having a few of these are great for the legs, and we also grabbed 2 of these which were amazingly helpful.
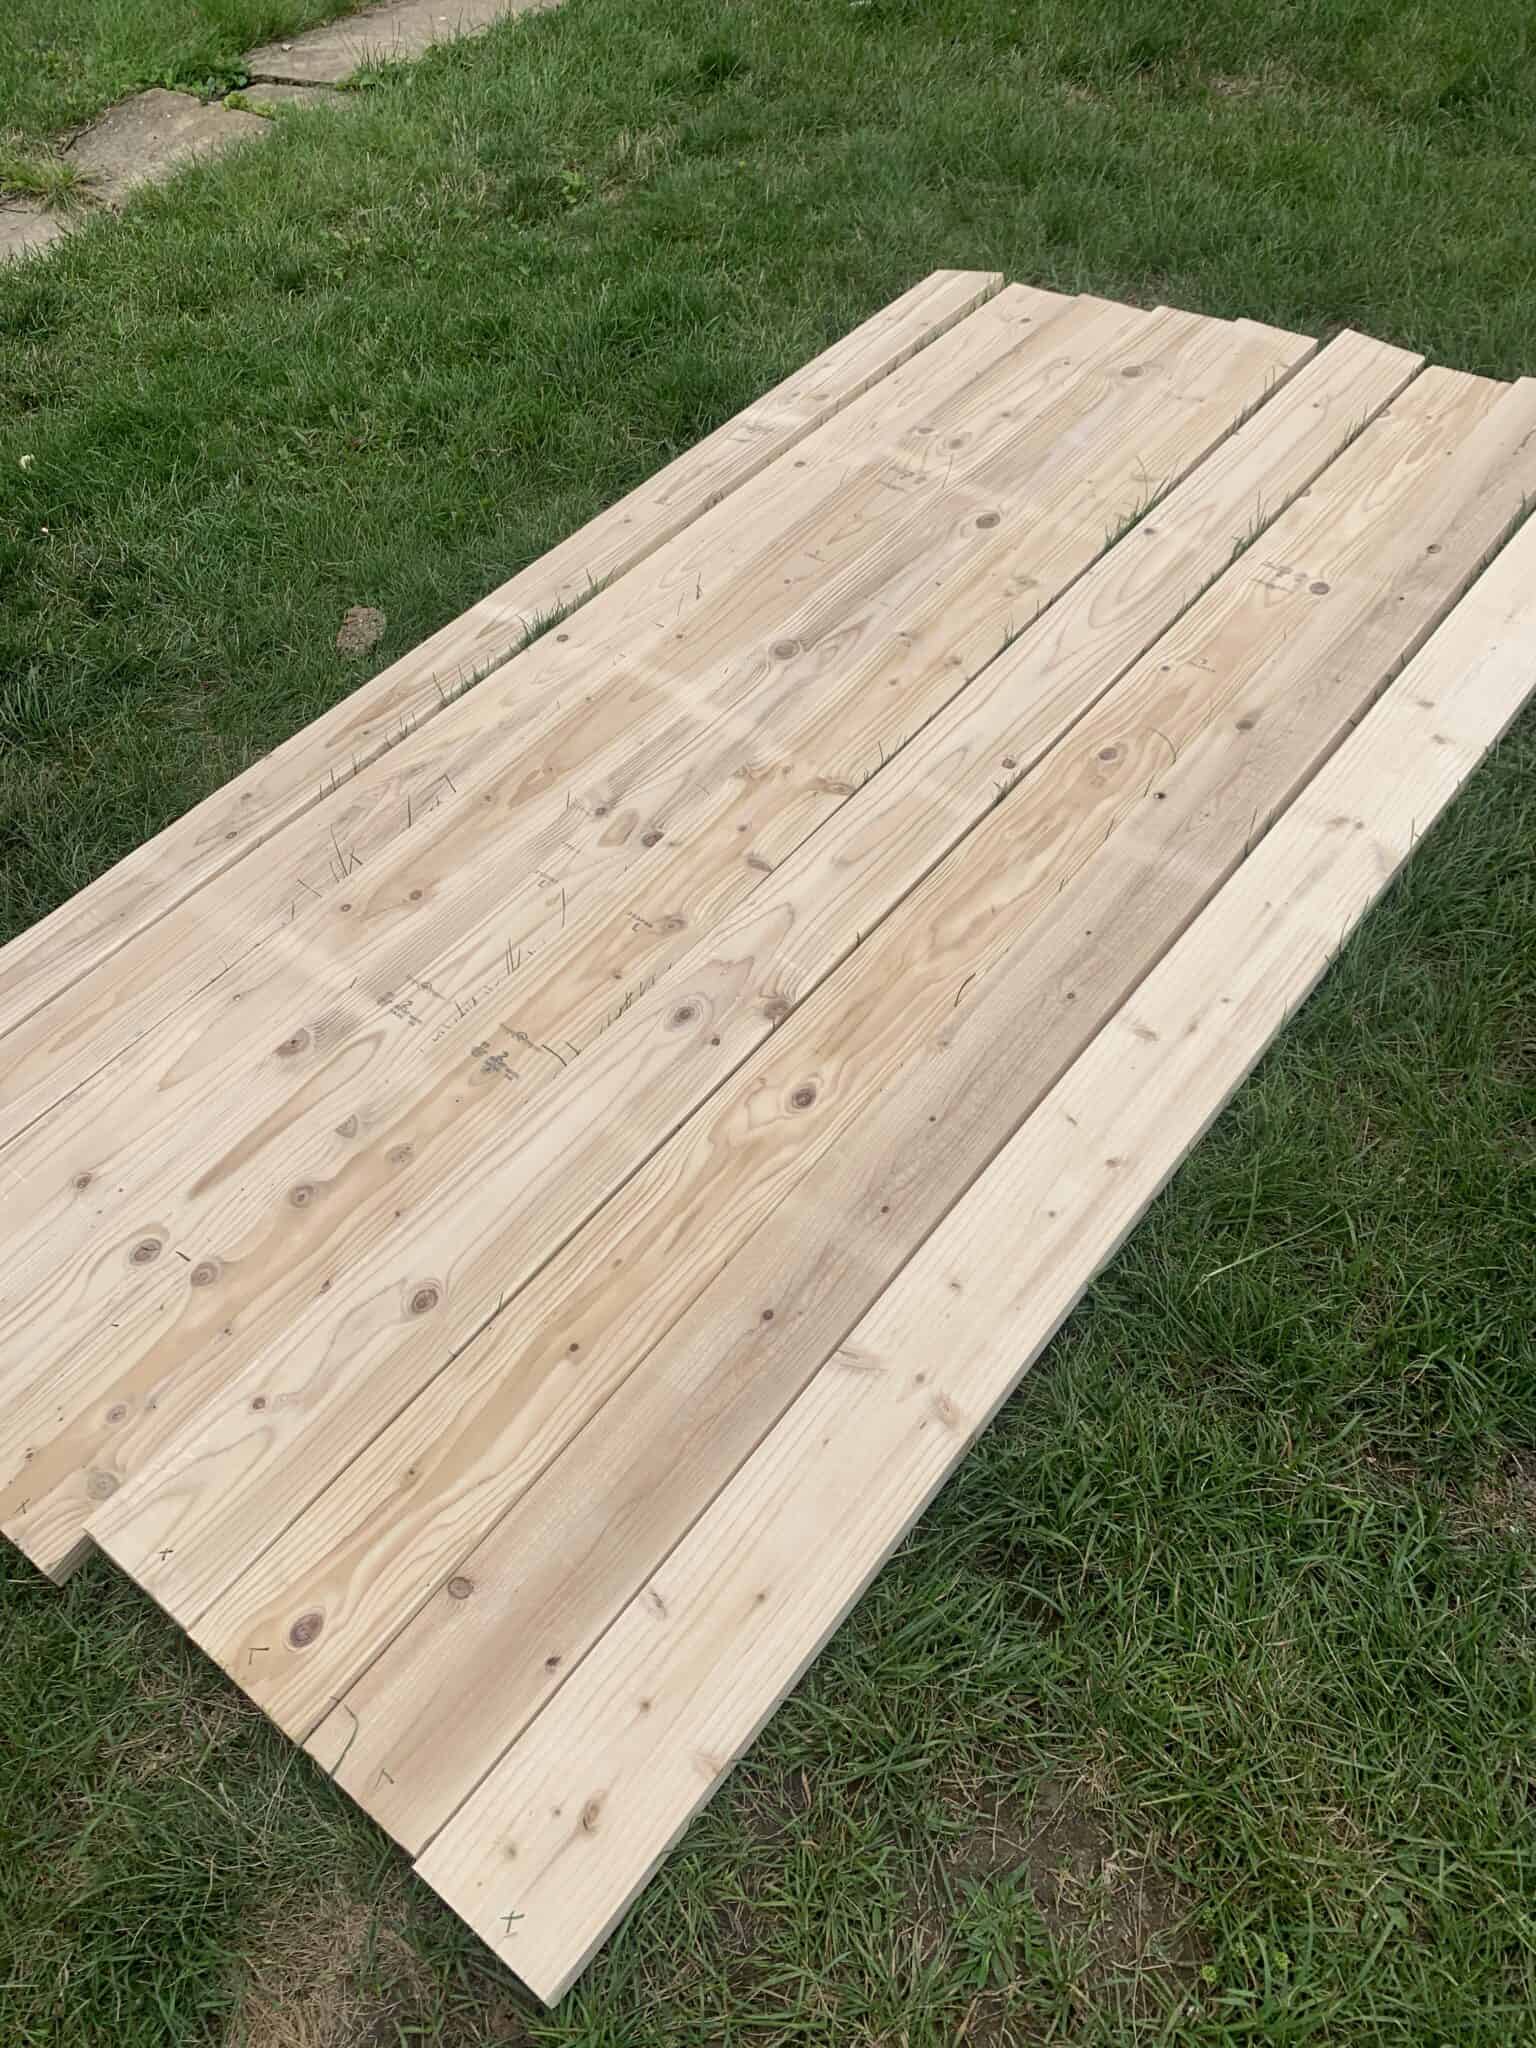
Lumber
I will list exactly what we used – but modify the table top and aprons based on the size you need. The legs should remain the same for any size table top. We personally have the best luck getting lumber at Menards, but I know not everyone has a Menards near them.
Table Top:
- 8 – 1×12 x 8 foot pine boards
- 2 – 1×6 x 10 foot pine boards ( you will want these end pieces no matter what, so if you don’t need a super long board you might be able to drop the 1×16’s to shorter sizes
- 2 – 1×3 x 10 foot pine boards (apron)
- 1 – 1×3 x 8 foot pine board (apron)
- 2 – 1×3 x 8 foot furring strips
Legs:
- 8 – 1×8 x 10 foot pint boards
Step by Step Plans to Building your DIY Kitchen Table
Take the order of the table top and the legs with a grain of salt. They both need to be done and in whatever order works best for you. I am going to start with the legs but feel free to build your table top first. There are also some pretty good step by step photos integrated into the post that are hopefully helpful.
Building the Table Legs:
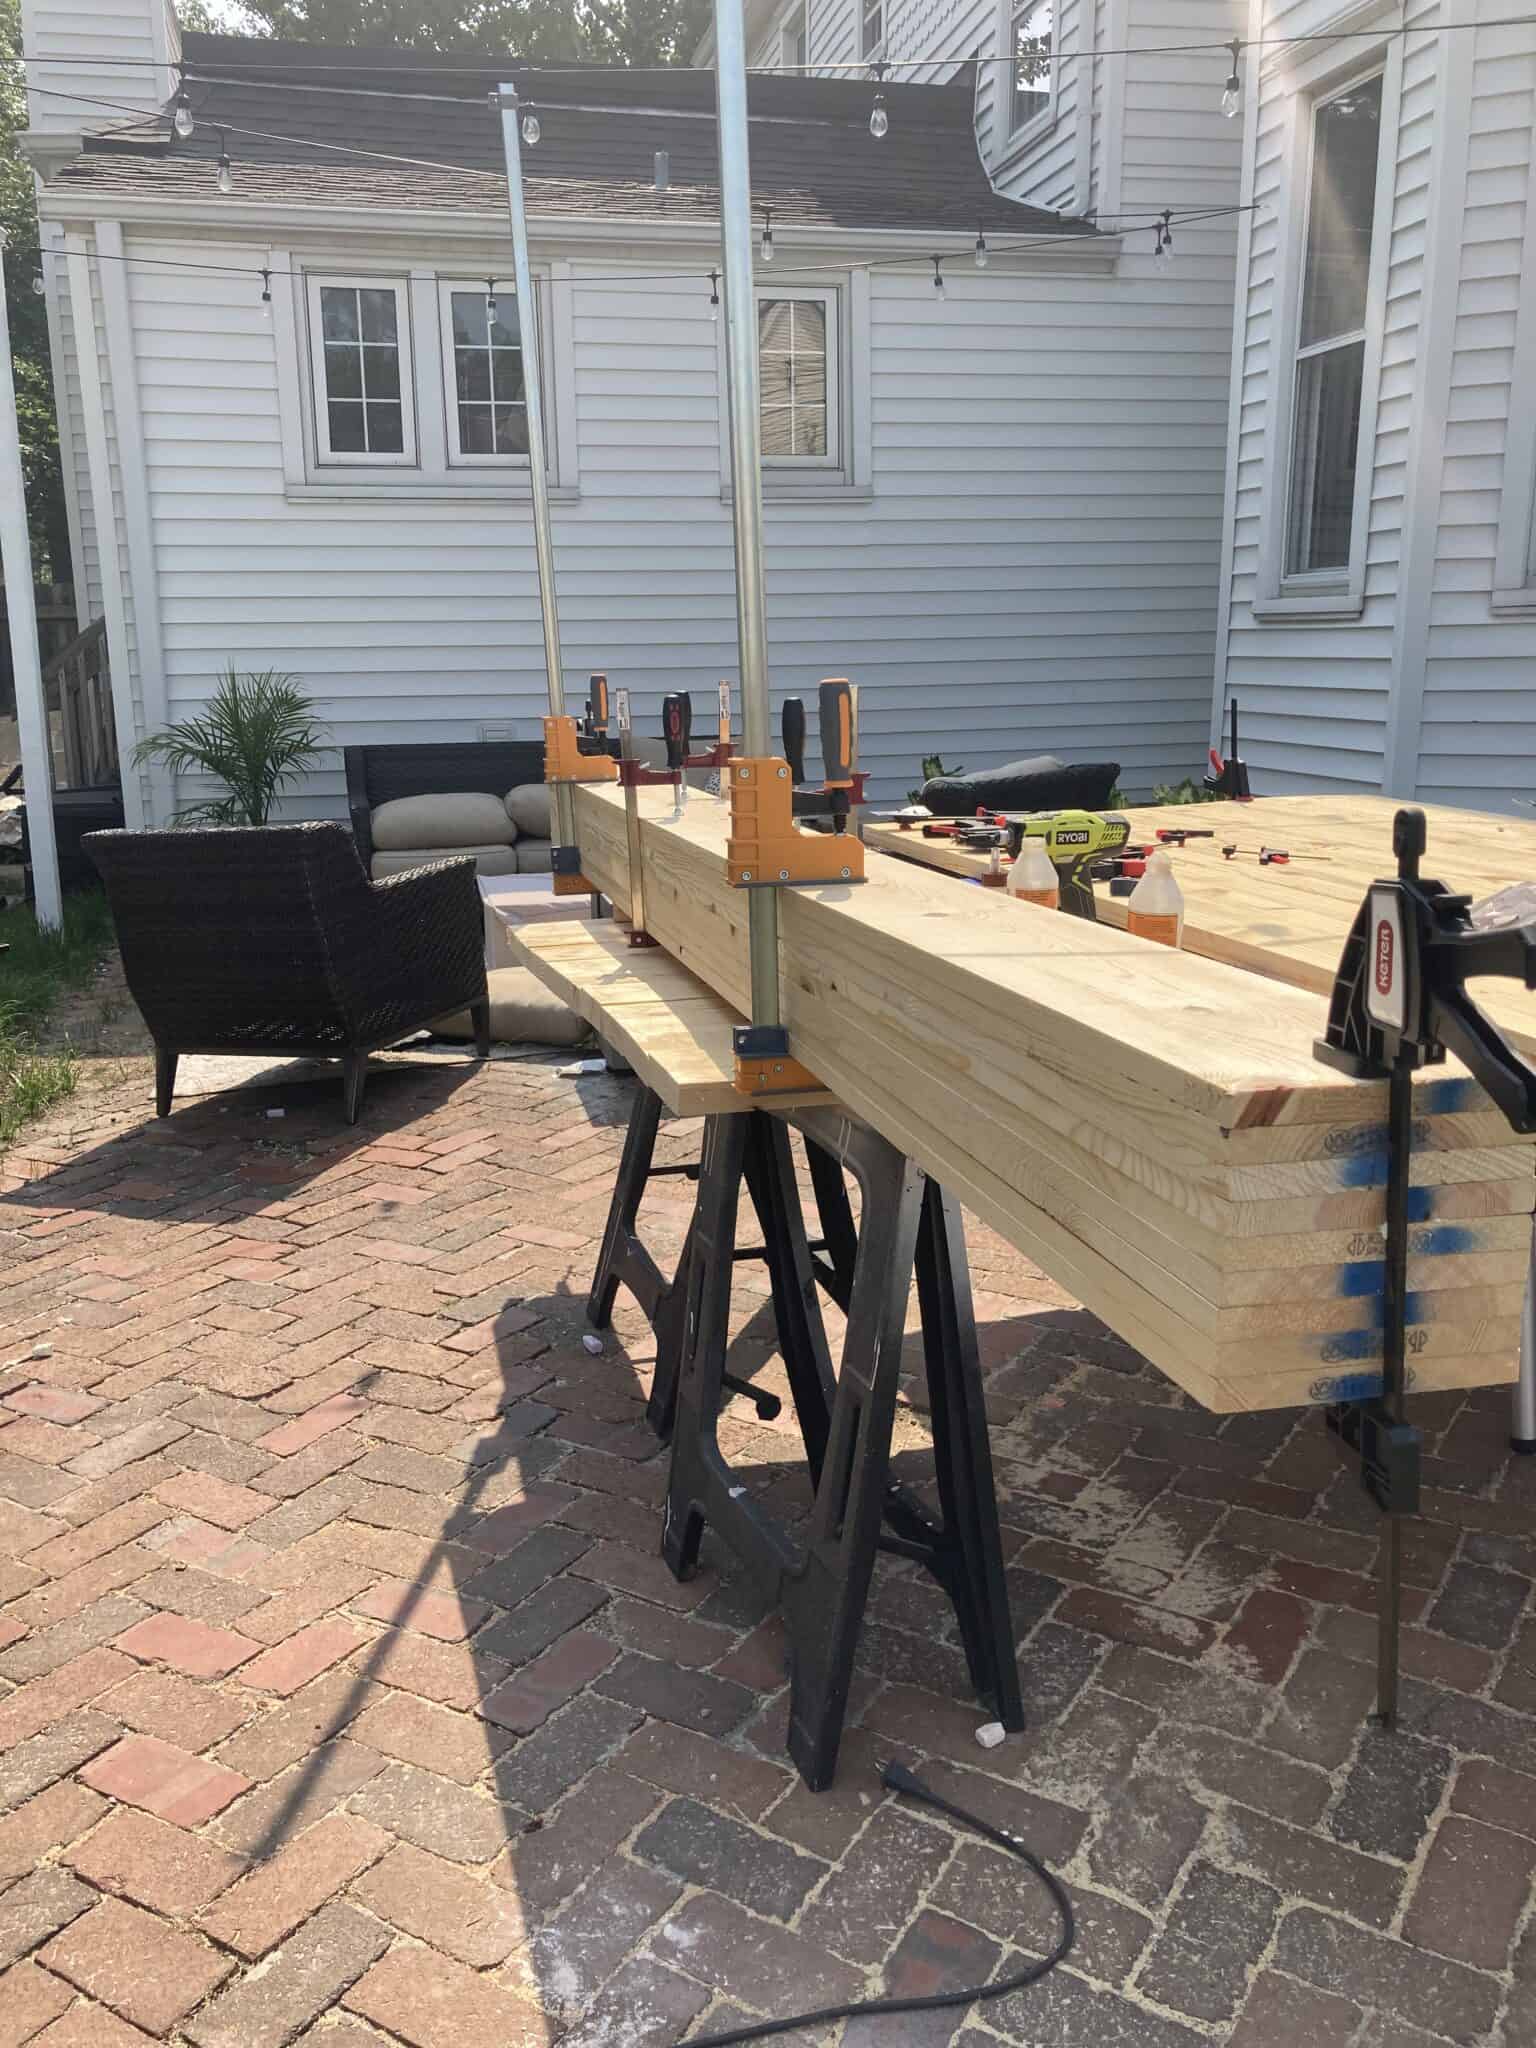
- This is just a case of wood gluing and clamping all the boards together. Lay your first board down and put down wood glue. Lay your next board on top, and repeat until they are all stacked.
- Now you need to clamp them. We used our two big clamps and 4 other smaller clamps. Use as many clamps as you can, and add weight in between. Then walk away from these for 24+ hours.
- Once the glue is dry, remove the clamps.
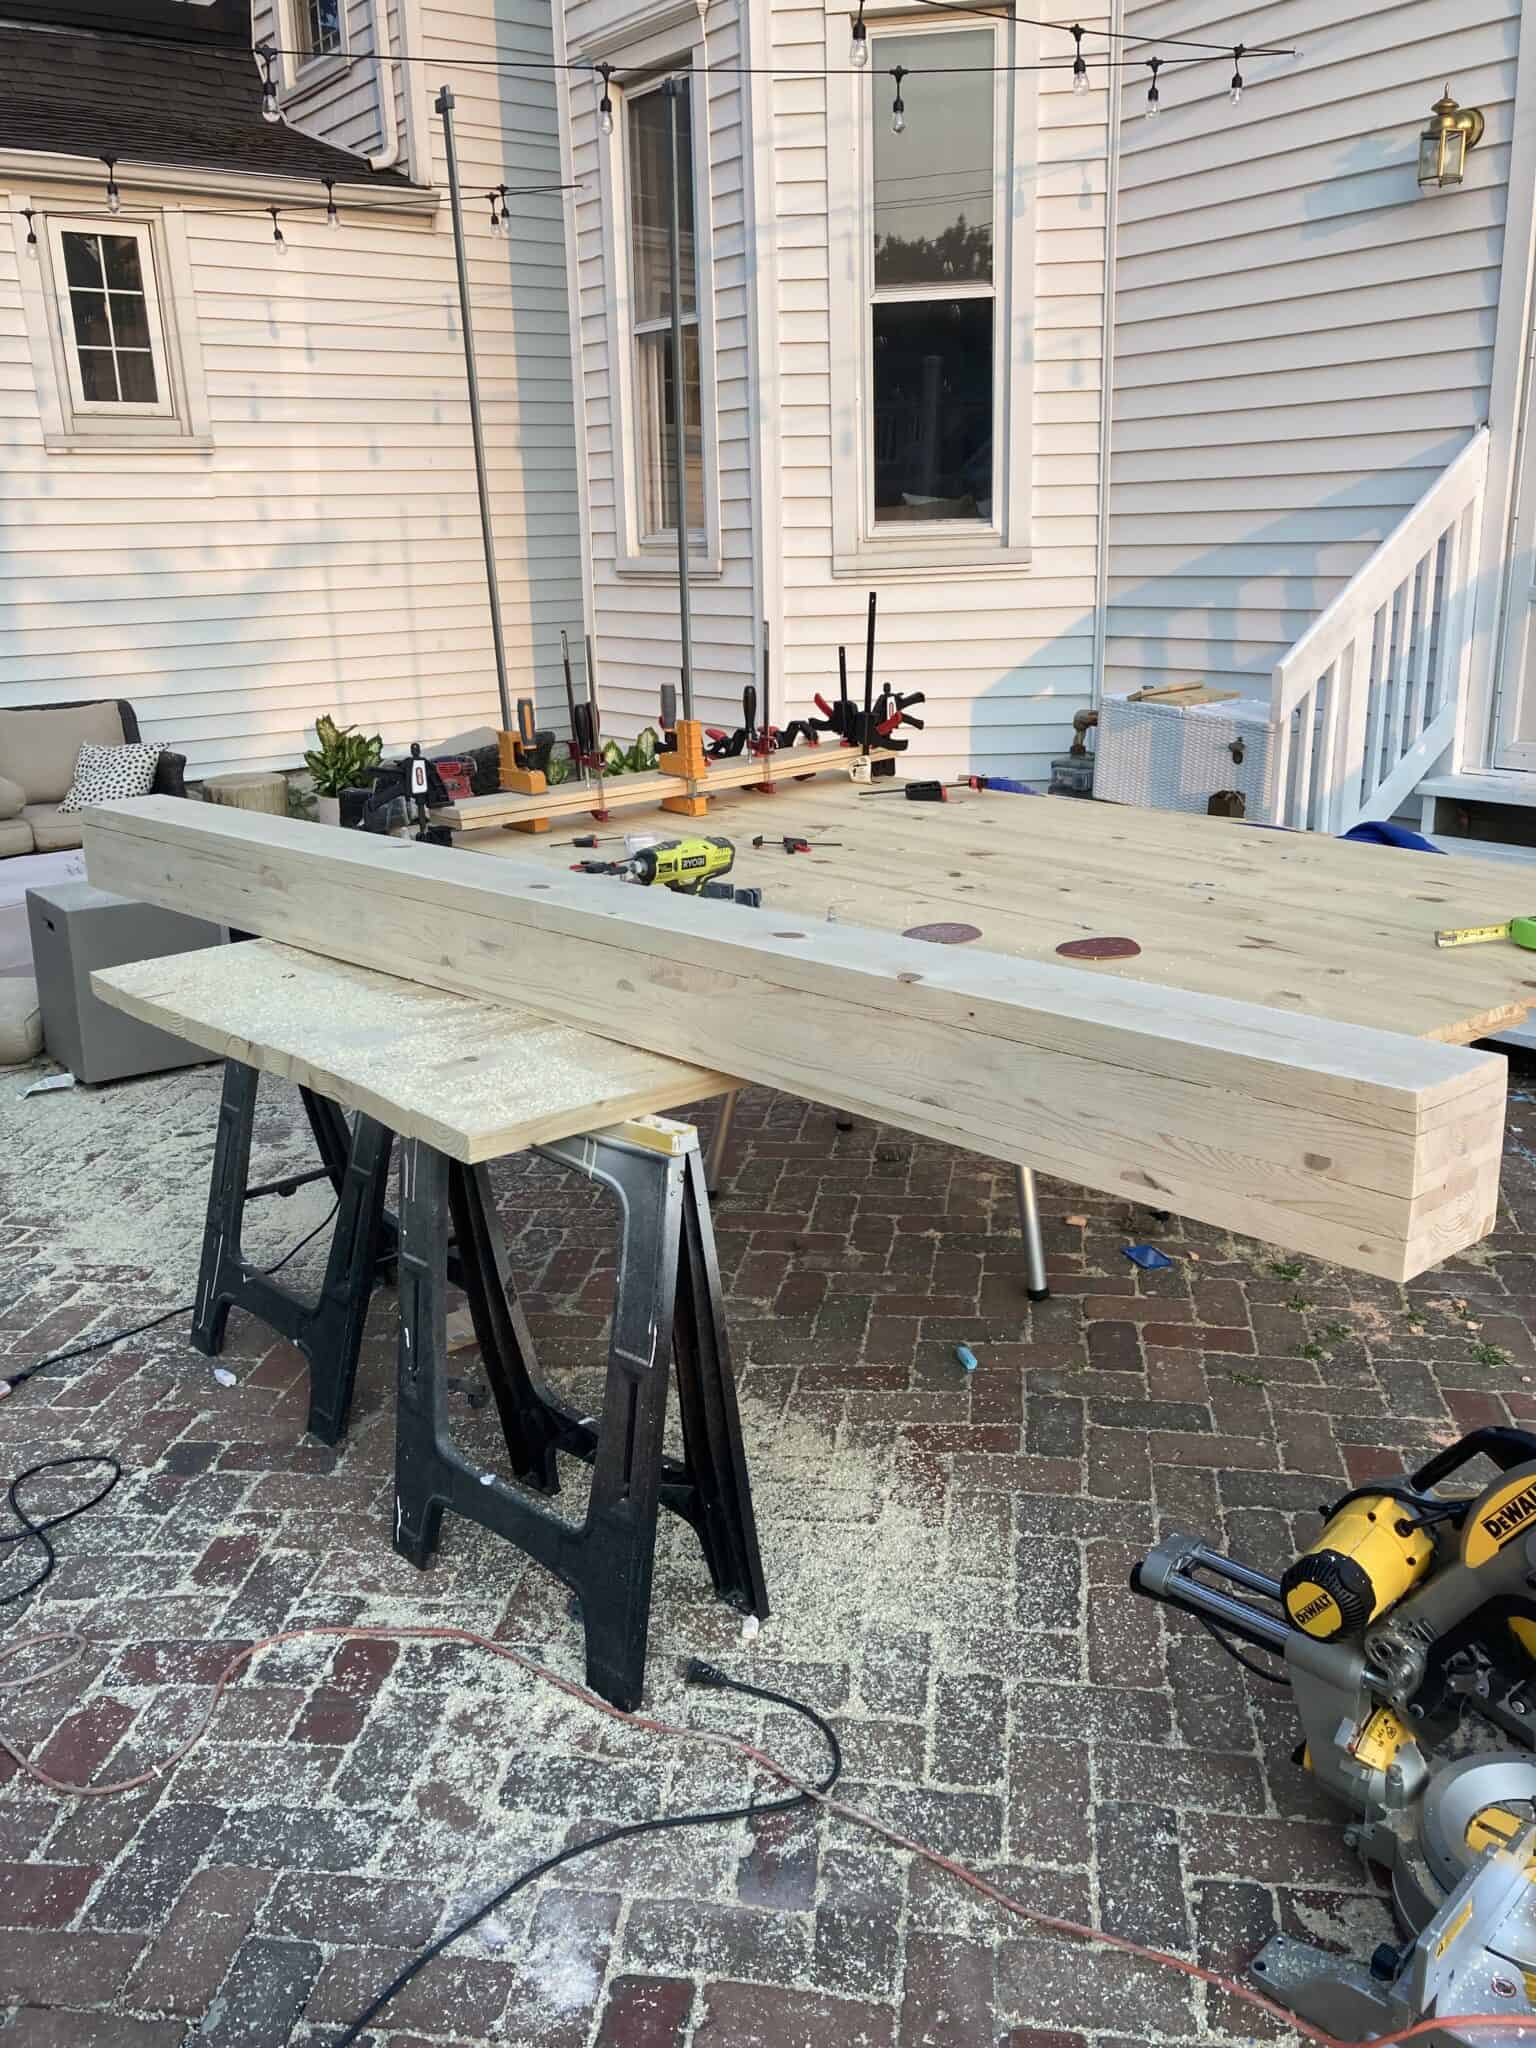
- Now you need to sand all 4 sides of the piece.
- Cut the Long piece into 4 equal parts.
- Sand down the ends to be smooth, and set the legs aside.
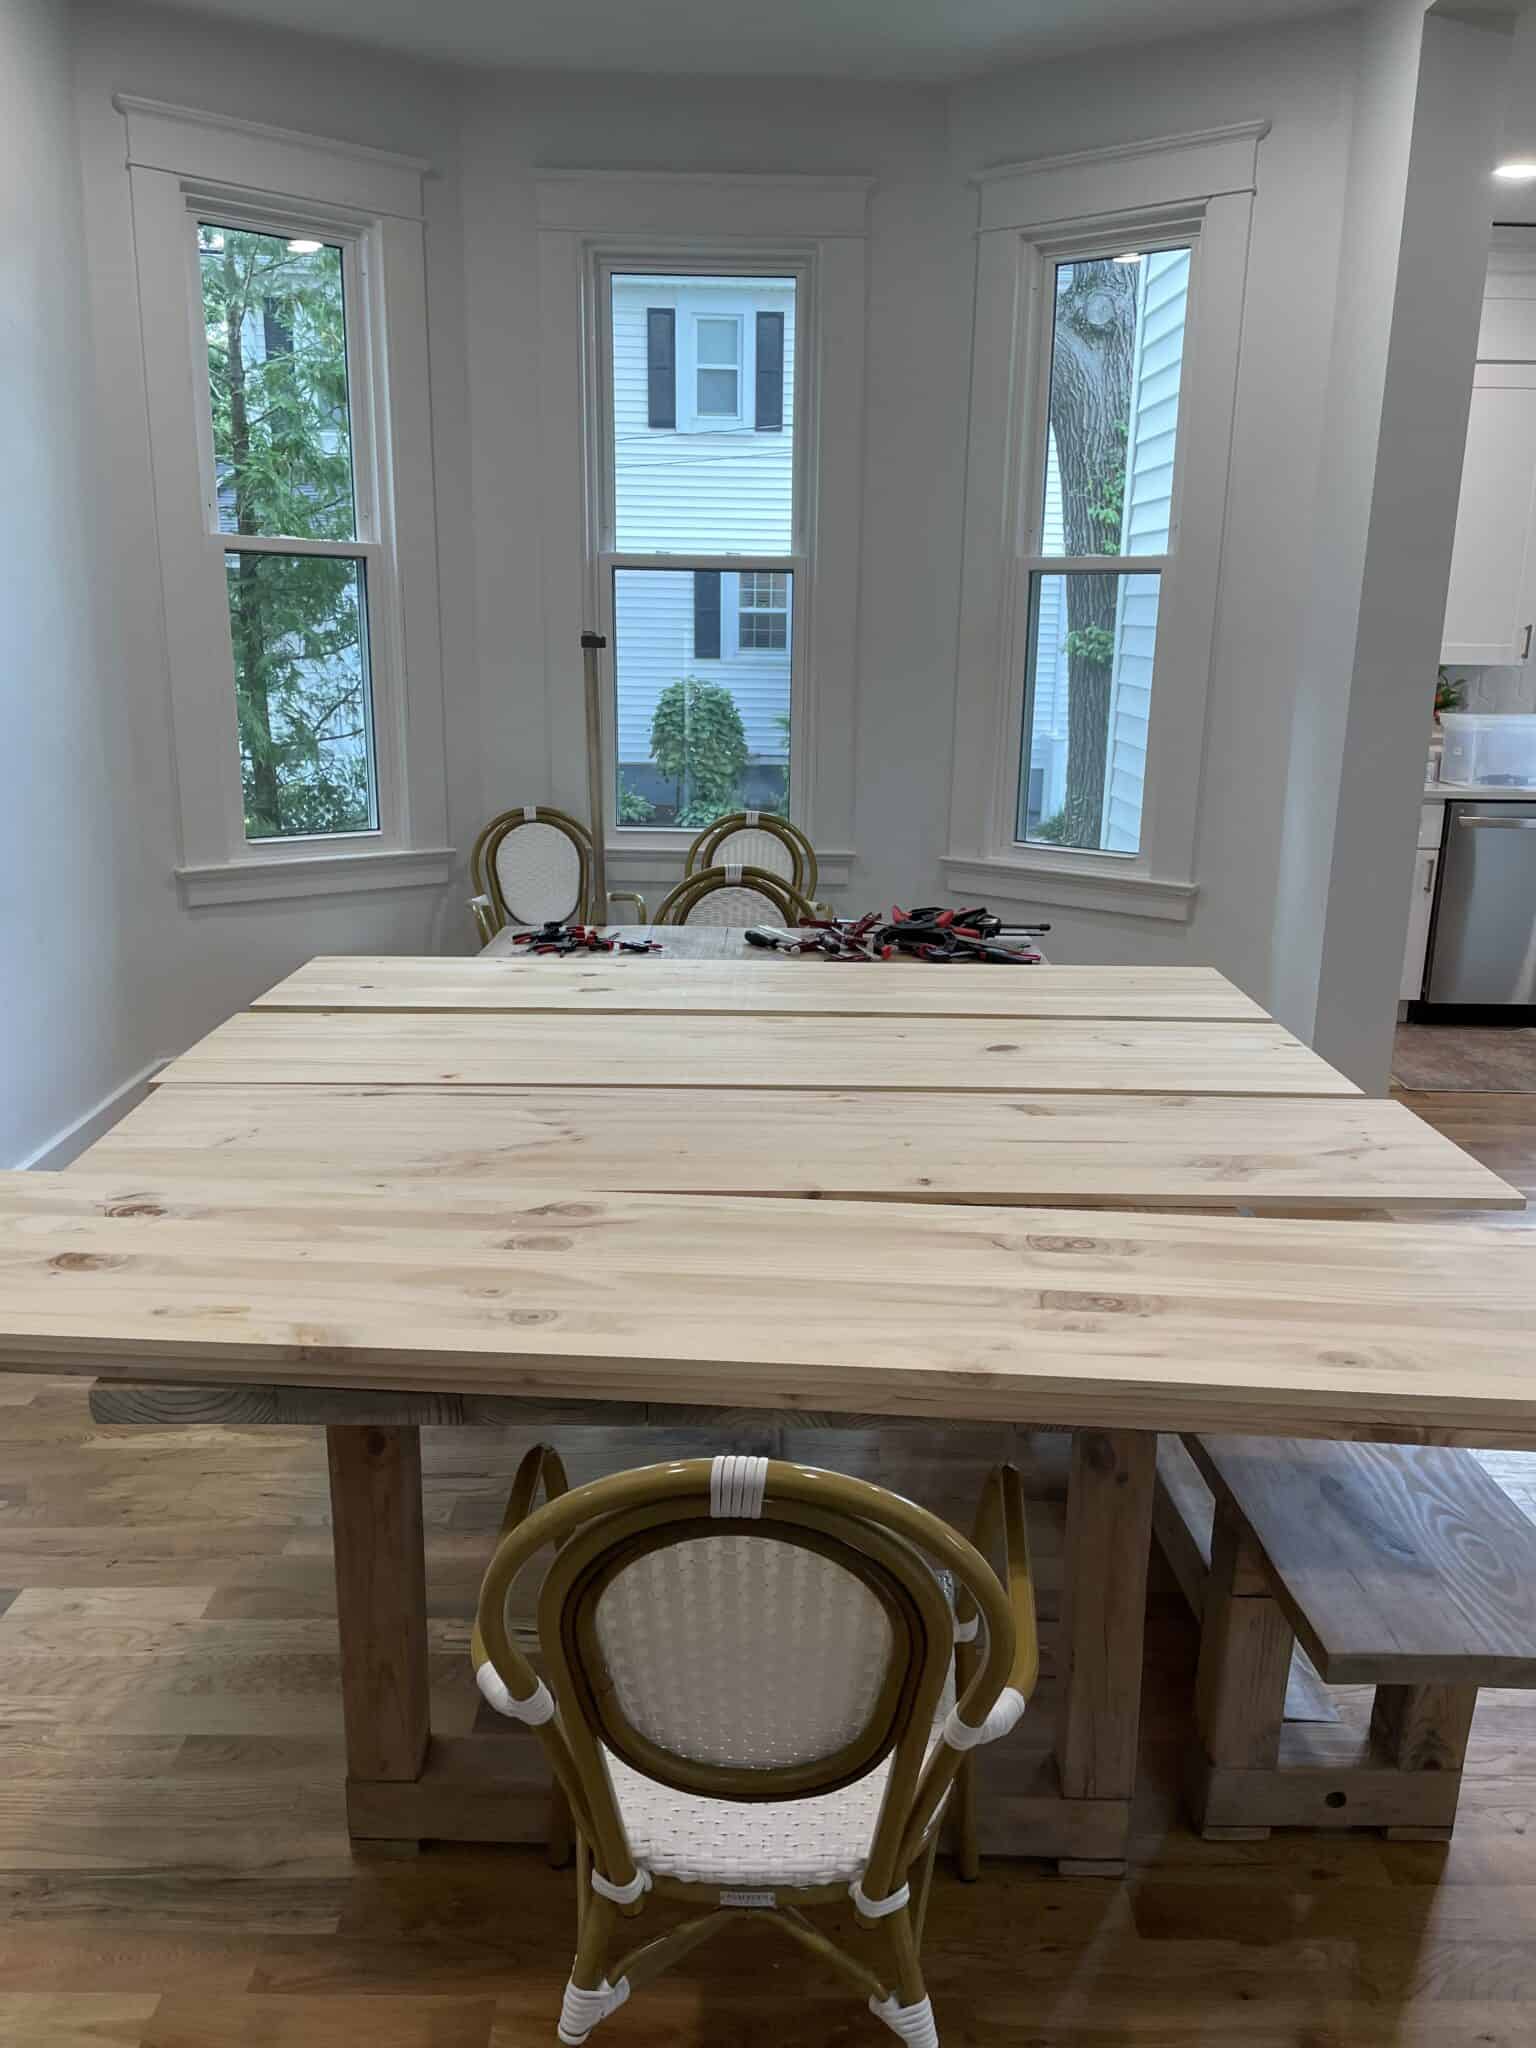
Building the Table Top:
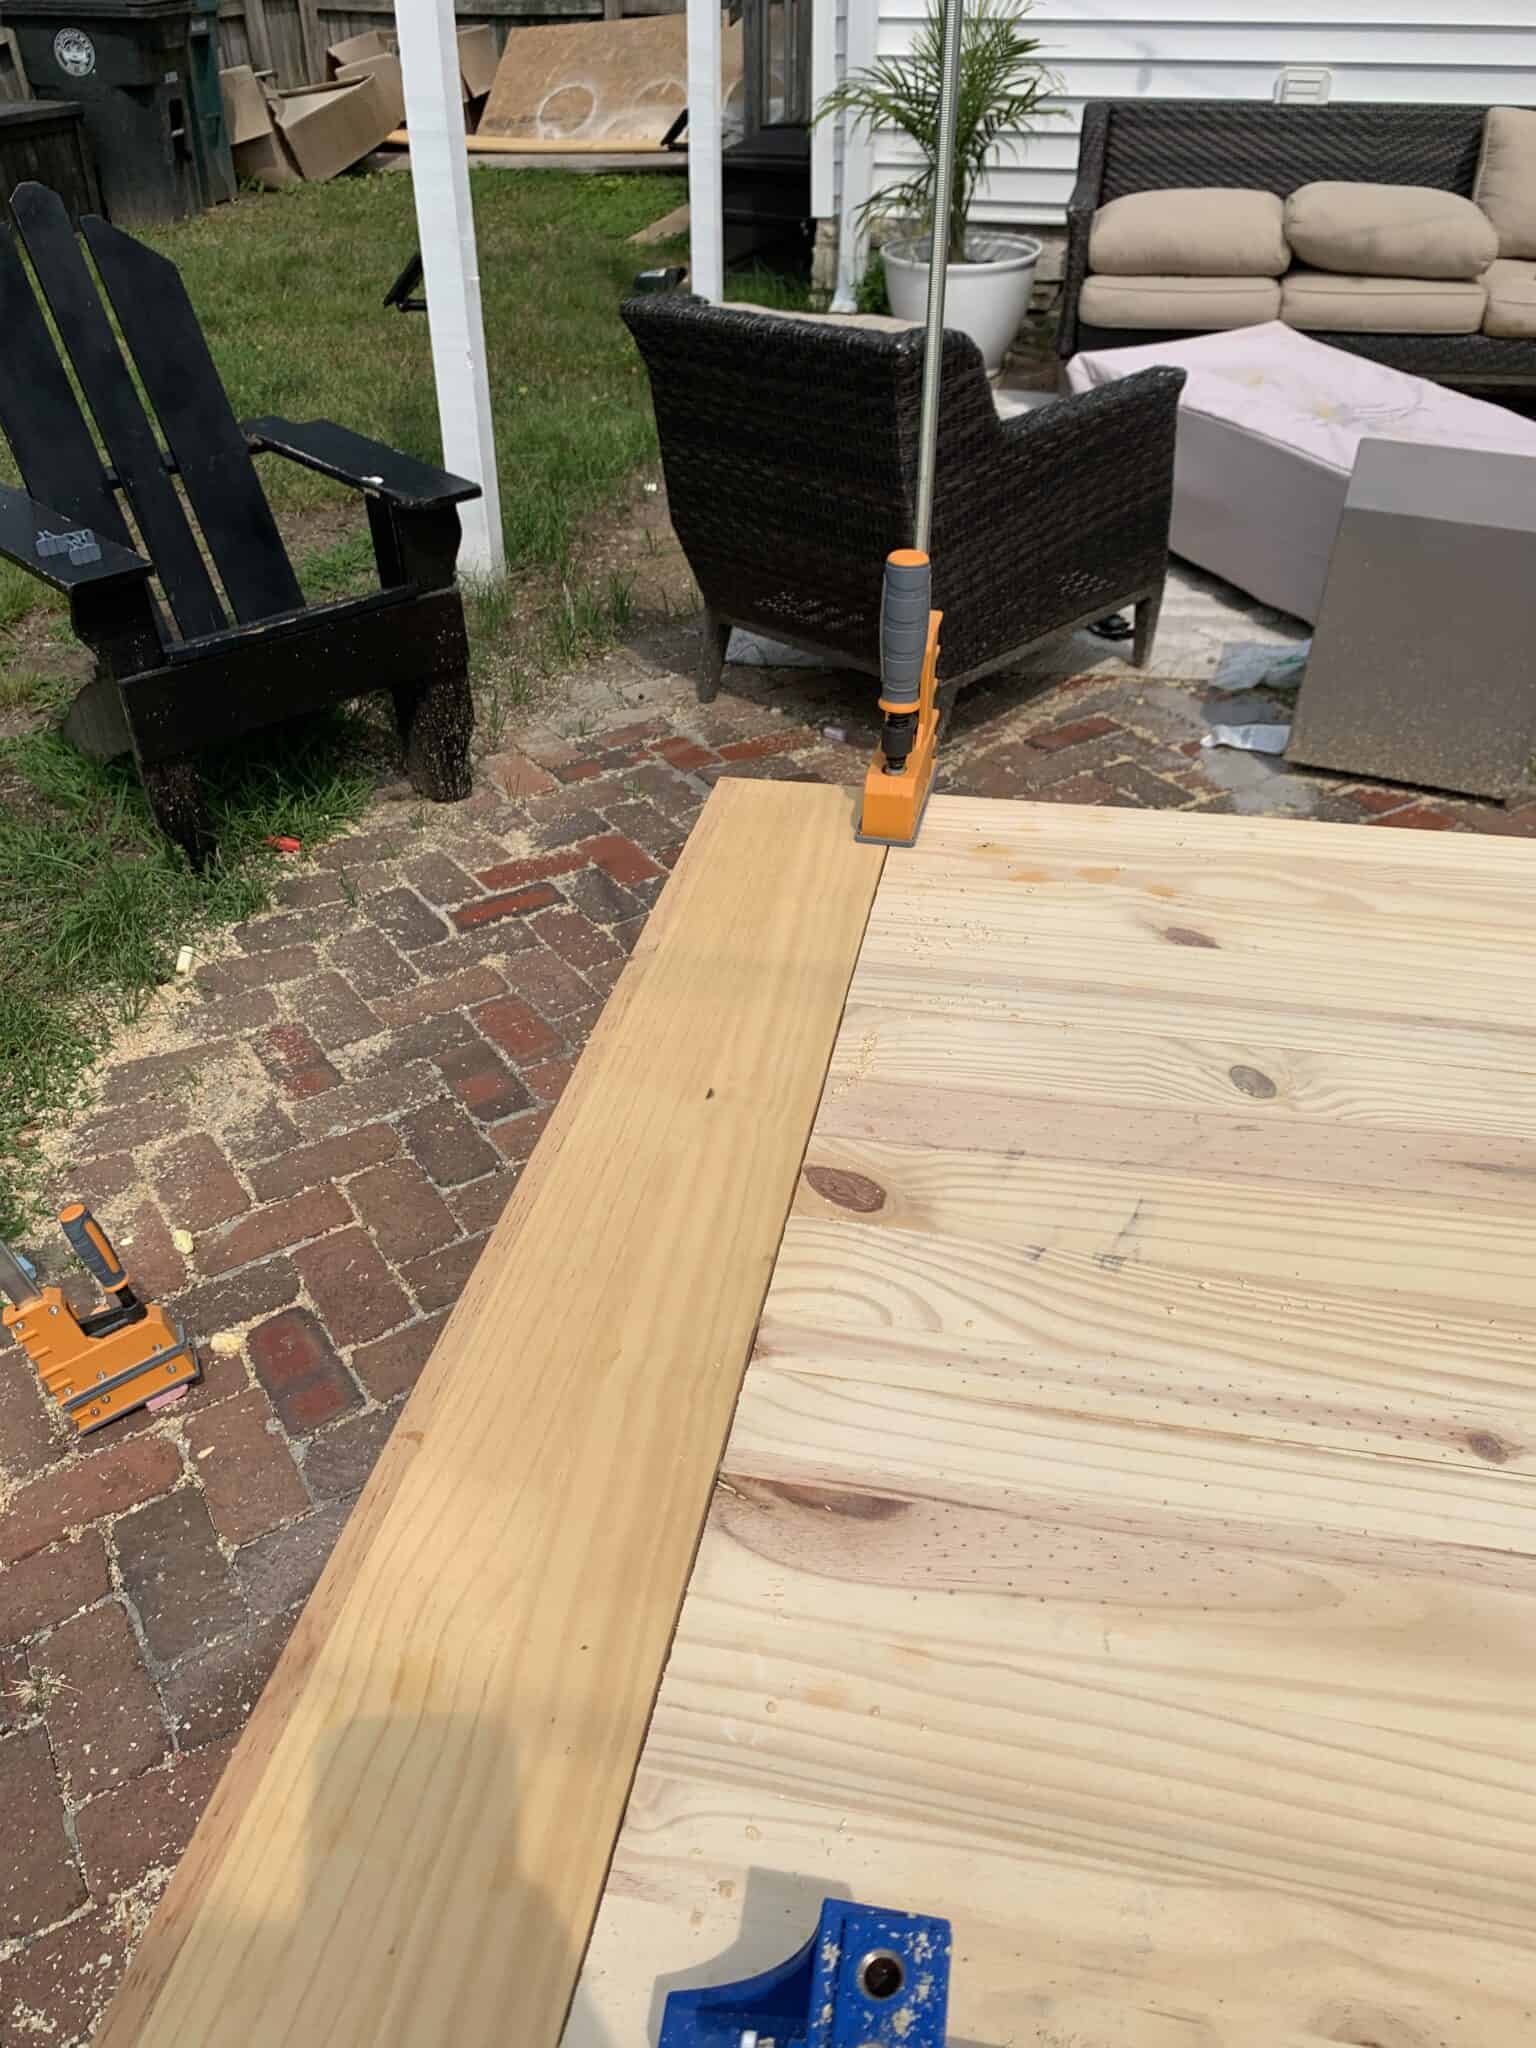
1. Sandwich each of your 1×16’s and 1×6’s into sandwiches. You want each of them to end up looking like a 2×16/2×6. Use the same method as before- Wood glue, clamp and weight, then let sit for 24 hours. Depending your number of clamps you may need to do this in phases.
2. Once the clamps are removed we are going to focus on the 1×16 boards.
Add just a few pocket holes (just the holes right now0 to the under side of your boards so you can join the 3 together.
(Keep in mind if you are going to end up cutting this section shorter don’t put the pocket screws in an area you will end up cutting off).
3. Clamp your table top together by using wood glue to join the three components. Take note of how low-key this is! These big clamps were what we utilized for the tabletop.
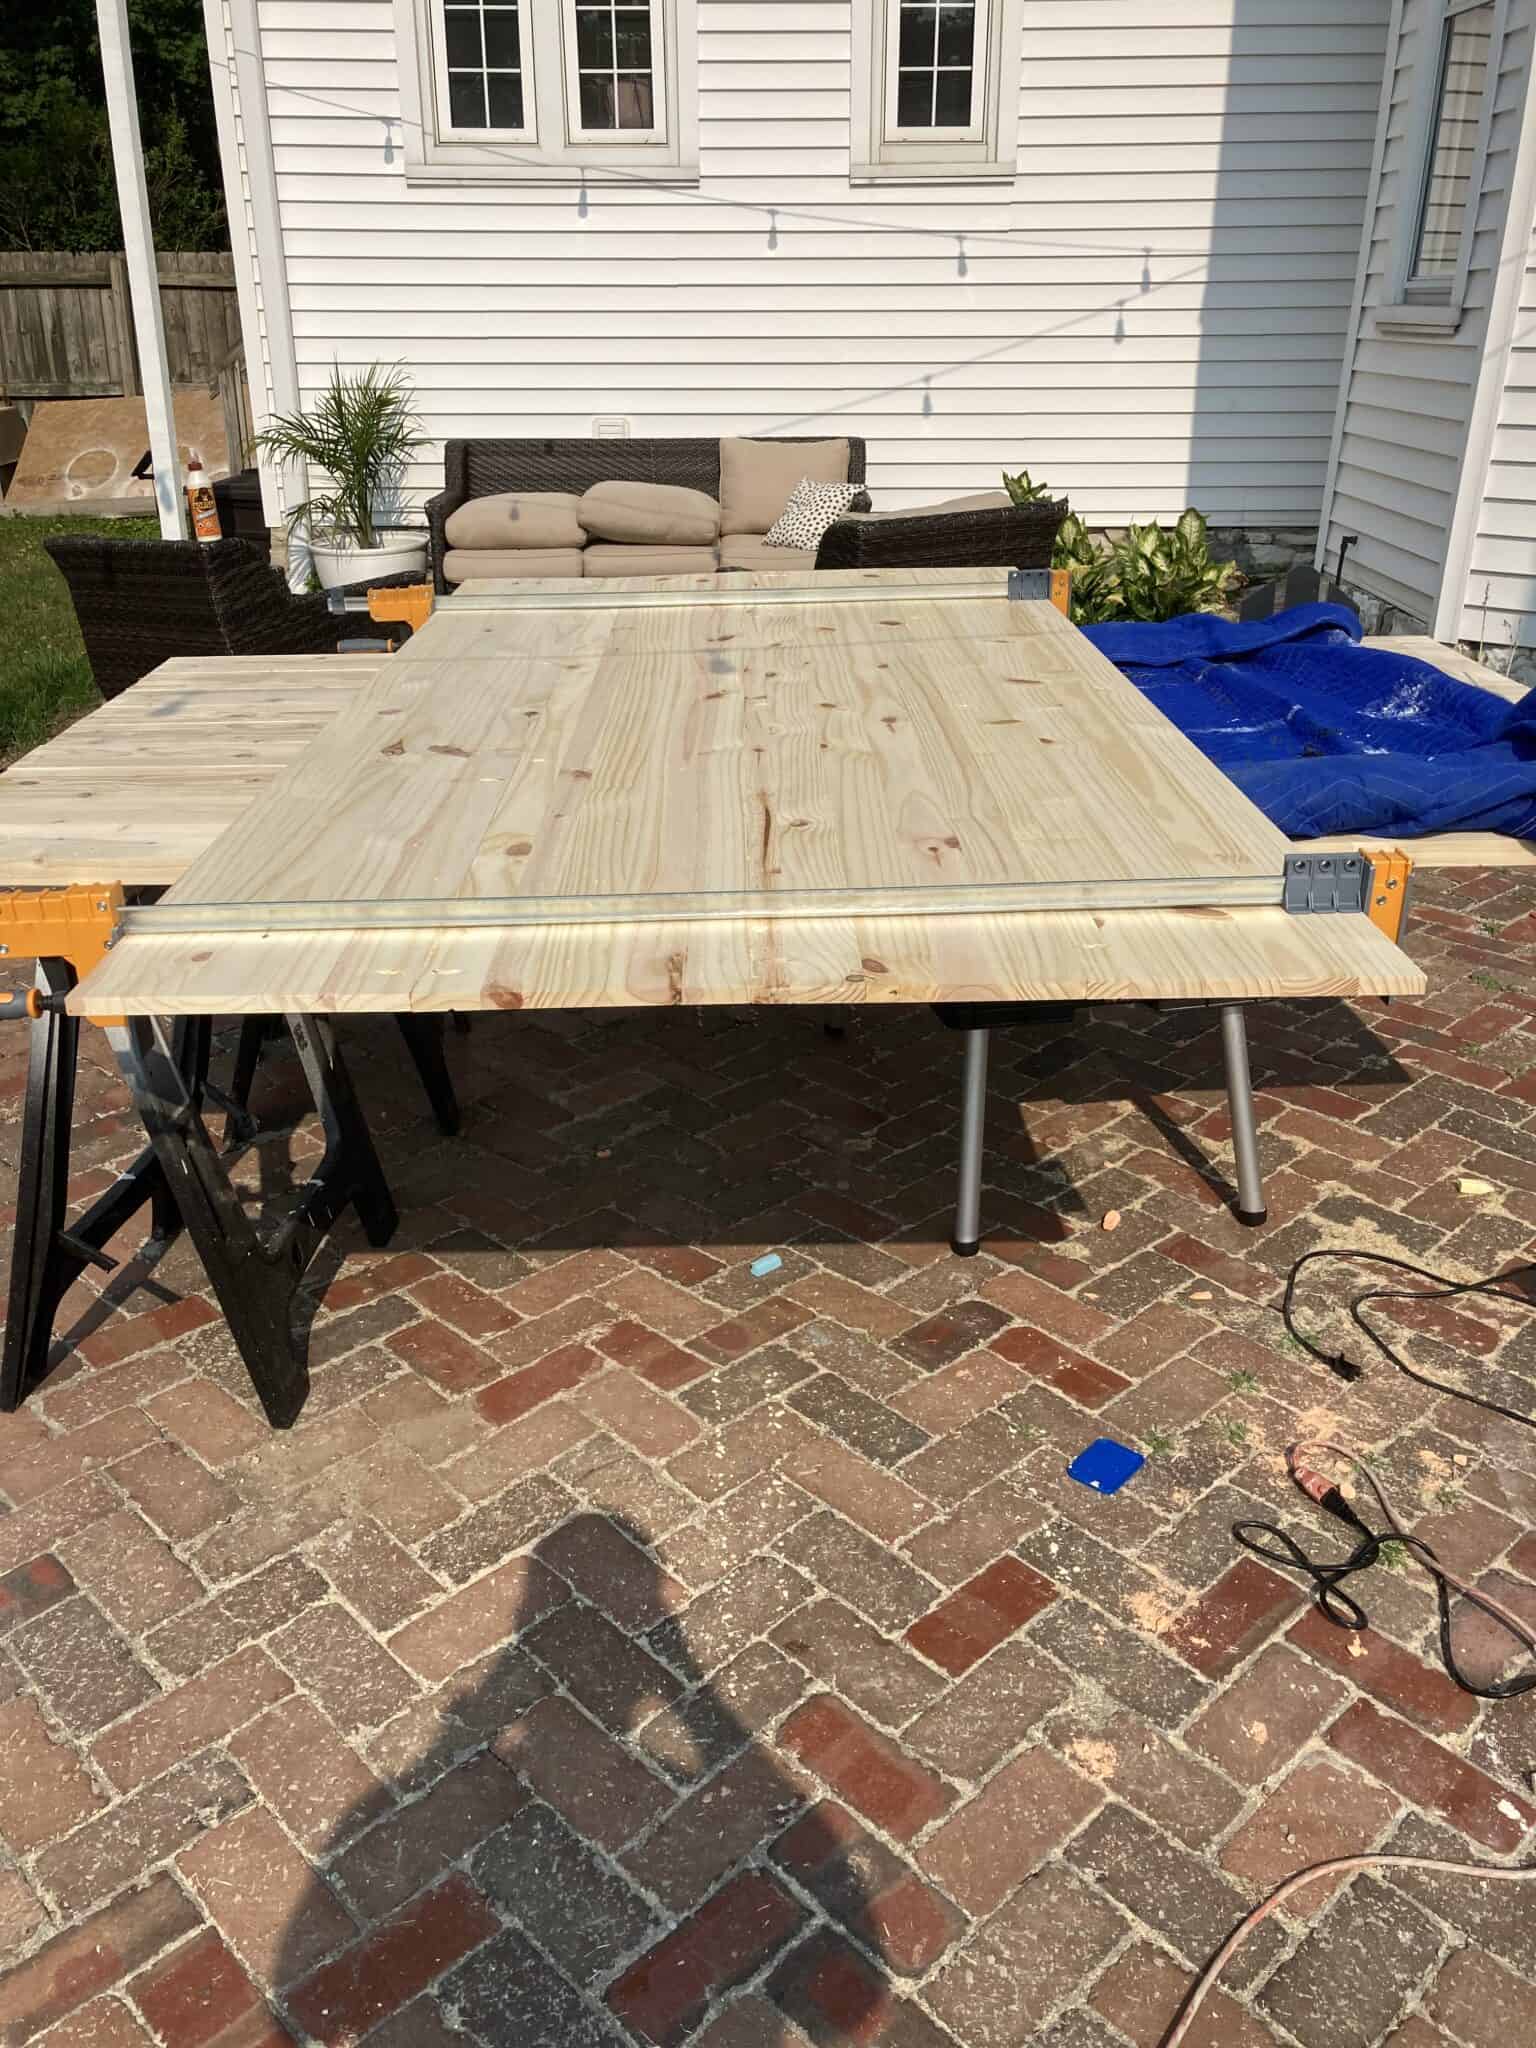
4. While it is clamped and the glue is still wet add your pocket screws. Again in this whole process this is the most important step to make sure its fully level, so take your time!
5. Once that is dried and you remove your clamps you will want to plane or sand the ends to be really smooth.
6. Now it is time to add your 6 inch end pieces. One thing that is really important is to measure your end of your table so you can cut the now 2×6 board to the width of each side. Measure each side. (that is why I told you to get a 10 foot board instead of an 8 foot board – with the 8 foot you have no room for extra and you will likely need just a tiny bit more than 48 inches).
7. Add pocket holes to the under side of the 6 inch piece.
8. Add wood glue, clamp, then pocket screw your end pieces on. Again let this sit for 24 hours.
9. Remove the clamps and the starting stages of the table top are complete!
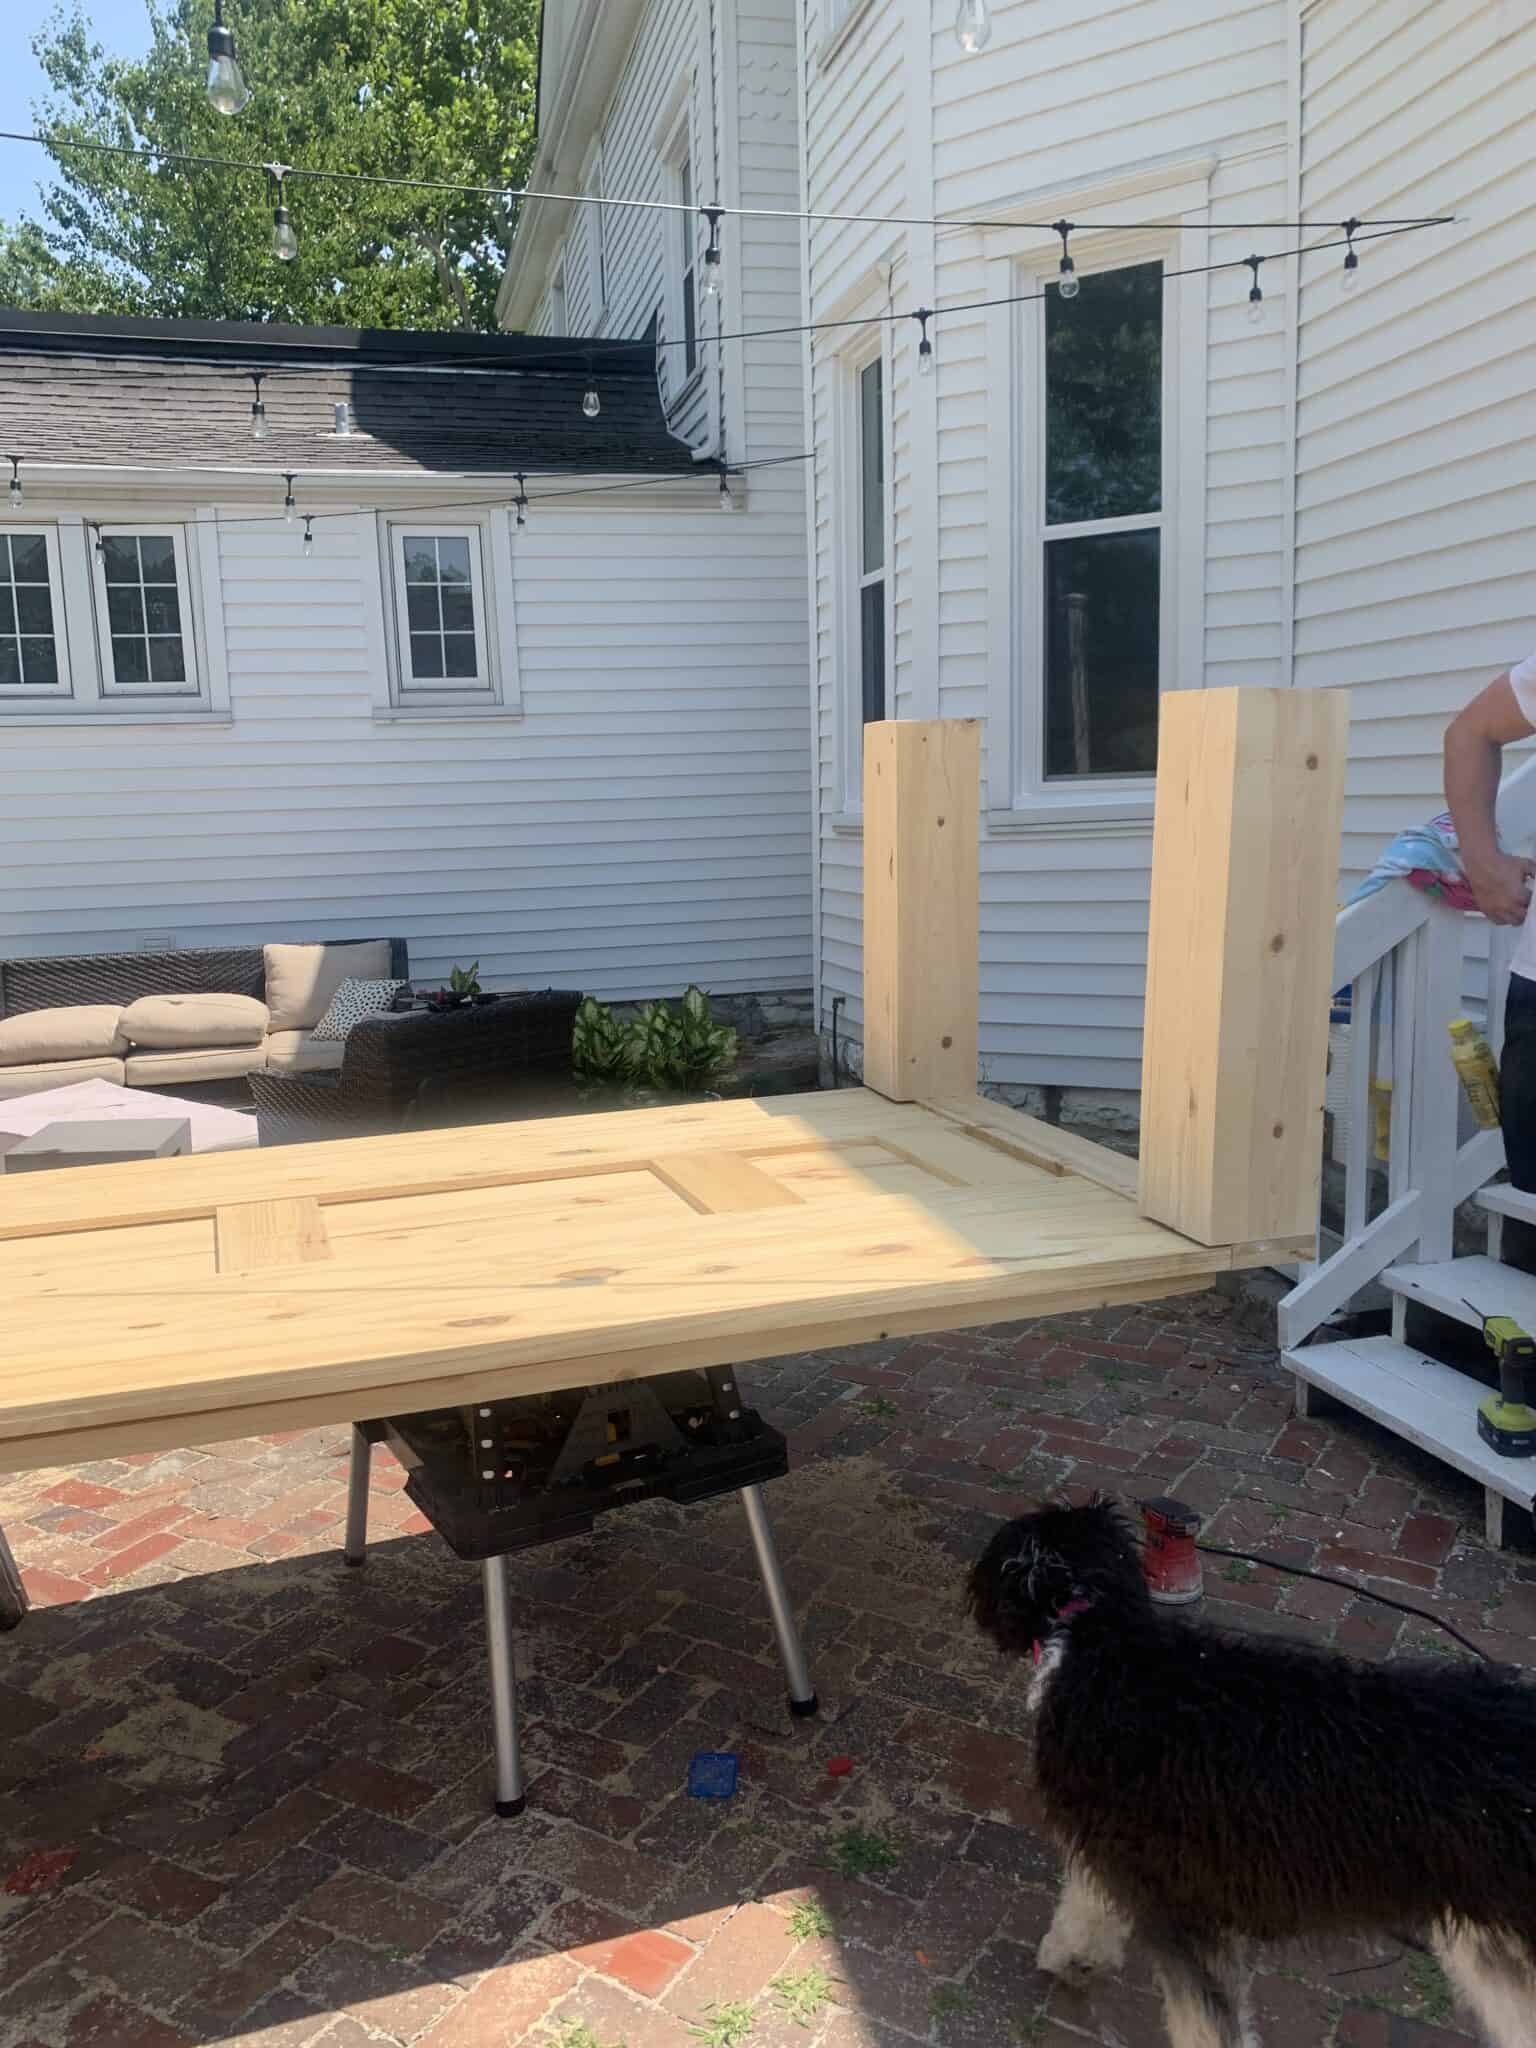
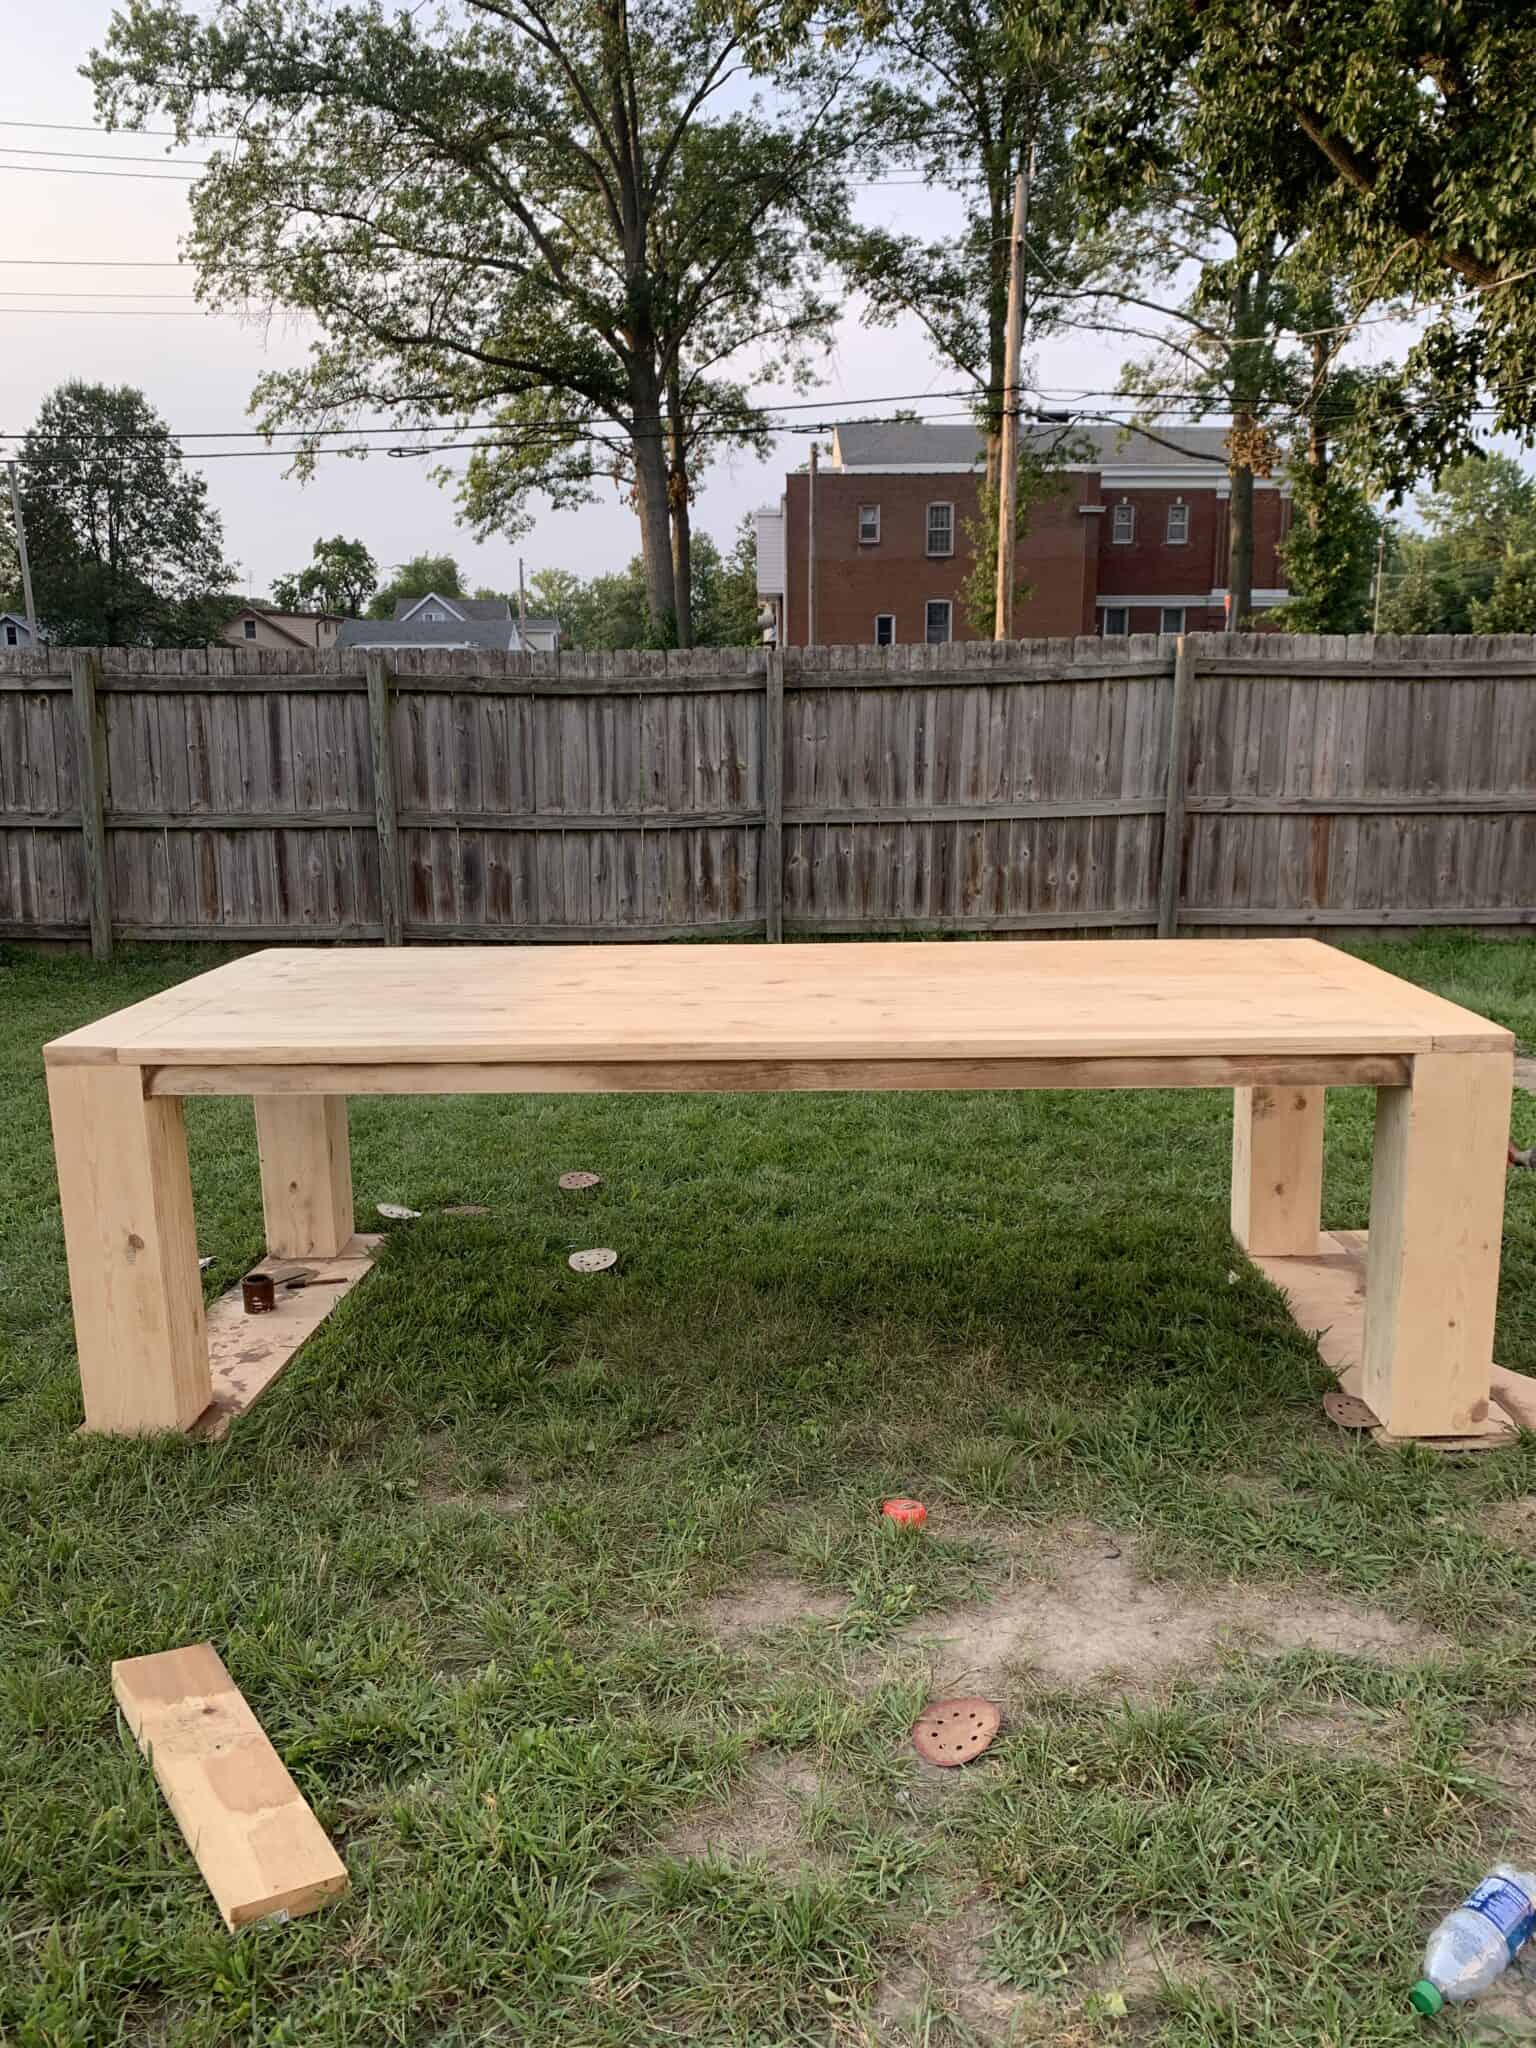
Attaching your Legs to the Table top
Your next step is going to be attaching those big legs to your table top. You should have 4 equally cut legs that have been sanded down.
- You will add pocket holes on two sides of the legs.
- Add wood glue to the top of the leg, and pocket screw and wood glue each leg on to the corners.
- Let this dry for 24 hours.
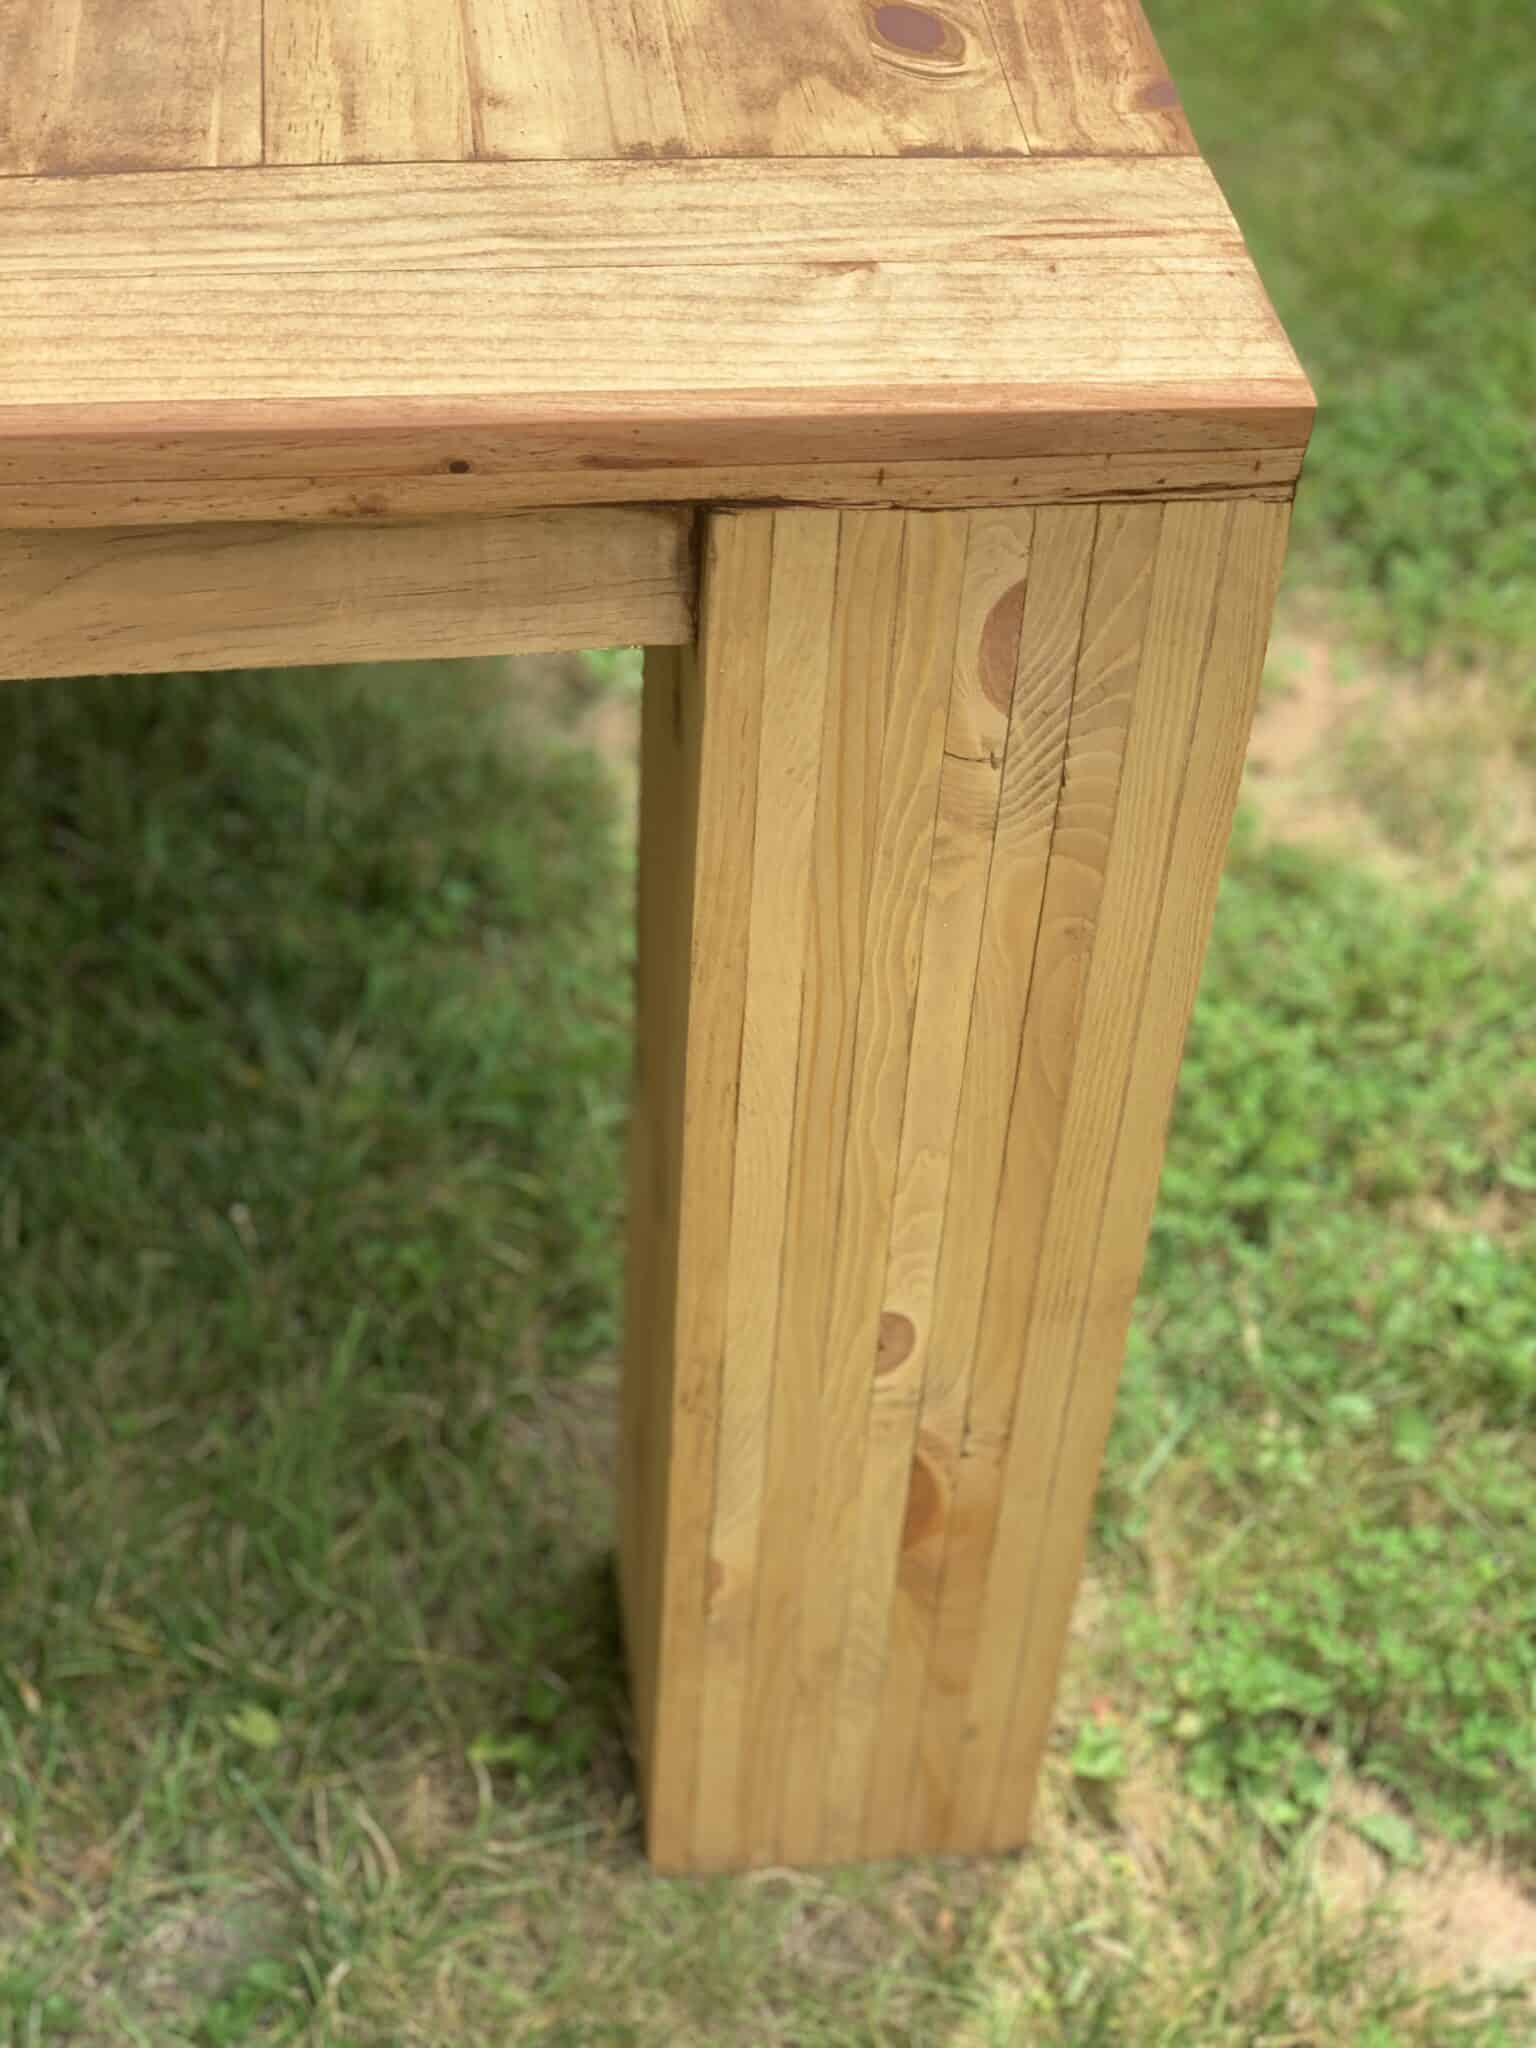
Adding an Apron and extra support slats
The apron of a table is basically support pieces that in my opinion elevate the overall look of the table.
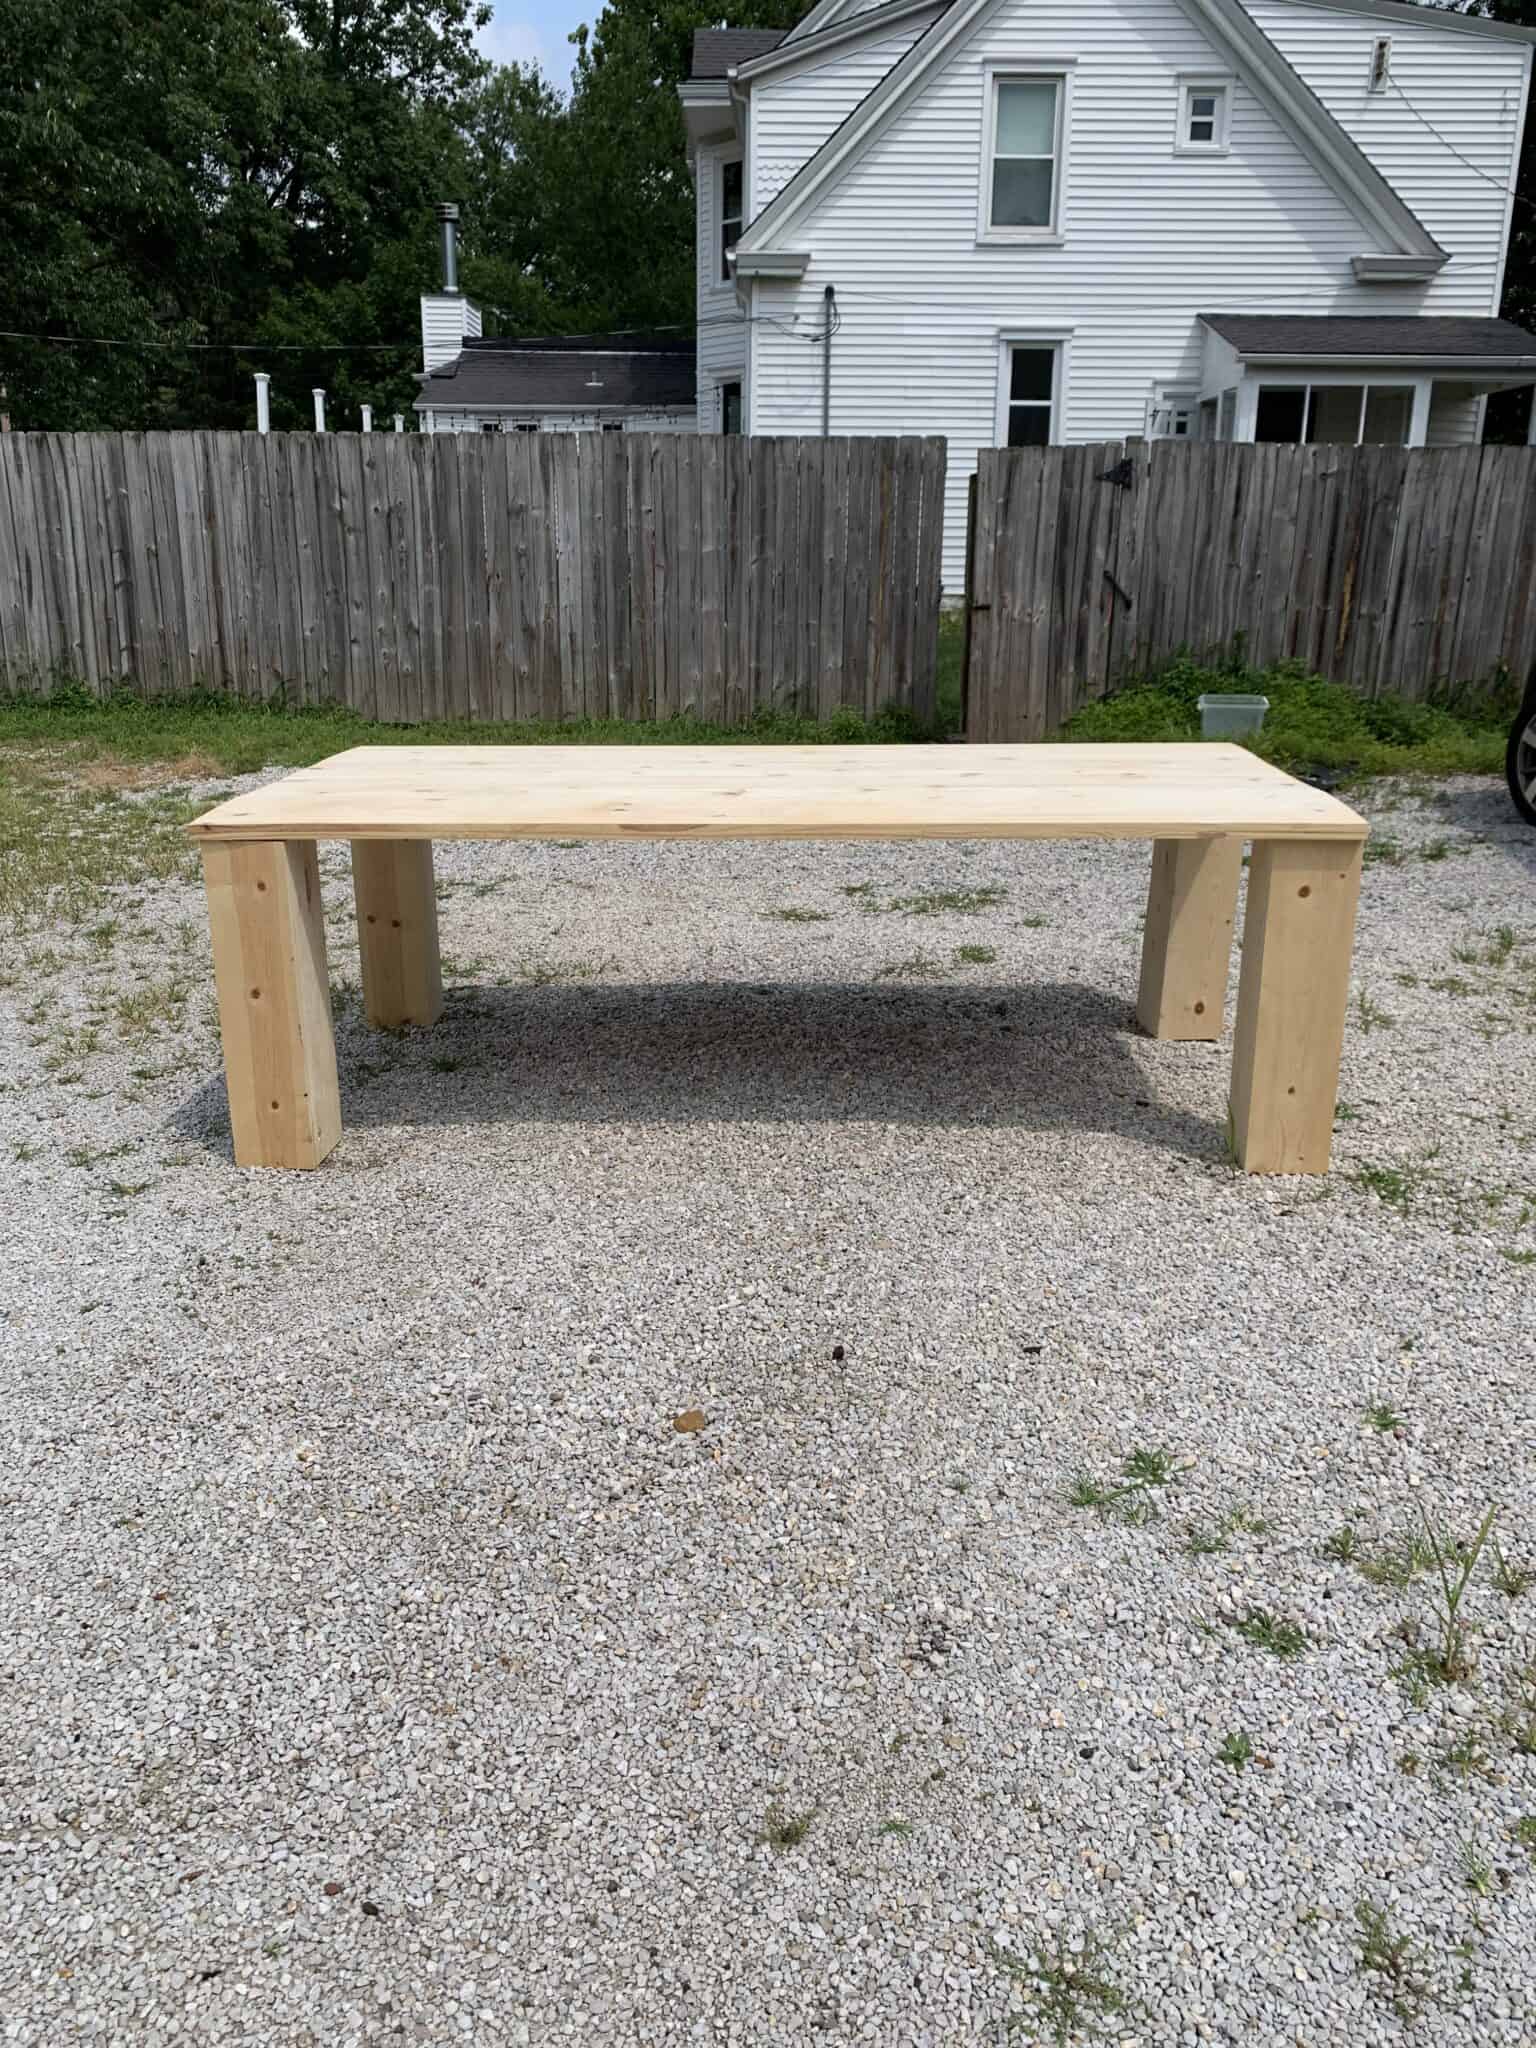
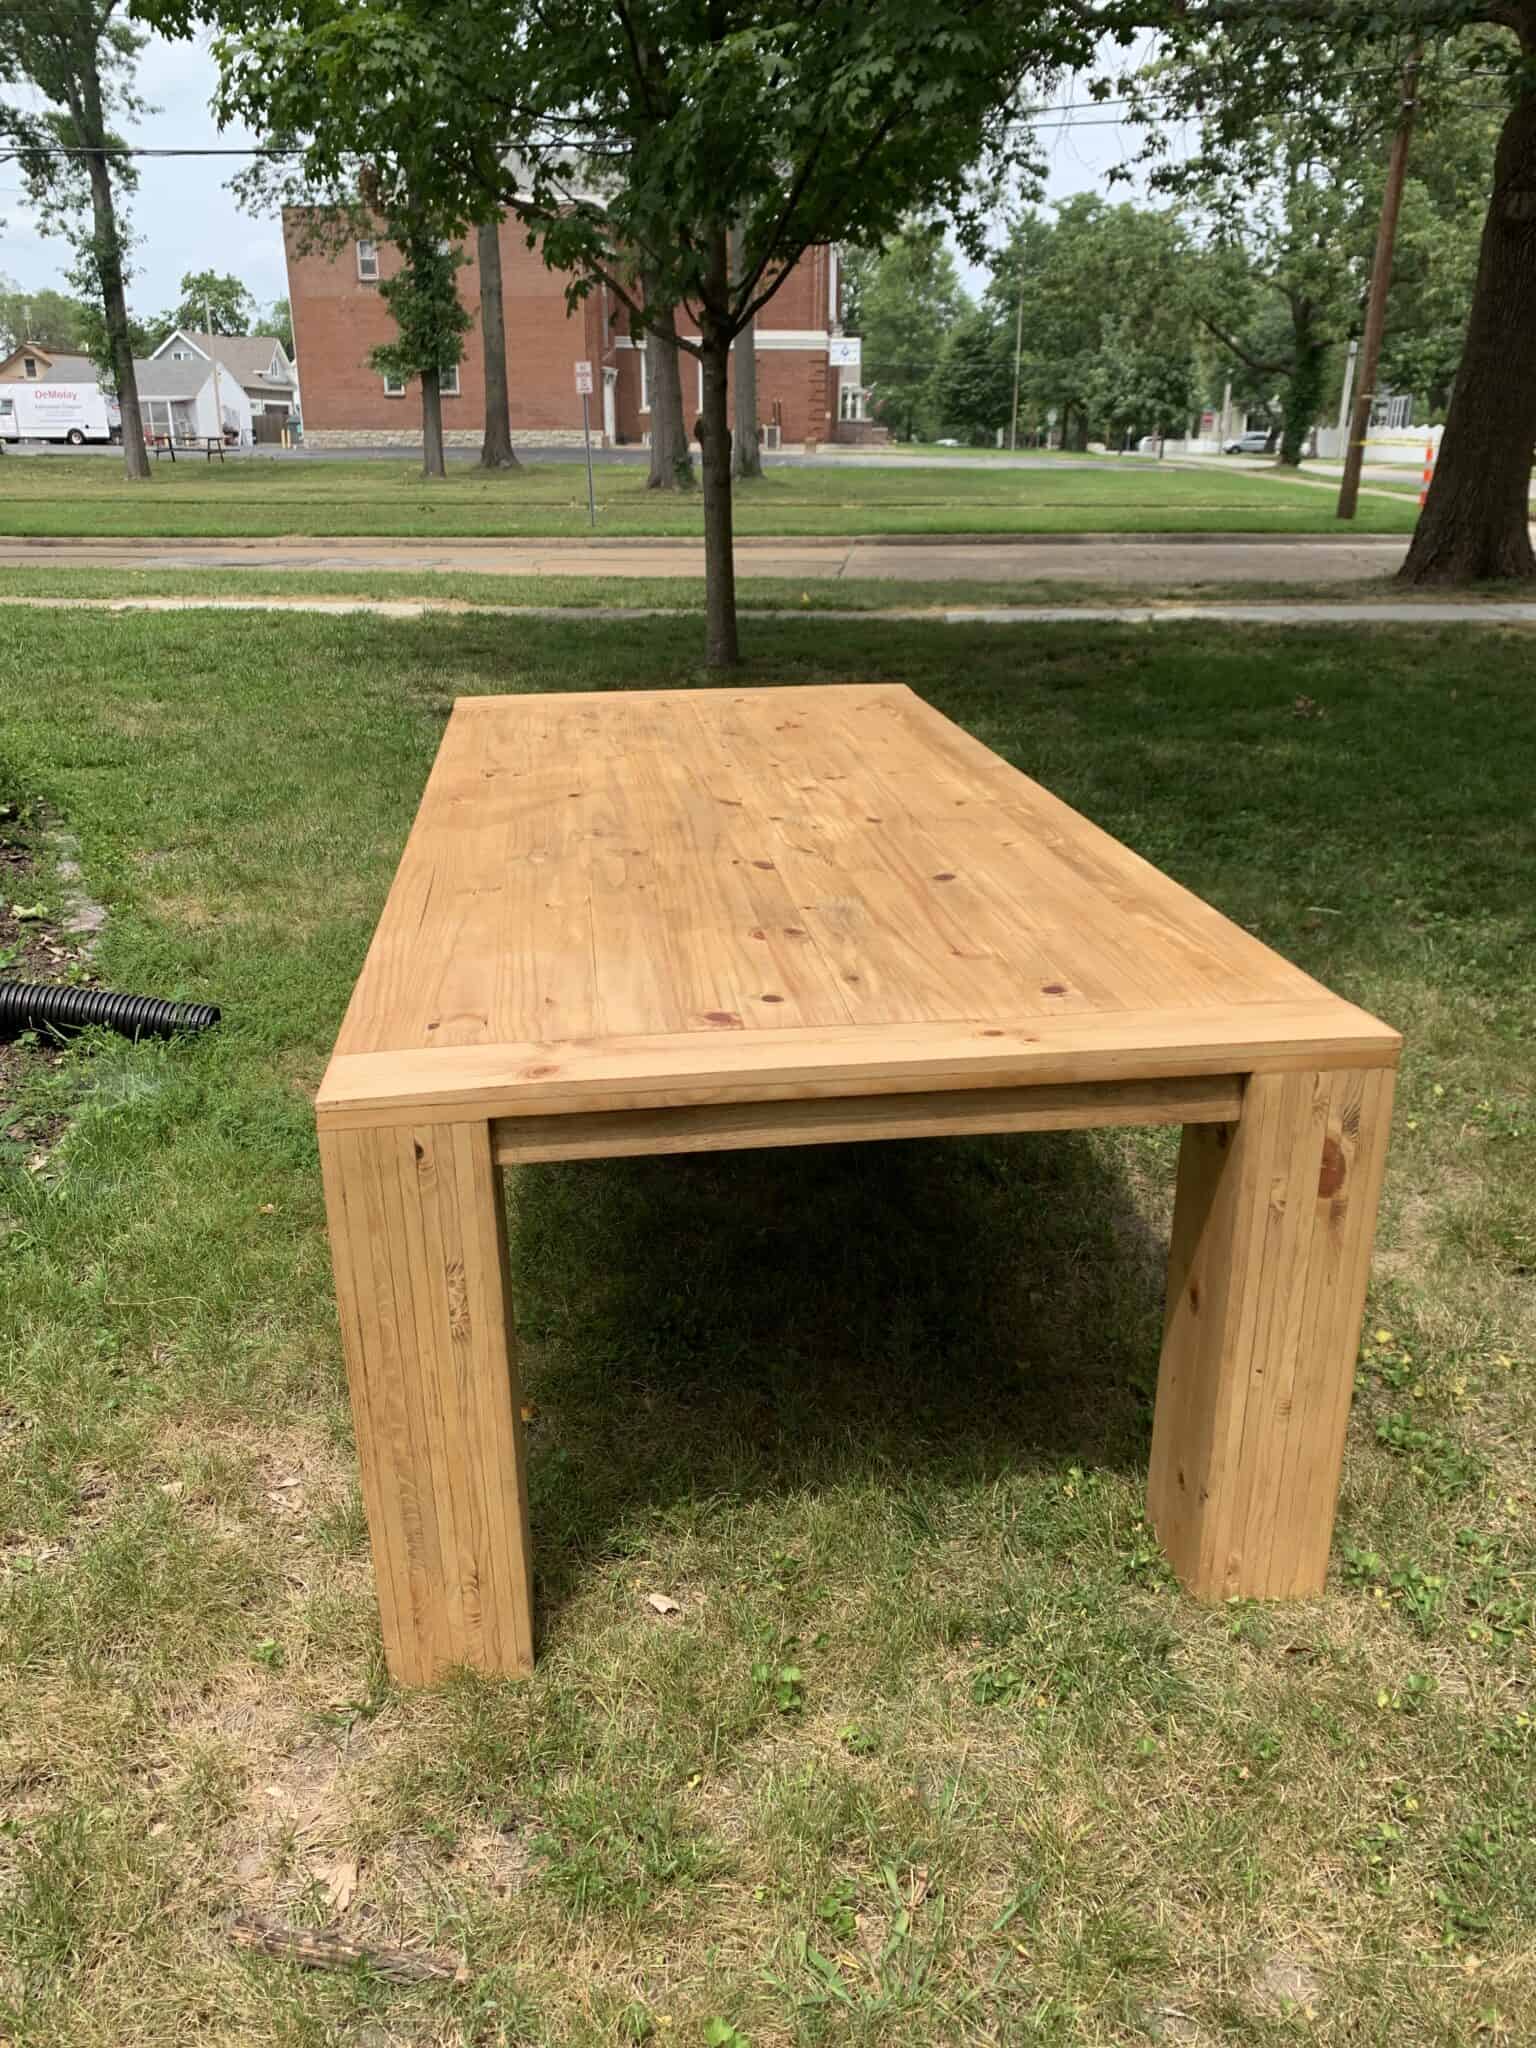
This view shows the table assembled and ready for the apron.
- You are going to cut your 1×3 pieces of pine to fit between the legs on all 4 sides of the table.
- Add pocket screws and wood glue to the ends.
- Pocket screw into the legs of the legs of the table.
- We then also added support pieces using the 3 inch furring strips to the bottom of our table because of the overall size. Those were simply screwed in with 1.25 inch screws. That step is not necessary if your table is not huge like the one we built.
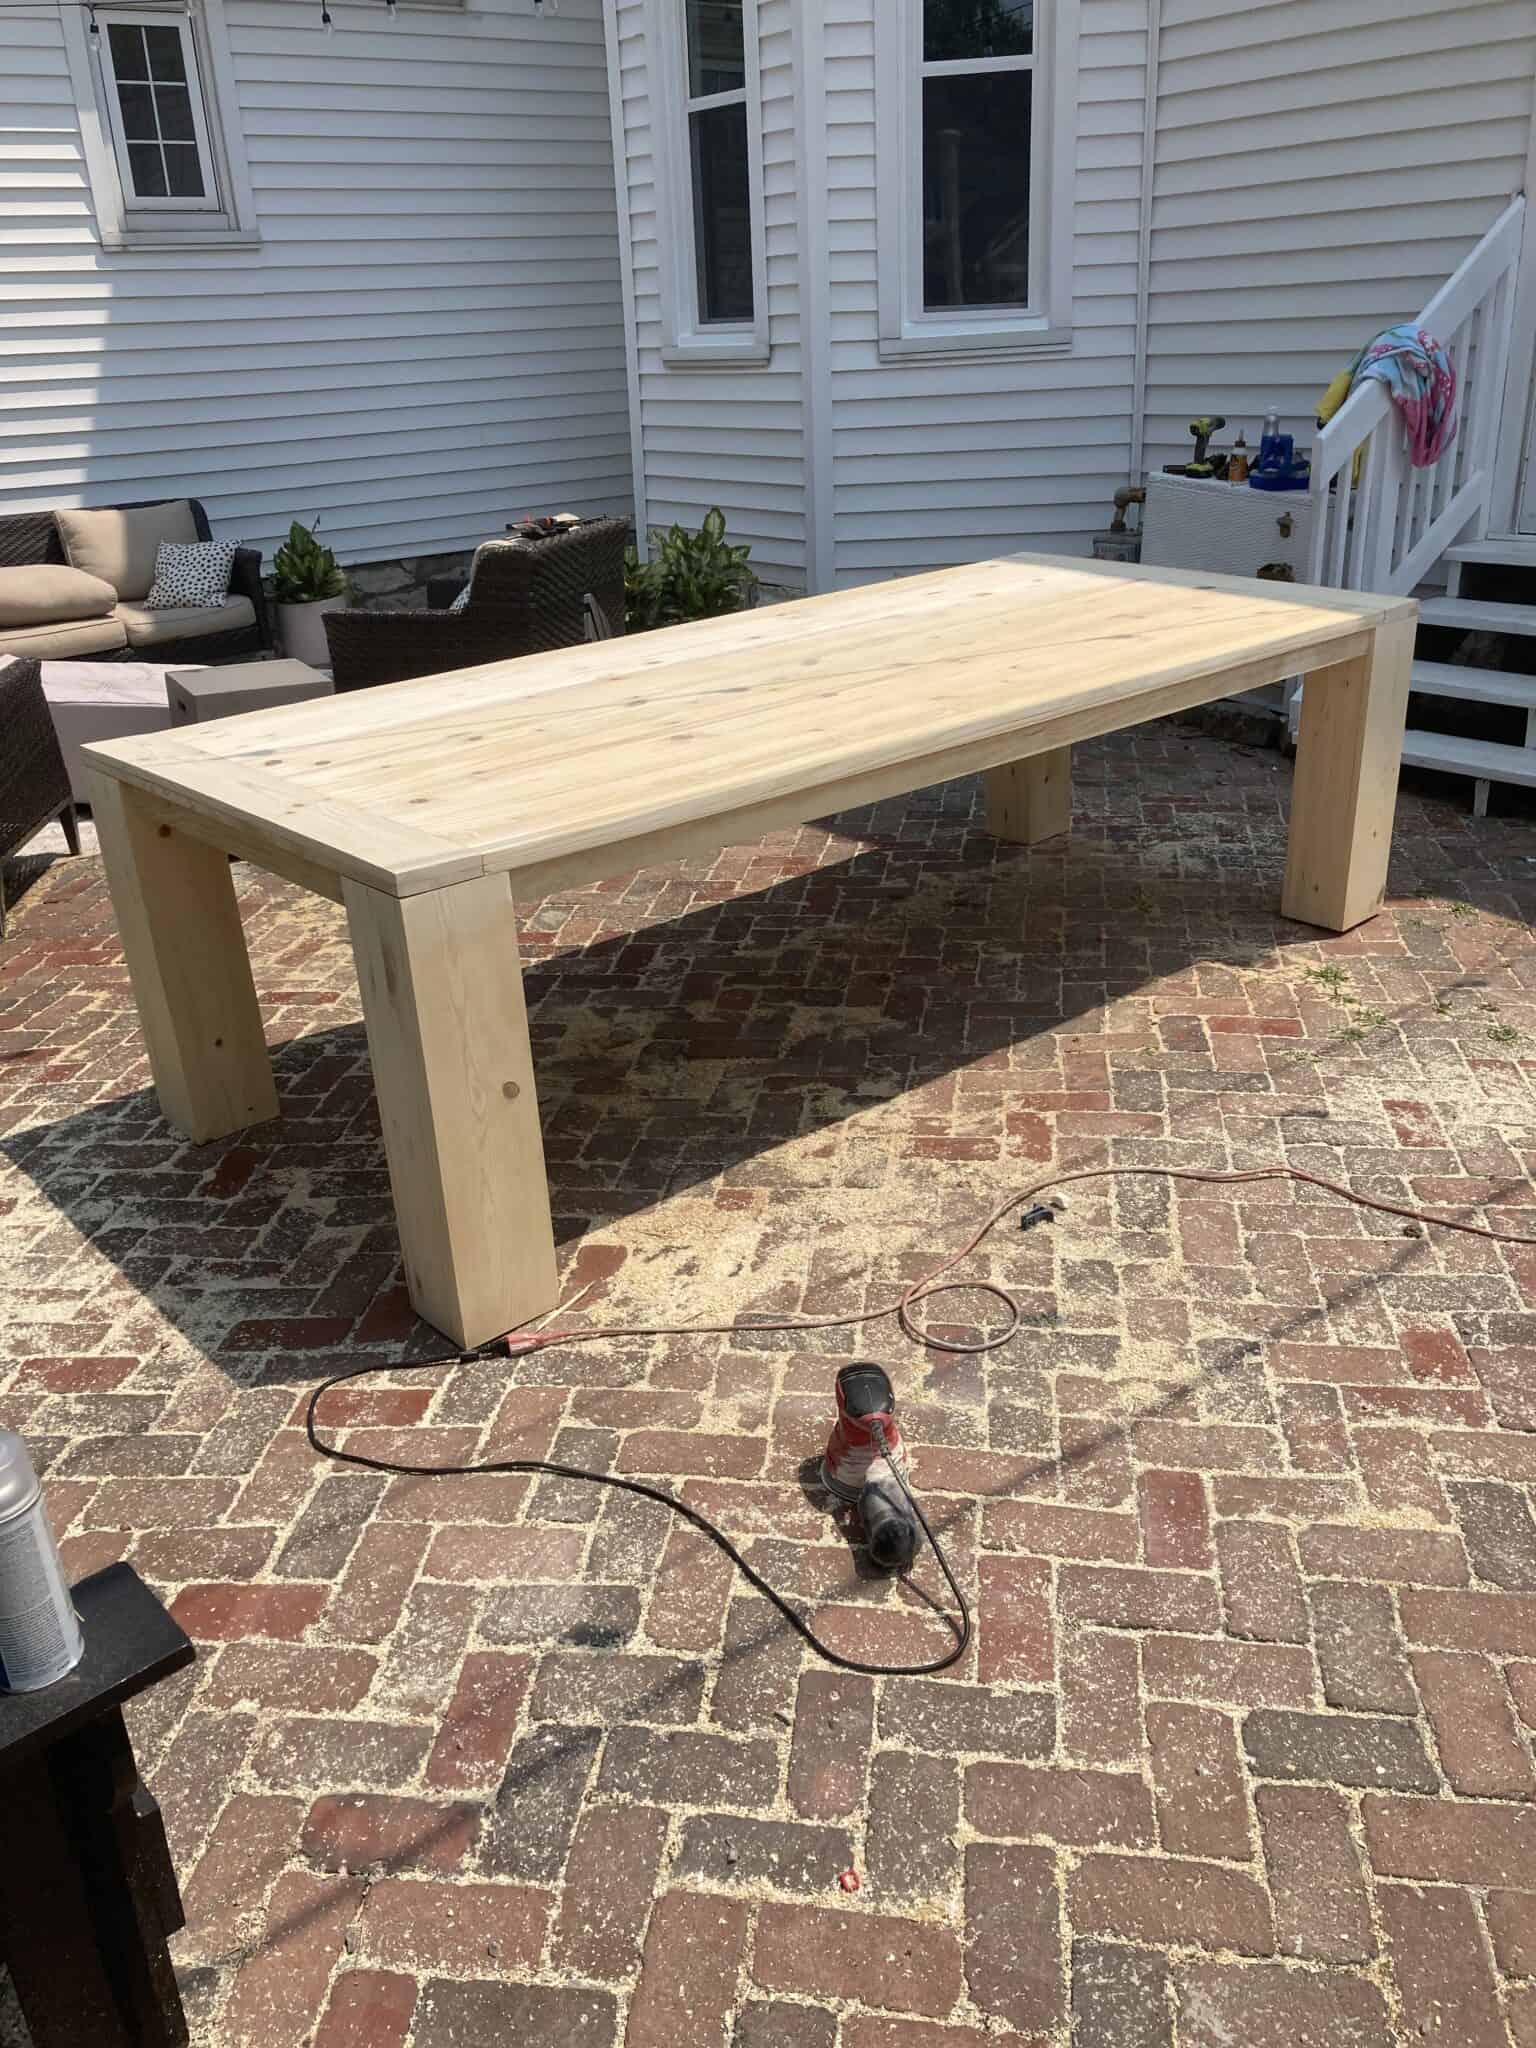
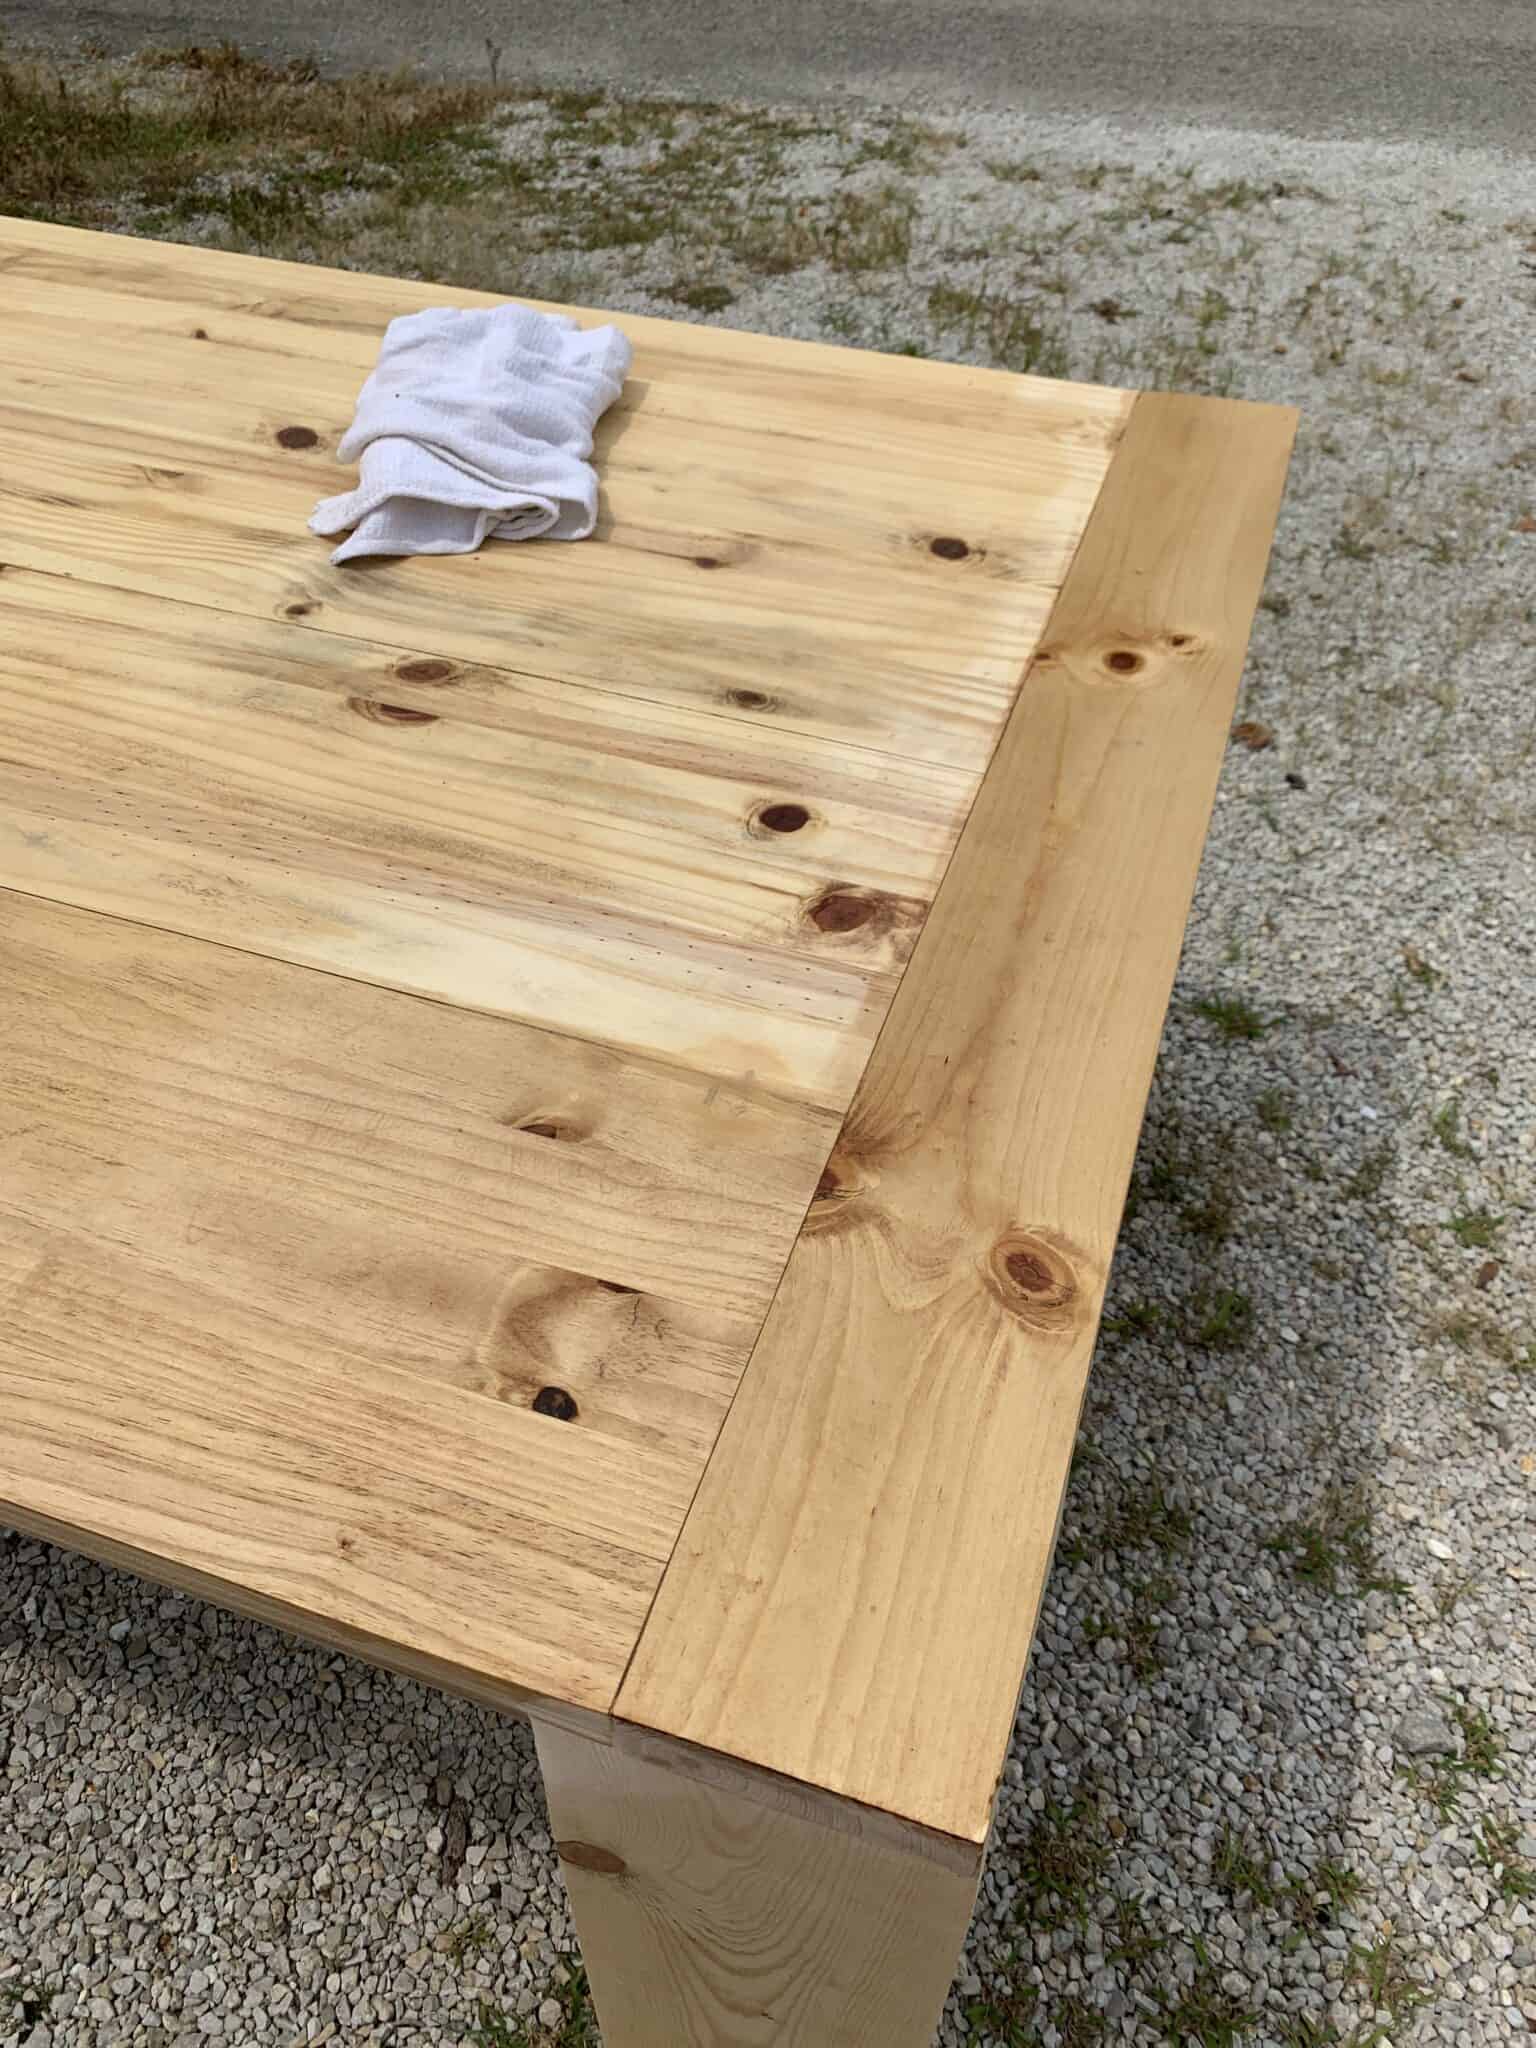
Finishing your DIY Table
Now you should structurally be able to look at your table and see a fully built and gorgeous table. But there is still quite a bit of work to do!.
- Wood filler – you need to add wood filler to all the cracks and crevices. You’ll use a good amount of wood filler, especially on those legs.
- Let it dry then sand – and SAND IT WELL. This is also your chance to sand every edge and just get everything looking perfect!
- Once your table is fully sanded it is time to wood condition your table. This is an important step! Essentially adding wood conditioner will make your table take the stain in a less blotchy way.
- Let the wood conditioner dry and now you can stain. Like I said above – we tested our stain on a sanded piece of pine. The colors we went with are in my supply section.
- Once the stain is fully dry you can add your polyurethane as the final step. This seals the table to keep it nice. Use a foam roller to apply the poly and allow that to dry for a few days before you use the finished product. You may want to add more than one coat – you be the judge!
AND NOW your wood dining table is done.

For More WoodWorking plans Get Access To The World Largest Plans