How To Applied Epoxy Resin To Wood Step By Step
Epoxy on wood,, how should a table be styled? (In addition to tossing your gowns onto it from the dryer.)
with the application of a glossy epoxy finish.
Don’t worry if this is something you have never done before.
This is how to applied epoxy on wood table a glossy finish with epoxy resin.
It’s likely that you have been noticing a lot of pour videos and finished river tables covered in oil on social media recently.
I’m sure you’re trying to figure out how to build your own piece after seeing all those gorgeous colors that make glass appear.
Who could blame you? After all, filling epoxy on wood is how all the hip kids do carpentry these days.
In addition to walking you through each stage of the process.
I’ll offer some insider knowledge to help make things run more smoothly and produce outcomes that appear polished.
Please watch the video to get some ideas on how to applied epoxy on wood.
Supplies
- Epoxy Resin
- Wood
- Tuck Tape
- Mixing Cup
- Propane Torch or Heat Gun
- Caulking
- Gloves and Mask
Step 1: Limits of Epoxy
There aren’t many restrictions because adding epoxy on wood, epoxy can adhere to almost anything.
Nevertheless, most problems arise from improper surface preparation or an incorrect curing temperature.
If you wish to applied epoxy on wood, make sure to wash off, lightly sand, plane, and cut each piece before pouring.
Once you’ve completed all of that.
All you need to do now is make sure your epoxy is thoroughly mixed.
Your work surface is clear of dust, and your room temperature is within the manufacturer’s specifications.
Step 2: Safety First

First thing, be safe always wear a respirator or be in a well ventilated area.
When applying epoxy on wood you’ll surely makes a mess so wear gloves and tape off the sides and bottom of the void or spot that you’re filling to hold the epoxy where you want it to stay.
Step 3: Clean and level the surface
Epoxy resin needs a clean surface to stick to.
The resin won’t stick to those spots if there’s dirt, wax, or grease.
You’ll have resin dimples and voids to clean up later.
The best way to do this is to sand the surface.
Start with coarse sandpaper (120 to 220 grit), then move to finer grits to make it smooth.
You can use an orbital sander for this step too.
Give your table a final wipe with a damp cloth to remove the dust.
💡 Pro tip: Ensure your table is smooth before you apply the resin.
Resin magnifies what’s underneath it.
That means any imperfections you notice, you’ll really see after adding clear epoxy.
Before adding epoxy on wood, If you want to paint the table surface, do that now.
If you’re painting or priming the surface, or if the surface is already sealed, you’ll only need one coat of epoxy.
But, if the wood surface is exposed, you’ll need two coats of epoxy.
Step 2: Measure the table
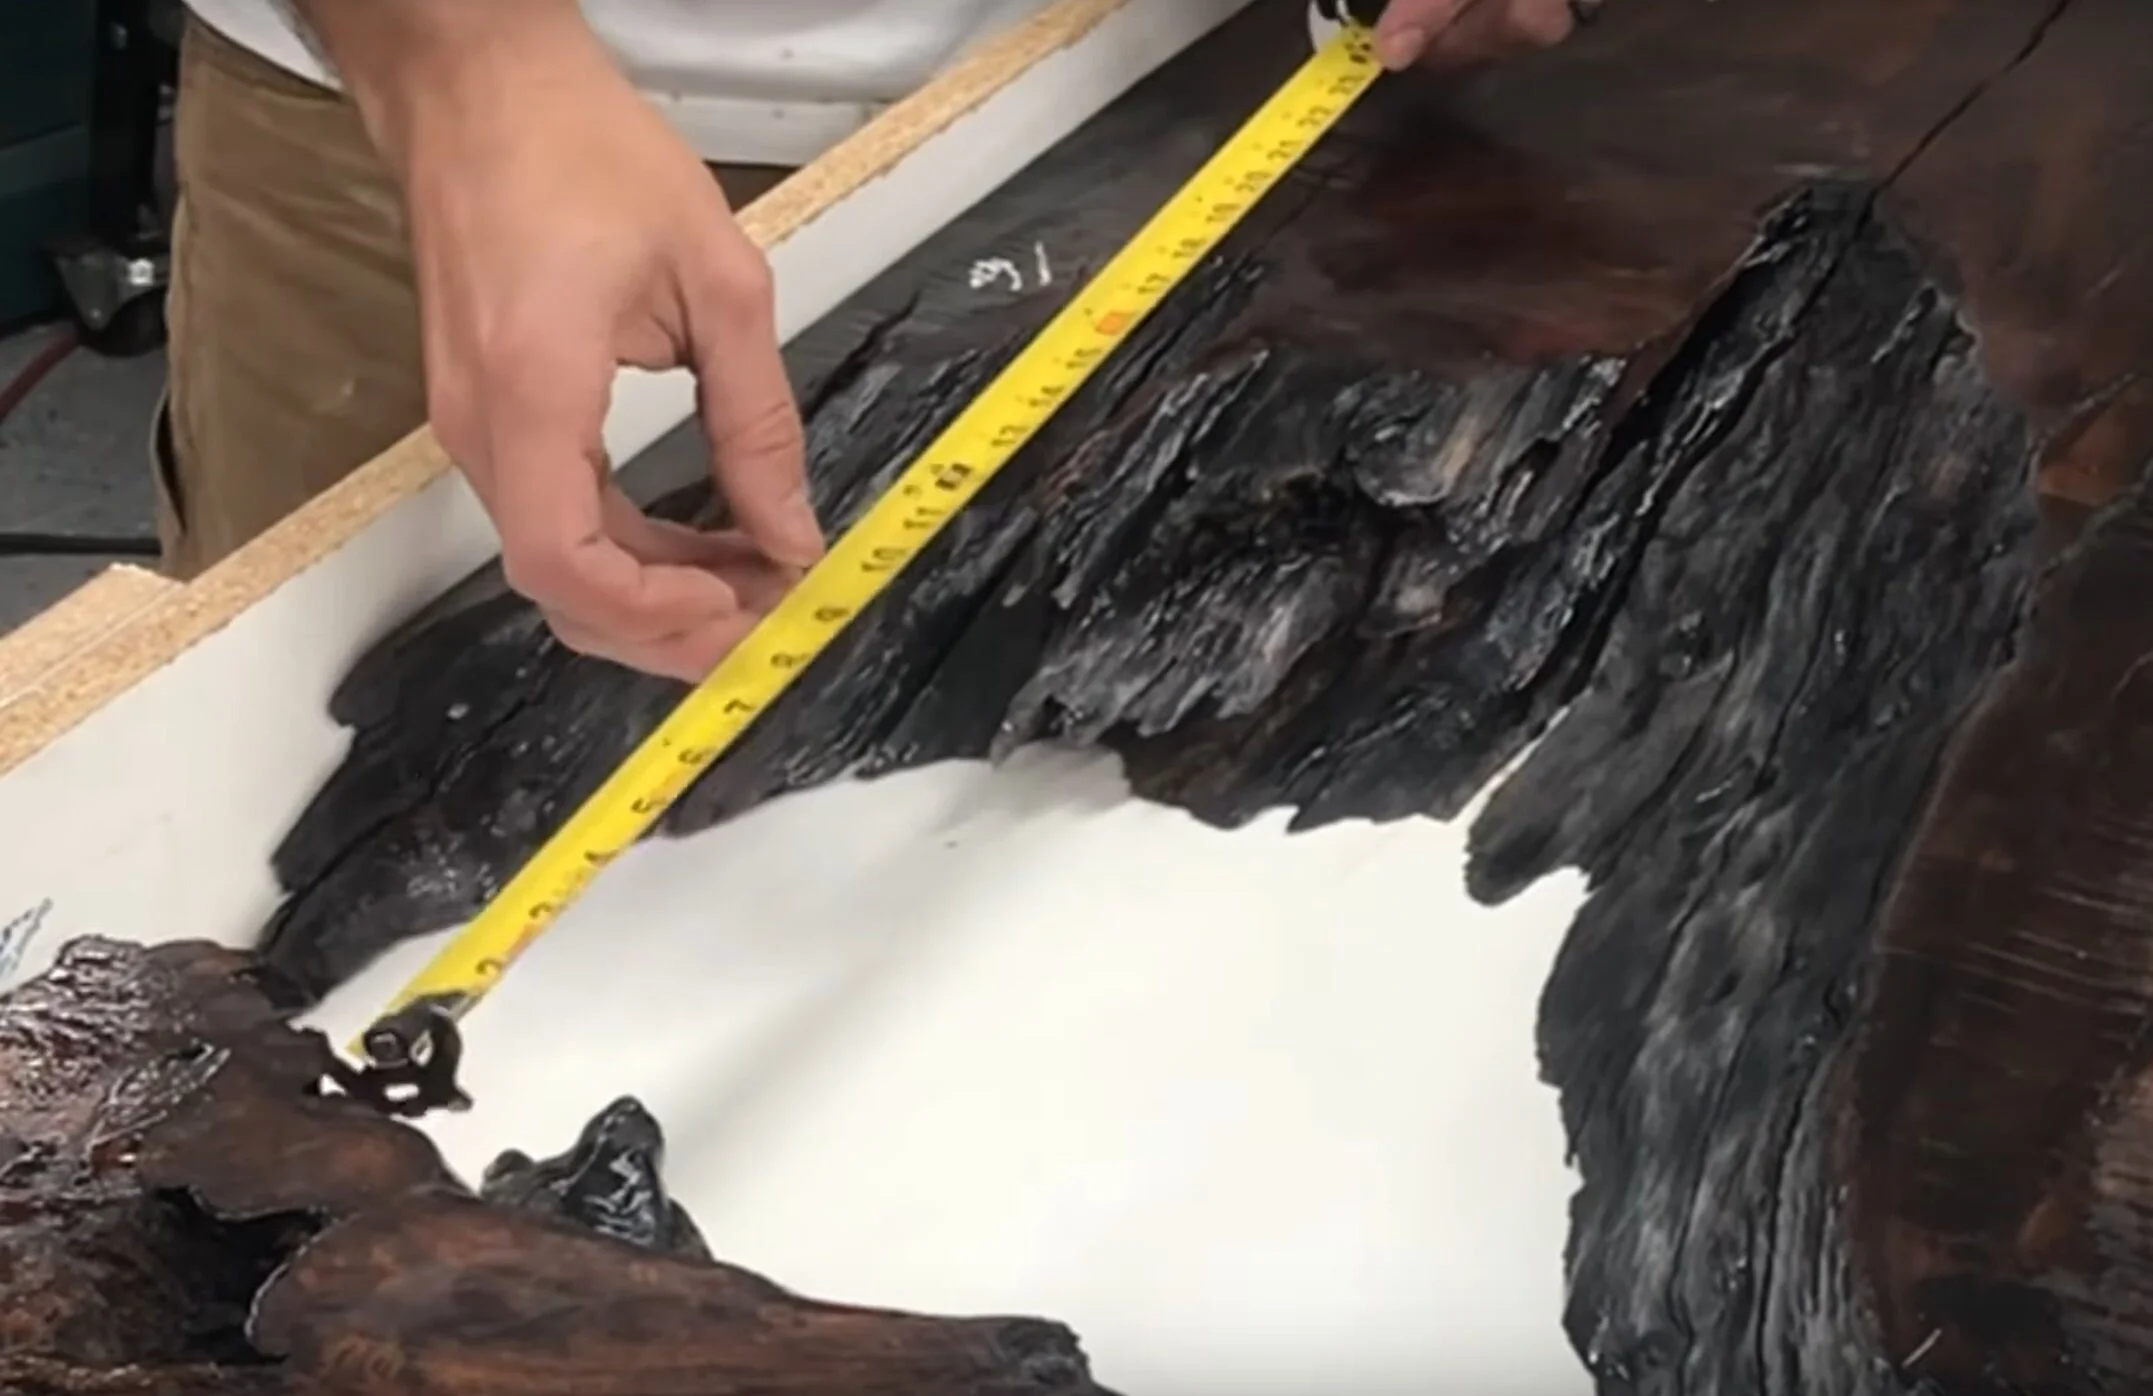
The ideal amount of resin to cover the table is not too much to leave a lot of extra resin behind.
Measuring the table is the simplest approach to determine the amount of resin you require.
For Better and accuracy cut you can use RIP CUT – KREG
The Resin Obsession resin calculator should then be filled up with those dimensions.
It determines how much resin you need by doing the calculations for you.
If you’re applying resin directly to the wood, you’ll need 1 1/3 times this amount.
The first layer will be a quarter of the total amount of resin you’ll need for the table.
Here’s a quick example for an exposed wood table of how much resin you need.
(Because math can be hard sometimes. 🤪)
You’re coating a rectangular wood table that’s 3 feet wide by 5 feet long with epoxy resin.
According to the calculator, you need 83.78 ounces of resin.
Let’s just round that up to 84 ounces.
Multiply 84 ounces by 1.33 to get 112 ounces.
About 28 ounces, or one-fourth of the 112 ounces, will be your initial pour onto the bare wood.
It seeps into the wood just enough to prevent bubbles from collecting on the surface.
It will be 84 ounces for your second coat of epoxy.
Step 3: Purchase your resin
After purchasing your resin.
you can mix as little as 3 ounces and as much as one gallon.
But you’ve only got 20 to 35 minutes to thoroughly mix and apply it before it thickens.
This can come quickly for resin beginners, so I recommend this for experienced creatives or if you’re working on a small table.
Step 4: Attach a tarp and tape to the bottom or border of the table.

You will need to shield them since the resin will probably flow off the side.
Put tarp tape on the edge of the table.
Subsequently, the resin spills onto the tarp as it flows over the side.
Step 5: Get the surrounding area ready
resin can make a mess on your floor, be sure to cover it too.
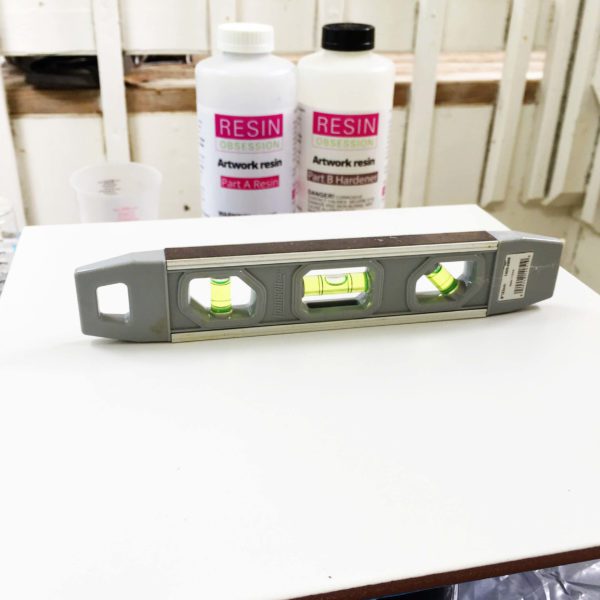
Step 6: Make sure your table is level
Use a level to make sure your table rests level in all directions.
If you don’t, the resin will pool on one side, leaving your other side bare.
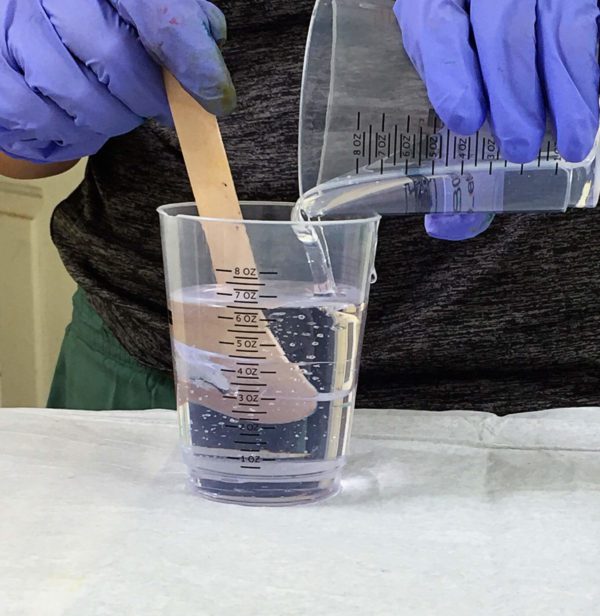
[PAINTED TABLE] Step 7: Blend resin

Measure equal portions of the resin kit’s A and B.
This should be the same as the amount of resin you determined in step 2.
If you’re pouring resin onto a painted surface.
Then, pour them together and stir for three to five minutes until clear and streak-free.
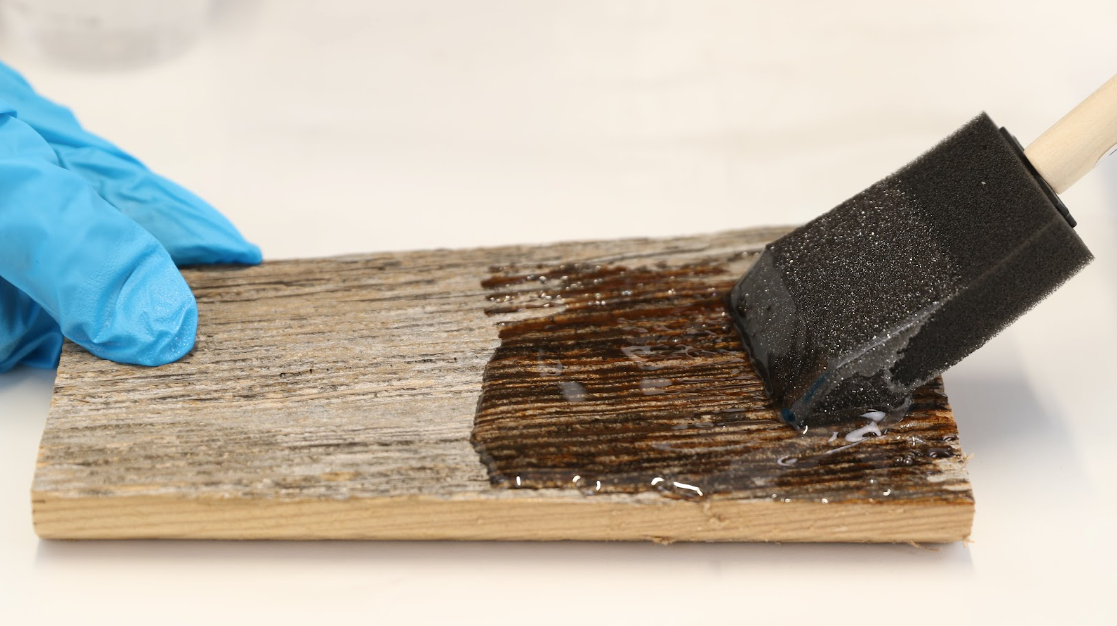
[EXPOSED WOOD TABLE] Step 7: Mix resin

You’ll mix resin just like for the painted table, but you’ll only blend a quarter of the amount you calculated in step 2.
This layer goes down to soak into the wood.
It should barely be enough to cover the wood.
Bubbles that don’t escape into this layer will stay trapped in the wood.
Step 8: Add to the table
Pour the resin into the center of the table. Use a silicone scraper tool, roller, foam brush, or your gloved hands to spread the resin over the surface.
💡 Pro tip: Don’t try cleaning a roller brush you use with resin. Unless you’ve got amazing skills like getting gum off a shoe. You’ll save your sanity by throwing it away after curing.
Step 9: Get rid of the bubbles
There will be bubbles in your resin even if you mix it carefully.
While the epoxy glue is still fluid, use a heat gun to smooth over the wood surface and burst any bubbles.
Step 10: Ensure it stays dust-free while it cures
Hair and dust that land on your wet resin will remain there.
If at all feasible, cover your table with a tent.
If that’s not possible (as it is with most of my tables), add resin to a section where you can keep everyone and everything hairy out of the room.
or coarse. or simply disorganized.
[EXPOSED WOOD TABLE] Step 11: Add second resin layer
Mix and add another resin layer of the amount you calculated in Step 2 (three-quarters of the total).
You can add this to the table as soon as 4 hours after adding the previous layer.
But you can come back and do this the next day if that fits your schedule better.
Don’t forget to check for bubbles again before letting the resin cure.
This step is optional if you’re working with a painted table surface.
Step 12: Remove tape
Remove the tarp and tape from the wood table after the epoxy glue has become rubbery rather than fluid.
This occurs for each of these two resins about 4–6 hours after mixing.
This is the time to remove the tape for a sharper edge.
Also, you might need to cut the resin with a sharp knife if it cures completely before you can remove the tape.
Your epoxy will be sufficiently cured to the touch after twenty-four hours.
However, before using it, let it cure as hard as possible for a full seven days.
DONE:

Extra Tips:

Trying to get professional finishes takes time but here are a few ways to get the job done quicker.
#1-Use a heat gun to warm the epoxy in the bottles prior to mixing. It not only makes the pour from the bottles easier, but will ensure it’s at a proper mixing temperature.
#2-When mixing always use one container. Measuring in separate containers or pouring into another one will change the ratio of the mixture.
#3-Heat the bubbles out of the mixing cup before pouring.The less bubbles you start with the less need removing.
#4-Pour low. It may look cool on your video to do a real long pour, but you’re adding air to the epoxy causing more bubbles needing to be removed later.
#5-Fully cured excess epoxy removals can be sped up by using a carbide scraper or a planer prior to sanding.
#6-If you’re building a river table, caulk the bottom edges of the box/form to hold in any accidental leaks.
#7- Mix some clear epoxy and using a foam brush, apply it to any wood contacting the epoxy. Allow it to fully cure, it will make less epoxy needed during the pour and help with air from the wood.
#8-If you have a deep void or knot to fill, you can fill the bottom half of it with clear glue or caulk and pour the epoxy on top to save on epoxy costs.
#9-Shine your epoxy like glass, literally. Use Windex to clean the epoxy once finished.
#10- The only way to get the truly crystal clear water like finish is to use a flood coat (pouring a final layer of epoxy over the finished product